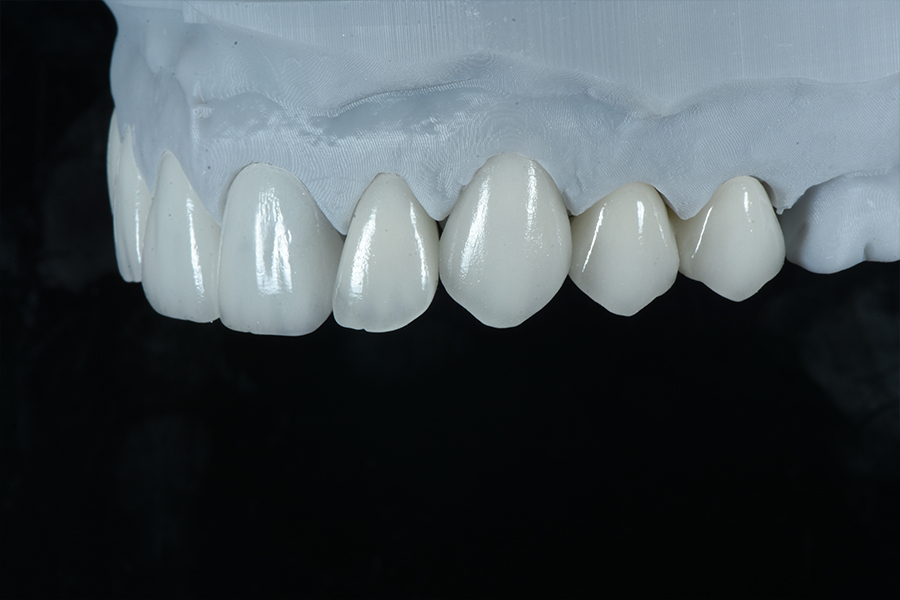
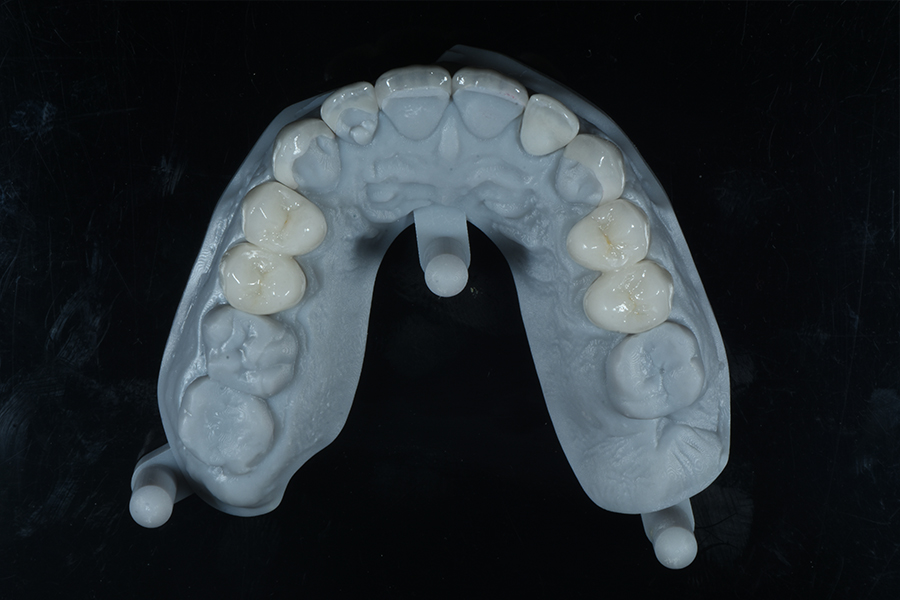
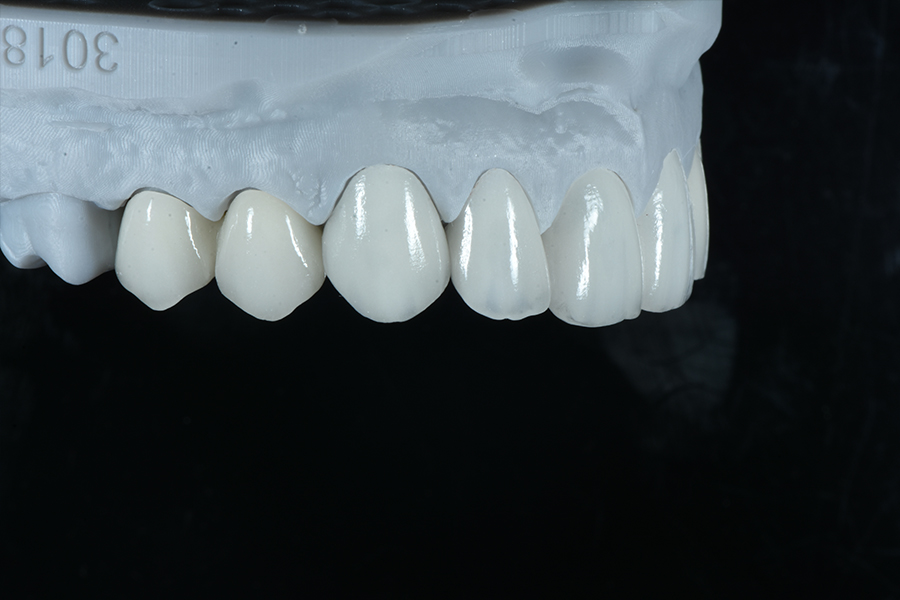
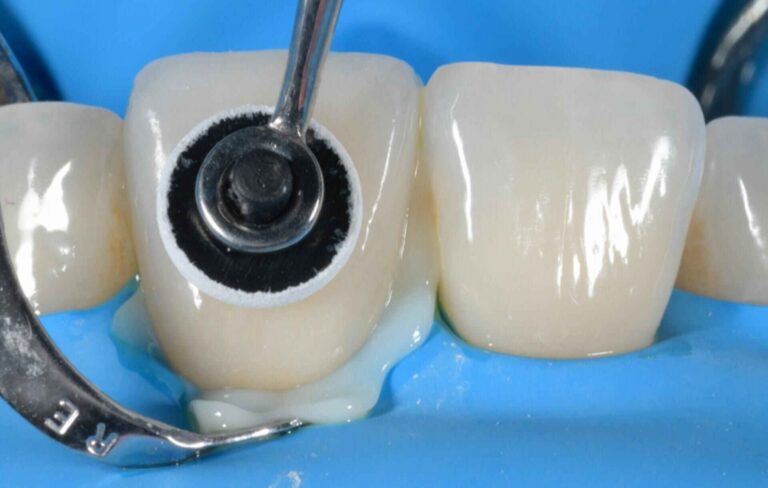
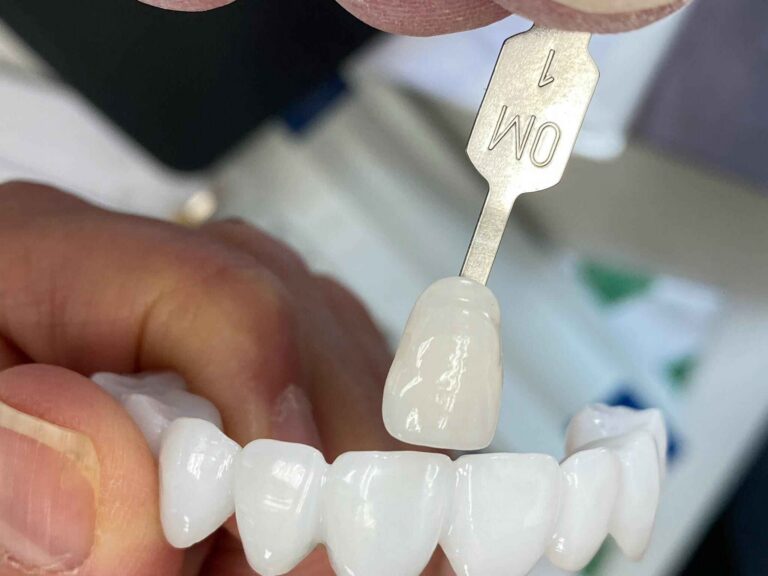
للمختبرات السنية والعيادات والموزعين وفرق التوريد التي تقارن بين تيجان الزركونيا وتيجان ثاني أكسيد الليثيوم والقشور وخدمات التصنيع حسب الطلب (OEM) أو طلبات الترميم بالجملة.
يرجى إطلاعنا على نوع المنتج، والمواد المستخدمة، وحجم المبيعات الشهري، وبلد المقصد، وطلب العينات، حتى يتمكن فريق المبيعات لدينا من تحديد الخطوة التالية المناسبة.
الأهداف الجمالية الخمسة التي يجب تحديدها في كل حالة تركيب قشرة قبل البدء في التصميم
التصميم يأتي في المرتبة الثانية.
قبل أن يقوم الفني بتحريك سن رقمي، وقبل أن يوافق الطبيب على نموذج الشمع، وبالتأكيد قبل أن يقوم أي شخص بتحضير المينا، يجب أن يتفق الفريق على الهدف الذي يُفترض أن تحققه الابتسامة النهائية داخل وجه المريض وفمه وإطاره الوظيفي.
لماذا لا يزال هذا الأمر مثيرًا للجدل؟
لأن سوق قشور الأسنان أصبح مهووسًا بالأدوات. الماسحات الضوئية داخل الفم. الماسحات الضوئية للوجه. مكتبات التصميم بمساعدة الحاسوب (CAD). الذكاء الاصطناعي. تصميم الابتسامة الرقمي. ثاني سيليكات الليثيوم عالي الشفافية. ومع ذلك، لا تستطيع أي من هذه التقنيات الإجابة عن السؤال الأساسي التالي: ما الذي نسعى إلى تحقيقه بالضبط؟
رأيي الصريح هو أن العديد من حالات الفينير السنية المخيبة للآمال لا تعود إلى أخطاء في التصنيع، بل هي إخفاقات ناجمة عن عدم تحديد الأهداف بوضوح.
“طبيعي.”
“مشرق.”
“فولر”.”
“أعجب بهذه الصورة على إنستغرام.”
هذه مجرد تفضيلات، وليست تعليمات تصميمية. فحالة تركيب الفينير الجادة تتطلب أهدافًا قابلة للقياس فيما يتعلق بالوجه والأسنان واللثة والسلوك البصري والوظيفة. وأي شيء أقل من ذلك يفرض على المختبر اتخاذ قرارات سريرية بناءً على التخمين.
خمسة أهداف تحول الطلب التجميلي إلى موجز تصميمي
ينبغي أن يحدد التخطيط العلاجي لتركيب الفينير التجميلي خمسة أهداف قبل البدء في تصميم الفينير الخزفي.
الهدف التجميلي
القرارات التي يجب تحديدها
السجلات المطلوبة
الأعطال الشائعة عند تجاهلها
التكامل بين الوجه وإطار الشفاه
خط الوسط، المستوى القاطع، عرض الأسنان، قوس الابتسامة، عرض الحشوة المرئي
صور للوجه بالكامل في وضع الراحة والابتسامة، ومقاطع فيديو، وصورة جانبية
أسنان جذابة تبدو مائلة أو طويلة أو قصيرة أو غير متناسقة مع ملامح الوجه
تناسب الأسنان والتسلسل الهرمي البصري
الهيمنة المركزية، وعلاقات العرض بالطول، والفتحات، وانتقال الأنياب
الصور المسحوبة، والمسح الضوئي، والنماذج الأولية، والمراجع المعتمدة
أسنان مسطحة على شكل “سياج خشبي” تفتقر إلى أي إيقاع بصري
بنية اللثة
مواقع الزينيث، وارتفاعات الأنسجة، والحليمات، وملامح الظهور
رسم خرائط اللثة، والصور بعد سحب اللثة، ومسح الأنسجة
يُعزى عدم التناسق الناتج عن الأنسجة إلى السيراميك
الهوية البصرية وخصائص السطح
القيمة، اللون، الشفافية، التعتيم، الملمس، اللمعان، التحكم في التظليل بالفرشاة
صور الظل، وظل الجذع، والصور ذات الاستقطاب المتقاطع، ومراجع الأسنان المجاورة
القشور التي تتطابق مع لون من لوحة الألوان ولكنها تبدو مصطنعة مع ذلك
الجماليات الوظيفية
موضع الحافة القاطعة، الصوتيات، التوجيه، التراكب الفكي، الوظائف غير الطبيعية، حدود المواد
عمليات ترميم جميلة تتعرض للتشقق أو انفصال الحشوات أو تسبب تآكل الأسنان المقابلة أو تفرض مسارًا غير طبيعيًّا للفك
هذا هو موجز العمل.
لا ينبغي أن يتلقى المختبر طلبًا غامضًا بـ“صنع ثمانية قشور”. بل ينبغي أن يتلقى تسلسلًا هرميًّا للنتائج، والتسويات المقبولة، والحدود غير القابلة للتفاوض.
الهدف 1: جعل الفينير يتناسب مع الوجه
يُصمم القشرة على السن، لكن تقييمها يتم من خلال المظهر.
هذا التمييز مهم لأن التصميم الأمامي قد يبدو متوازناً بشكل جميل في صورة مقصوصة ومتراجعة، بينما يبدو مائلاً أو أكبر من اللازم أو مُركزاً بشكل غريب عندما تعود الشفاه والأنف والذقن والعينان إلى الإطار.
تحديد الخطوط الوسطى الثلاثة
على الأقل، قم بتوثيق ما يلي:
خط الوسط للوجه
الخط الوسطي الحالي للأسنان في الفك العلوي
الخط الوسطي التصالحي المقترح
قد لا يتطابقان. وهذا لا يشكل مشكلة بالضرورة.
تبدأ المشكلة عندما لا يحدد أحد الجهة التي ينبغي أن تتولى إدارة القضية.
أنا أعتبر التباين الذي يبلغ 1 ملم نقطة تستدعي مراجعة التصميم، وليس فشلًا تلقائيًّا. أما عند بلوغ التباين 2 ملم، فيجب على الفريق إجراء مناقشة صريحة حول الموضوع. وقد تتطلب الانحرافات الأكبر تخطيطًا في مجالات تقويم الأسنان أو أمراض اللثة أو الترميم، أو التوصل إلى حل وسط مدروس، بدلاً من التصحيح الصامت عن طريق استخدام قشور أسنان أعرض أو أضيق.
دليل الموقع الإلكتروني حول الحفاظ على خط الوسط والتناسق في حالات تركيب الفينير المتعدد ويوضح هذا الأمر بالتفصيل: يجب تسجيل خط الوسط الوجهي، وخط الوسط السني، وزاوية القاطع، والعلاقة بين القاطع المركزي والقاطع الجانبي، وعدم تناسق اللثة، كل على حدة.
سطر واحد لا يكفي.
تحديد موضع الحافة القاطعة قبل تشكيل السن
لا يقتصر دور الحافة القاطعة على تحديد الطول الظاهري للسن فحسب، بل إنها تؤثر أيضًا على مظهر السن في حالة الراحة، وقوس الابتسامة، والنطق، ودعم الشفتين، والتوجيه الأمامي، ومدى ما تبدو عليه الابتسامة من نضج أو شباب.
قبل البدء في التصميم، قم بتسجيل ما يلي:
ظهور القواطع الفكية في حالة الراحة
ظهور الأسنان القاطعة أثناء الابتسامة الطبيعية
إظهار الابتسامة بأقصى حد
العلاقة مع انحناء الشفة السفلية
“الصوتيات ”F“ و”V“ و”S»
التآكل الحالي والإضافة المخطط لها للطول
ما إذا كان المريض يقبل زيادة ظهور الأسنان
قد يُظهر تصميم الابتسامة الرقمي أسنانًا أطول. لكنه لا يثبت أن المريض سيتمكن من التحدث براحة مع هذه الأسنان.
ولهذا السبب لا أثق في التخطيط القائم على الصور الثابتة عندما يُستخدم بمفرده. فمقطع الفيديو الذي يظهر الابتسامة الطبيعية غالبًا ما يكشف عن عدم تناسق الشفتين، ووضعية الرأس، والتعويض العضلي، وكيفية إظهار الأسنان، وهي أمور تخفيها الصورة التي يتم التقاطها في وضعية مدروسة بعناية.
دراسة تبحث في جماليات الابتسامة من منظور الوجه الكامل للإنسان العادي وهذا يؤكد الفكرة الأوسع نطاقاً: يتم تقييم العوامل الجمالية بشكل مختلف عندما يكون الوجه بأكمله مرئياً، مقارنةً بحالة ظهور الأسنان والجزء السفلي من الوجه فقط.
المرضى يبحثون عن نتيجة ترضيهم. لذا، علينا أن نصمم مثل هذه النتيجة.
الهدف 2: إرساء التسلسل الهرمي للأسنان، وليس التناظر الميكانيكي
الأسنان المتساوية تمامًا تبدو غير طبيعية.
عادةً ما يجب أن تكون القواطع المركزية هي محط الأنظار. أما القواطع الجانبية فيجب أن تدعمها بدلاً من التنافس معها. أما الأنياب فيجب أن توجه الابتسامة نحو الجزء الخلفي من الفم بدلاً من أن تبدو وكأنهما قاطعتان مركزيتان إضافيتان.
هذا هو التسلسل الهرمي البصري.
يجب أن تكون السيطرة المركزية متعمدة
بالنسبة لكل قاطع مركزي، حدد ما يلي:
المدة المقررة
العرض الظاهري
زوايا خطوط الوجه
شكل الحافة القاطعة
موضع التلامس
تطوير فتحات الرماية
درجة التماثل بين المركزين
لا تعتمد على «النسبة الذهبية» العامة. فالوجوه ليست جداول بيانات، وأبعاد الأسنان التي تناسب مريضًا ما قد تبدو غير معقولة عند مريض آخر.
والسؤال الأكثر فائدة هو التالي: ما هي الأسنان التي يجب أن تلفت انتباه العين أولاً، وثانياً، وثالثاً؟
ويمكن التحكم في هذا التسلسل الهرمي من خلال زوايا الخطوط، والعرض المرئي، والطول، والقيمة، والملمس، وتدرج الفتحة. ويمكن للفني أن يجعل السن يبدو أضيق دون أن يجعل السن الفعلي أضيق بشكل كبير، وذلك ببساطة عن طريق تحريك زوايا الخطوط العاكسة نحو الداخل.
هذا هو التصميم الحقيقي لقشرة البورسلين. إنه ليس مجرد سحب لحدود في برنامج CAD.
تحديد حالات عدم التماثل التي يجب تصحيحها
لا يعني تصميم الابتسامة استنادًا إلى ملامح الوجه فرض التناسق الرياضي على كل سمة من سمات الوجه. بل يعني تحديد أي من حالات عدم التناسق تلفت انتباه العين وأيها تجعل الابتسامة تبدو طبيعية.
يمكن للاختلافات المدروسة في تآكل حافة القاطع، أو بروز الفص، أو نسيج السطح، أو دوران القاطع الجانبي أن تخلق الحياة. أما الاختلافات العشوائية في عرض القاطع المركزي، أو ارتفاع اللثة، أو مستوى حافة القاطع، فتؤدي إلى الفوضى.
قاعدتي بسيطة:
تصحيح عدم التماثل الهيكلي. الحفاظ على السمات البيولوجية المحددة.
قد يكون المريض الذي يطلب قشورًا “مثالية” يهدف في الواقع إلى الحصول على محاذاة نظيفة ولون متناسق، وليس ثمانية كتل خزفية متطابقة. وينبغي أن يتم خلال استشارة النموذج الأولي التمييز بين هذين المفهومين قبل الموافقة على التصميم النهائي.
الهدف 3: تحديد ما تسمح به اللثة — وما لا تسمح به
لا يمكن للسيراميك أن يتفاوض مع الكائنات الحية.
في حالة وجود تفاوت في ارتفاعات اللثة، أو نقص في الحليمات اللثوية، أو تراجع نشط في اللثة، أو تعارض بين بنية الأنسجة وأبعاد الأسنان المخطط لها، يجب تحديد المشكلة قبل الانتقال بمرحلة تخطيط قشرة الأسنان إلى مرحلة التصميم النهائي.
وإلا، فسيحدث أحد الأمور الثلاثة التالية:
يقوم الفني بإنشاء حواف عنقية طويلة أو ضخمة لإخفاء التباينات في الأنسجة.
يطلب الطبيب إعادة العمل بسبب عدم التناسق الذي كان موجودًا قبل بدء التحضير.
يكتشف المريض أن “الأسنان الجديدة” لم تنتج الإطار اللثوي الذي ظهر في المحاكاة.
لا تشكل أي من هذه المشكلات مشكلة تتعلق بالسيراميك.
تسجيل بنية الأنسجة
يجب أن يتضمن سجل ما قبل التصميم ما يلي:
حواف اللثة لكل سن على حدة
مواقع زينيث
ملء الحليمة
الركود الاقتصادي
المثلثات السوداء
النمط الحيوي
تاريخ عمليات إطالة التاج
التهاب الأنسجة
التدخل المخطط له في مجال أمراض اللثة أو تقويم الأسنان
الفترة الزمنية بين معالجة الأنسجة والمسح النهائي
كما يتعين على الفريق أن يقرر ما إذا كان سيتم تصحيح عدم التناسق في الأنسجة، أو إخفاءه بصريًّا، أو القبول به.
قلها بوضوح.
قد تصبح الصورة الرقمية التي تُظهر حوافًا مثالية للثة صورةً تسويقيةً خطيرةً عندما لا تتضمن الخطة السريرية طريقةً لتحقيق هذا الوضع للأنسجة. وأنا أعتبر ذلك خطأً في الحصول على الموافقة أكثر منه خطأً في التواصل.
السيطرة على ظهور الأعشاب دون تكوين كتل
يمكن أن يغير الفينير ملامح الوجه، لكن تأثيره على المنطقة العنقية محدود. وقد يؤدي الإفراط في تشكيل حواف السيراميك لإغلاق «المثلث الأسود» أو محاكاة زاوية قمة مختلفة إلى إنشاء ترميم سميك يحتجز البلاك ويبدو ثقيلًا عند النظر إليه من الجانب.
وهنا يصبح الاستعداد الحذر أكثر من مجرد شعار.
المقال حول الحفاظ على المينا أثناء تحضير القشرة ويُبيّن التمييز الصحيح: فالهدف ليس بالضرورة “التحضير الصفري”. بل هو الحد الأدنى من التخفيض الذي يوفر مساحة ترميمية كافية وموزعة بالتساوي مع الحفاظ على طبقة ربط ملائمة.
البساطة لا تعني دائمًا التحفظ.
قد يكون تحضير السن غير الملائم الذي يفرض استخدام سيراميك سميك أقل تحفظًا من الناحيتين البيولوجية والجمالية مقارنةً بالتحضير المنضبط الذي يسترشد بنموذج تجريبي معتمد.
الهدف 4: تحديد الخصائص البصرية قبل اختيار السيراميك
الظل ليس تصميمًا.
لا يصف تصنيف درجات ألوان VITA، مثل A1 أو BL3، توزيع القيم اللونية، أو كثافة اللون عند العنق، أو شفافية الحافة القاطعة، أو التعتيم، أو الفلورة، أو شدة الهالة، أو الخصائص الداخلية، أو ملمس السطح، أو اللمعان.
ومع ذلك، لا تزال المختبرات تتلقى وصفات طبية تنص على: “ثماني وحدات، A1، طبيعية”.”
طبيعي لمن؟
فصل القيمة والصبغة والشفافية
ينبغي على الفريق أن يقرر ما يلي:
ما مدى السطوع الذي ينبغي أن تظهر به الابتسامة الأخيرة
ما إذا كان يجب أن يتناسب الغطاء مع الأسنان المجاورة أم أن يضفي قيمة جديدة على الابتسامة الكاملة
ما هي المساحة التي يجب إخفاء الظل الناتج عن جذع الشجرة منها؟
ما إذا كان ينبغي أن تزداد الشفافية باتجاه الثلث القاطع
سواء كان المريض يرغب في إشراقة الشباب أم في رصانة النضج
ما مدى وضوح التأثيرات الداخلية عند مسافة المحادثة
ما إذا كان يجب أن يكون المظهر النهائي للسطح شديد اللمعان، أم ساتاني، أم ذو ملمس عتيق
يمكن أن يوفر ثنائي سيليكات الليثيوم، الذي يُرمز له كيميائيًا بـ Li₂Si₂O₅، ترميمات ملتصقة قوية وذات مظهر جمالي عالٍ. ويمكن أن يوفر البورسلين الفلسباتي طبقات بصرية دقيقة وخصائص سطحية مميزة. أما الزركونيا، ZrO₂، فقد توفر خيارات أفضل من حيث التغطية أو الخصائص الميكانيكية في حالات محددة.
لكن اختيار المواد يجب أن يتماشى مع الهدف البصري، لا أن يحل محله.
ظل الجذع جزء من اللون النهائي
تعمل قشور الأسنان الرقيقة كنظام بصري يتألف من:
السيراميك
سماكة السيراميك
لون المستحضر
قيمة الراتنج والأسمنت
نسيج السطح
الترطيب
الإضاءة
المينا الطبيعية المجاورة
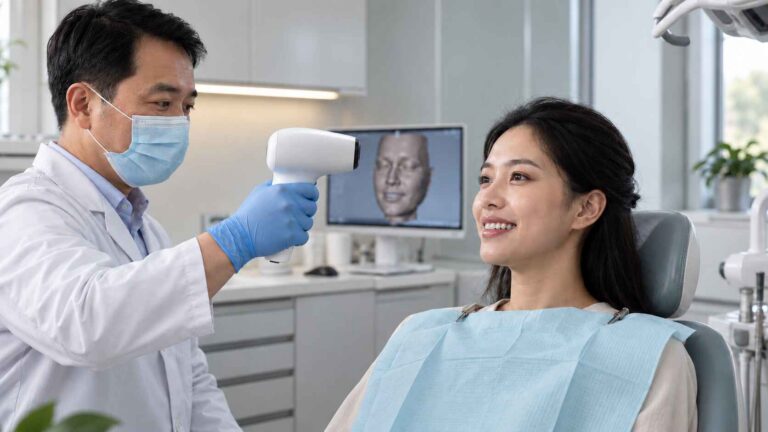
لذلك، يحتاج المختبر إلى معلومات عن لون الجذع كلما كان للركيزة تأثير على النتيجة. ولا تكفي صورة واحدة للون الجذع مأخوذة تحت ضوء حلقي دون سحب.
يمكن أن تساعد التصوير باستخدام مرشحات الاستقطاب المتقاطع في التمييز بين اللون الداخلي والانعكاس السطحي. ومن المفيد استخدام لوح تدرج ألوان مُعاير يقع في نفس مستوى السن. كما يُفيد تصوير منطقة التحضير قبل أن يؤدي الجفاف إلى تشويه لونها الظاهري.
قائمة المراجعة التفصيلية الخاصة بـ إرسال حالات الفينير الأمامي إلى المختبر يغطي السجلات العملية: المسح الضوئي للقوس الكامل، والأسنان المقابلة، والعضة، والحواف، وألوان جذوع الأسنان، واللون النهائي، وصور التحضير، والصور الفوتوغرافية للوجه، والمخاطر الوظيفية، والمراجع التي وافق عليها المريض.
قدم الأدلة إلى المختبر.
الملمس هو الذي يحدد ما إذا كان اللون يبدو حقيقيًّا أم لا
إليكم حقيقة صعبة في هذا المجال: غالبًا ما يلقي الفنيون والأخصائيون باللوم على درجة اللون في الحالات التي تفشل في الواقع بسبب شكل التسنين وانعكاس السطح.
يؤدي السطح المسطح للوجه إلى انعكاس واسع وموحد. وقد يؤدي الإفراط في التلميع إلى زيادة القيمة الظاهرية. كما أن الزوايا غير الصحيحة للخطوط قد تجعل القاطع المركزي يبدو أعرض. وقد يبدو السيراميك المفرط في النعومة اصطناعيًا حتى عندما تكون درجات اللون متوافقة تقنيًّا.
المينا الطبيعية، التي تتكون في معظمها من الهيدروكسيباتيت — Ca₁₀(PO₄)₆(OH)₂ — ليست عبارة عن بلاطة متجانسة بصريًّا. ففصوصها، وأخاديدها النمائية، وعلامات التآكل، وملمسها الدقيق، ولمعانها المتغير، كلها عوامل تعمل على تشتيت الضوء لتشكيل نمط تتعرف عليه العين على أنه سن.
ما تناولته الموقع من مناقشة حول نسيج السطح في الترميمات الأمامية وهذا مفيد هنا لأنه يفصل بين النسيج الكلي والنسيج الجزئي واللمعان وخصائص الحافة القاطعة ومحيط العنق، بدلاً من إخفاء كل شيء تحت مصطلح “طبيعي”.”
يجب تحديد الملمس.
الهدف 5: تحقيق نتيجة جمالية تتجاوز الجانب الوظيفي
الوظيفة جزء من الجمال.
إن حالة تركيب الفينير التي تبدو ممتازة في الصورة الثابتة، ولكنها تعيق الكلام، أو تسبب تلامسًا بارزًا شديدًا، أو تحبس الفك السفلي، أو تنكسر نتيجة الاستخدام غير السليم، لا تُعتبر نجاحًا جماليًا. إنها مجرد صورة مؤقتة.
تحديد الحدود الوظيفية قبل زيادة الطول
قبل الموافقة على زيادة طول القاطع، يجب تقييم ما يلي:
وجود تداخل علوي وتداخل أمامي
نطاق الدالة
نقاط التلامس البارزة
التوجيه الكلبي أو النشاط الجماعي
الحركة من الحافة إلى الحافة
مخاطر العضة العميقة
صرير الأسنان أو شد الفكين
مادة الترميم المقابلة
نمط التآكل الحالي
الرد الصوتي على النموذج الأولي
الحاجة إلى علاج تقويم الأسنان أو علاج الإطباق
لا تستعين بمواد خزفية لتصحيح تشخيص وظيفي لم يتم علاجه.
الإرشادات المتعلقة بـ القشور في حالات العضة العميقة وحالات التداخل الكامل ويقدم نفس الحجة: فهذه الحالات تمثل مشاكل هندسية بقدر ما هي مشاكل تجميلية، وقد يكون تركيب الفينير مباشرةً غير آمن دون توفير المساحة اللازمة، أو تصحيح الإطباق، أو إجراء علاج تقويم الأسنان، أو اتباع خطة ترميمية مختلفة.
الأدلة طويلة الأمد تؤكد جدوى التخطيط المنضبط
البيانات السريرية أفضل مما توحي به قصص الرعب المتداولة على وسائل التواصل الاجتماعي — ولكن فقط عندما يتم التحكم في اختيار الحالات، والترابط، والركيزة، والتصميم، والصيانة.
أفاد تحليل أُجري عام 2021 حول قشور البورسلين المركبة أن التقديرات تشير إلى 95.5% معدل البقاء التراكمي بعد 10 سنوات. هذا رقم مثير للإعجاب، لكنه لا يعطي الحق في تجاهل الحفاظ على المينا، أو الحمل الوظيفي، أو هندسة التحضير، أو شروط التثبيت.
أفادت تجربة سريرية عشوائية منفصلة استمرت 10 سنوات، قارنت بين الفينير غير المباشر المصنوع من مركب الراتنج والفينير الخزفي، بأن احتمالات بقاء كل منهما تبلغ 75% للمواد المركبة غير المباشرة و100% لقشور السيراميك. كان للمواد دور مهم في تلك الدراسة. وكذلك كان الحال بالنسبة للبروتوكول السريري الخاضع للرقابة الذي استندت إليه.
النجاح يترك وراءه أدلة.
لا تثبت هذه الدراسات أن كل قشرة خزفية ستدوم عشر سنوات، كما أنها لا تثبت أن البورسلين مناسب لكل مريض. بل تُظهر أن علاج القشور يمكن أن يحقق نتائج ممتازة للغاية عندما يتم التشخيص والتنفيذ بدقة.
قائمة المراجعة التمهيدية للتصميم التي سأطلبها
قبل أن يبدأ الفني في تصميم الابتسامة الرقمي من أجل الفينير، أطلب تقديم موجز حالة واحد معتمد يتضمن المعلومات التالية.
سجلات الوجه
صورة كاملة للوجه في وضع الراحة
ابتسامة طبيعية تظهر الوجه بالكامل
ابتسامة عريضة
مناظر بزاوية 45 درجة إلى اليمين واليسار
الملف الشخصي
فيديو قصير يُظهر الكلام والابتسامة العفوية
خط الوسط للوجه والمرجع الأفقي
السجلات داخل الفم والسجلات الرقمية
مسح ضوئي لكامل القوس بتنسيق STL أو PLY
القوس المقابل
سجل دقيق للعضة
صور أمامية وجانبية مأخوذة من مسافة بعيدة
صور الإطباق
الفحص التحضيري أو الفحص التمهيدي
تحديد الهامش
نقاط التلامس الإطباقية الحالية وسجلات الحركة
التعليمات التجميلية
خط الوسط الترميمي المخطط له
موضع الحافة القاطعة
طول القاطع المركزي وعرضه الظاهري
التسلسل الهرمي للقواطع الجانبية
مرحلة الانتقال لدى الكلاب
تطور فتحة المدفعية
القيود المتعلقة باللثة
القيمة النهائية ودرجة اللون
أهداف الشفافية والإخفاء
ملمس السطح ولمعانه
حالات عدم التماثل المسموح بها
الميزات التي لا يجوز نسخها
التعليمات البيولوجية والوظيفية
توافر المينا
انكشاف العاج
ظل الجذع
حالة اللثة
الوظيفة غير الطبيعية
خطر «العض العميق» أو «الحافة إلى الحافة»
التوجيهات المخطط لها
النتائج الصوتية
خطة واقي الأسنان الليلي
القيود المتعلقة بالمواد
موافقة المريض
يجب أن يوافق المريض على النموذج الأولي أو النتيجة المؤقتة على الوجه، وأثناء التحدث، وتحت إضاءة واقعية — وليس فقط على الشاشة.
توثيق التغييرات المطلوبة.
ثم قم بتجميد الهدف.
لا يمكن للمختبر إعادة إنتاج تصميم بشكل متسق عندما يتغير هذا التصميم باستمرار بين مراحل النموذج الشمعي، وموعد التحضير، والمرحلة المؤقتة، والموافقة النهائية على السيراميك.
الحقيقة الصعبة حول تصميم الابتسامة الرقمي
يُعد التصميم الرقمي للابتسامة من أجل الفينير نظامًا للتواصل والتصور، وليس تشخيصًا مستقلاً.
يمكنه مقارنة أطوال الأسنان. ويمكنه عرض نسب بديلة. ويمكنه مساعدة المريض على فهم التغيير المقترح. ويمكنه تحويل الخطة المعتمدة إلى نموذج شمعي، ونموذج تجريبي، وتركيب مؤقت، وسير عمل CAD.
ولكنه قد يجعل الافتراضات الخاطئة تبدو متقنة أيضًا.
لا يمكن للتراكب الرقمي المتماثل تشخيص عدم استقرار اللثة. ولا يُعد قوس الابتسامة المثالي اختبارًا للصوتيات. كما أن العرض المشرق لا يكشف عن تأثير درجات الألوان الداكنة للجزء المتبقي من السن. ولا تثبت المحاكاة ثنائية الأبعاد أن محيط الوجه المقترح سيتناسب مع سماكة السيراميك المتاحة.
البرامج تولد الثقة بسرعة.
أحيانًا تكون سريعة جدًّا.
لا يزال الطبيب هو المسؤول عن التشخيص. أما المريض فهو صاحب الاختيار المستنير. والمختبر هو المسؤول عن الترجمة الفنية. ولا تظهر القدرة على التنبؤ إلا عندما يتم الفصل بين هذه المسؤوليات ثم التنسيق بينها.
الأسئلة الشائعة
ما هي الأهداف الجمالية الخمسة لقشور الأسنان؟
الأهداف الجمالية الخمسة لقشور الأسنان هي: الانسجام مع ملامح الوجه وإطار الشفاه، والتناسب المتوازن بين الأسنان والتسلسل الهرمي البصري، وبنية اللثة المتوافقة، والهوية البصرية المتميزة، والجماليات الوظيفية التي يمكنها الصمود أمام ضغوط الكلام والإطباق. ويجب أن يكون كل هدف قابلاً للقياس ومُعتمدًا قبل البدء في التحضير أو التصميم المختبري.
وتعمل هذه الأهداف مجتمعة على تحويل طلب تجميلي غامض إلى مواصفات تصميم سريرية ومخبرية.
كيف ينبغي لطبيب الأسنان أن يخطط لحالة تركيب الفينير قبل البدء في التصميم؟
ينبغي على طبيب الأسنان التخطيط لحالة تركيب الفينير من خلال توثيق ملامح وجه المريض، وحركة الشفتين، وخط الوسط الترميمي، وموضع الحافة القاطعة، والتسلسل الهرمي للأسنان، وحدود اللثة، ولون الجذع، والتفضيلات البصرية، والإطباق، وعلم الصوتيات، والمخاطر الوظيفية. ثم ينبغي على المريض الموافقة على نموذج تجريبي مادي أو رقمي يعكس هذه الأهداف المحددة.
ينبغي أن يتماشى اختيار المواد وتصميم الإعداد النهائي مع تلك الموافقة، لا أن يسبقها.
ما المقصود بتصميم الابتسامة القائم على ملامح الوجه؟
تصميم الابتسامة المستند إلى ملامح الوجه هو طريقة تخطيط تعمل على تحديد موضع الأسنان وفقًا لخط الوسط الوجهي للمريض، وديناميكيات الشفتين، ومدى ظهور الأسنان، وقوس الابتسامة، والمنظر الجانبي للوجه، والتعبيرات الطبيعية، بدلاً من تصميم الأسنان استنادًا إلى قياسات معزولة داخل الفم. وتقيّم هذه الطريقة الترميم في سياق الوجه بأكمله، حيث يرى المرضى النتيجة فعليًّا.
وبالتالي، فإن الصور التي تظهر الوجه بالكامل ومقاطع الفيديو التي تظهر الابتسامة الطبيعية أكثر فائدة من الصورة المقصوصة التي يظهر فيها الفم مشدودًا وحدها.
هل تصميم الابتسامة الرقمي ضروري في حالة استخدام قشور البورسلين؟
يُعد التصميم الرقمي للابتسامة طريقة مفيدة للتصور والتواصل فيما يتعلق بقشور البورسلين، لكنه ليس إلزاميًا ولا يمكن أن يحل محل التشخيص السريري، أو الاختبارات الوظيفية، أو تقييم اللثة، أو النموذج التجريبي المُثبت. وتعتمد قيمته على دقة السجلات وجودة القرارات التي يتم إدخالها في البرنامج.
قد يتفوق النموذج الشمعي اليدوي المصحوب بسجلات دقيقة على الخطة الرقمية المتطورة المبنية على افتراضات ضعيفة.
ما هي المعلومات التي يجب إرسالها إلى مختبر الأسنان من أجل تصنيع الفينير؟
يجب أن يتلقى مختبر الأسنان مسحًا ضوئيًّا للقوس الكامل، والقوس المقابل، وقراءة دقيقة للعضة، وصورًا للوجه وللأسنان بعد سحب اللثة، ومرجعين لخط الوسط والمستوى القاطع، وألوان الأسنان النهائية وألوان جذوع الأسنان، وتفاصيل التحضير، وقيود الأنسجة، ومخاطر الإطباق، وتفضيلات الملمس، بالإضافة إلى نموذج شمعي معتمد أو نموذج تجريبي أو مرجع مؤقت يوضح النتيجة المرجوة.
كما يجب أن توضح التعليمات ما يمكن للفني تغييره وما يجب أن يظل ثابتًا.
هل ينبغي اختيار مادة القشرة قبل تصميم الابتسامة؟
ينبغي اختيار مادة الفينير بعد تحديد الأهداف البيولوجية والبصرية والمكانية والوظيفية، لأن خيارات ثاني سيليكات الليثيوم، والبورسلين الفلسباتي، والزركونيا، والخيارات القائمة على الراتنج تعالج مشكلات مختلفة. وقد يؤدي اختيار المادة في مرحلة مبكرة جدًّا إلى إجبار عملية التحضير والتصميم على التكيف مع السيراميك بدلاً من تلبية احتياجات المريض.
قبل إرسال حالة الفينير التالية إلى المختبر، قم بعقد اجتماع تمهيدي للتصميم مدته عشر دقائق.
حدد خط الوسط الترميمي. ضع علامة على الحافة القاطعة المخطط لها. حدد الأسنان التي يجب أن تبرز في الابتسامة. سجل حدود الأنسجة. حدد الدرجة اللونية والشفافية والملمس واللمعان. اختبر الصوتيات والحركات. ثم تأكد مما وافق عليه المريض فعليًّا.