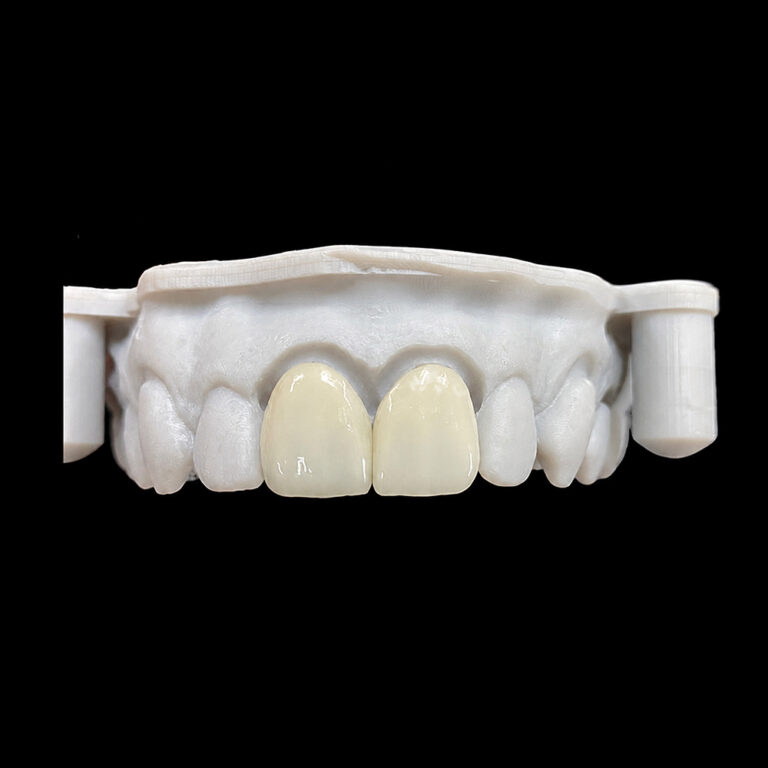
Can Veneers Be Re-Polished to Restore Their Original Esthetics?
Yes—but only within limits.
Polish can work.
When a porcelain veneer has lost surface gloss because of minor chairside adjustment, prophylaxis, superficial abrasion, or localized roughness, a material-specific dental veneer repolishing sequence can often produce a smoother, brighter surface without removing and replacing the restoration.
But can it truly restore the veneer’s original esthetics?
Sometimes. Not always.
My blunt view is that “repolishing” is frequently presented as a cosmetic reset button when it is actually a controlled surface-refinement procedure. It can change roughness, gloss, light scattering, tactile smoothness, and superficial stain retention. It cannot rebuild missing ceramic, close an open margin, reverse a crack, correct an overcontoured facial surface, or recreate texture that has already been ground away.
That distinction matters.
Veneer Polishing Changes Light, Not Just Shine
Patients usually describe the problem in simple language:
“The veneer looks cloudy.”
“One tooth is flatter than the others.”
“It no longer catches light correctly.”
“My tongue feels a rough spot.”
“The edge looks dull.”
“It stains faster than before.”
These complaints may sound cosmetic, but several different defects can produce the same visual result.
A veneer is not perceived as a color chip. Its appearance depends on ceramic thickness, surface texture, line angles, value, translucency, underlying stump shade, resin cement, surrounding enamel, and the way the facial surface redirects light.
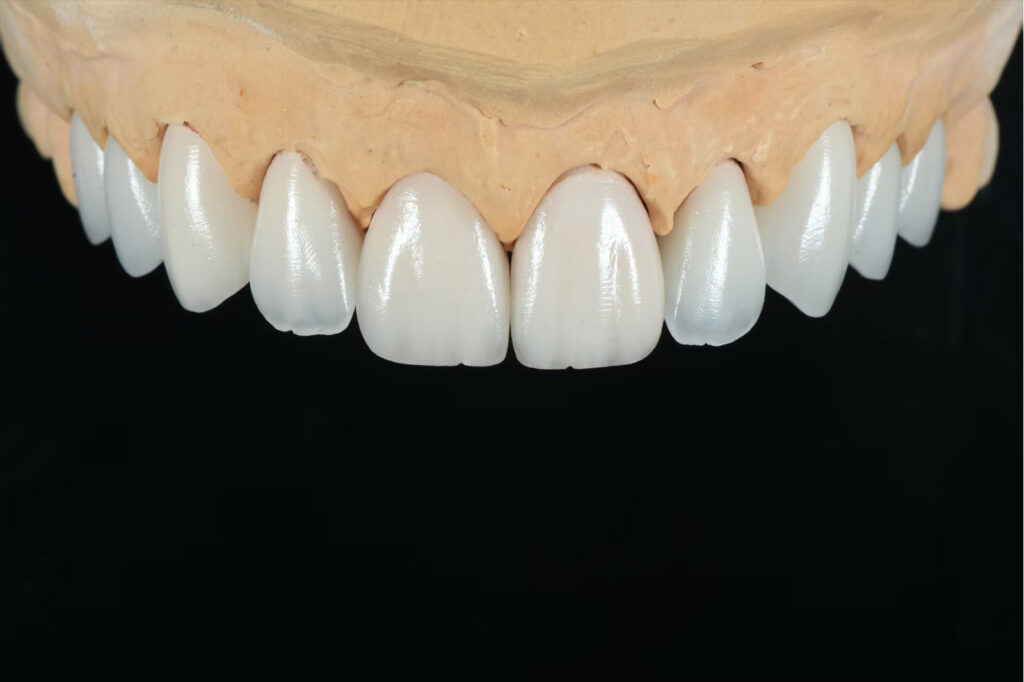
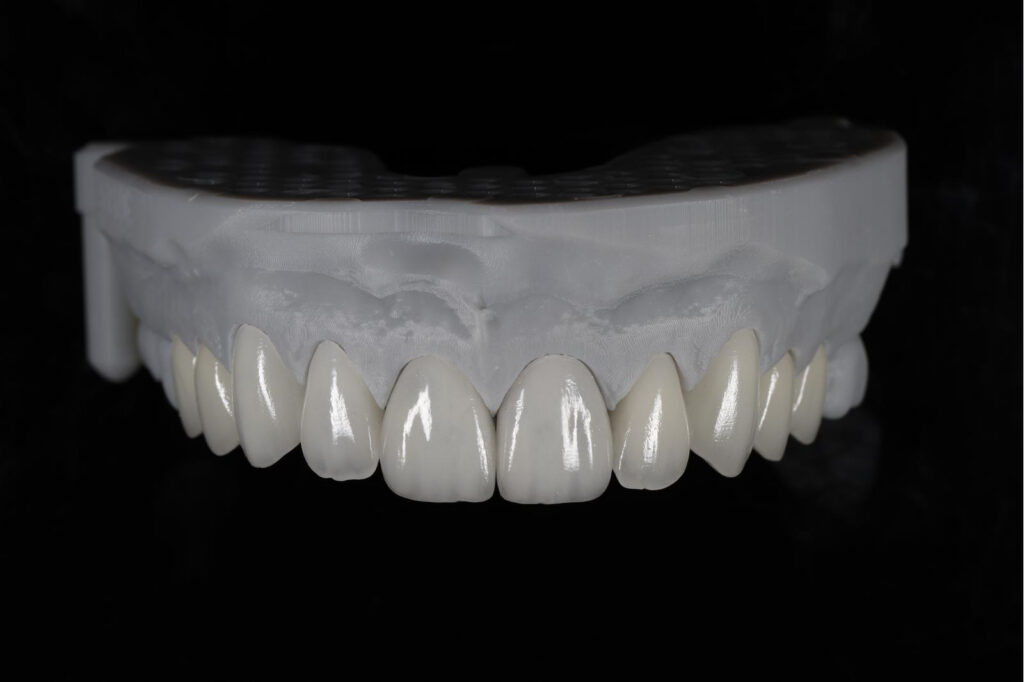
Artist Dental Lab’s guide to surface texture in veneers makes the useful distinction between visible morphology and microscopic smoothness. A veneer can retain developmental lobes, shallow grooves, perikymata, and incisal detail while still having a smooth, cleanable final surface.
That is the target.
Natural enamel is largely composed of hydroxyapatite, Ca₁₀(PO₄)₆(OH)₂. It is not uniformly flat or mirror-polished. Yet natural-looking texture should not be confused with uncontrolled ceramic roughness. One creates a believable reflection pattern. The other creates haze, plaque-retentive irregularities, staining risk, and an unpleasant tactile surface.
Gloss and smoothness are not identical
A surface can appear glossy while retaining microscopic defects. It can also feel smooth but reflect light differently from adjacent teeth.
This is why visual inspection alone is weak. A clinician evaluating veneer polishing should compare:
Dry and hydrated appearances
Frontal and 45-degree photographs
Direct and diffused light
Adjacent enamel gloss
Facial reflection width
Cervical, middle, and incisal thirds
Tongue-detectable roughness
Marginal integrity
Existing glaze and characterization
Signs of chipping, cracking, or debonding
A bright operatory lamp can hide a poor result. Smartphone flash can exaggerate it. Daylight usually exposes the truth.
What the Research Actually Says About Ceramic Repolishing
The evidence supports repolishing, but it does not support improvisation.
A landmark Dental Materials review of surface roughness and plaque retention identified an Ra value of approximately 0.2 μm as an important threshold. Below that level, further smoothness may not meaningfully reduce bacterial accumulation; above it, increasing roughness was associated with increasing plaque retention and greater risk of caries or periodontal inflammation.
That number is useful. It is not magical.
Ra is the arithmetic average roughness measured across a surface profile. It does not fully describe deep isolated scratches, directional grooves, gloss, three-dimensional topography, or how a specific veneer reflects light. Two surfaces can report similar Ra values and still look different clinically.
Adjustment kit followed by diamond paste: 0.438 ± 0.043 μm
The interesting result was not that “diamond paste works.” Used alone, the paste group produced the roughest surface in that experiment. The combination of sequential porcelain polishing followed by diamond paste produced a finish statistically similar to the reglazed group.
Sequence mattered.
This is exactly where generic advice fails. Buying the “best polishing paste” does not guarantee the best polishing system for dental veneers. A fine paste cannot efficiently erase deep scratches left by an earlier coarse instrument. The surface must be reduced through a controlled abrasive progression.
Newer ceramics do not respond identically
A 2026 BMC Oral Health study evaluated polishing and glazing effects in lithium disilicate and zirconia-reinforced lithium silicate ceramics. Most measured Ra values fell between 0.13 and 0.18 μm, while the researchers also found material-dependent differences in optical behavior and color change.
For zirconia-reinforced lithium silicate, certain glazing conditions produced color changes above a reported perceptibility or acceptability boundary of ΔE 1.7. The polished groups generally showed less color change than the glazed groups.
So the hard truth is this: reglazing is not automatically more esthetic, and polishing is not automatically safer. Ceramic chemistry, crystal distribution, glaze compatibility, abrasive sequence, pressure, rotational speed, and treatment time all affect the result.
Can Porcelain Veneers Be Re-Polished Successfully?
Porcelain veneers can usually be re-polished when the problem is confined to the exposed surface and enough ceramic remains to permit controlled finishing.
Good indications include:
Localized roughness after occlusal adjustment
Minor scratches from finishing instruments
Loss of gloss after professional prophylaxis
Superficial staining attached to a rough surface
A small over-glossy or under-glossy area
Sharp ceramic edges without a structural fracture
Minor texture inconsistency between adjacent units
Accessible excess resin cement near the margin
Localized surface haze without internal damage
A conservative repolishing procedure may improve how the veneer feels and reflects light. It may also make superficial stains less likely to reattach by removing microscopic surface irregularities.
But “may” is doing serious work here.
Defects polishing cannot fix
Veneer polishing is the wrong treatment when the underlying problem is structural, biological, optical, or geometric.
Clinical finding
Can polishing solve it?
More appropriate response
Superficial roughness
Usually
Material-specific finishing and polishing
Minor loss of gloss
Often
Controlled repolishing and gloss matching
Shallow surface stain
Sometimes
Cleaning, assessment, then repolishing
Deep internal discoloration
No
Diagnose substrate, cement, or ceramic color
Open or leaking margin
No
Repair assessment or replacement
Veneer crack
No
Structural evaluation; replacement often required
Ceramic chip
Limited
Repair or replacement based on size and location
Debonding
No
Remove, inspect, and rebond or remake
Overcontoured veneer
Not by polishing alone
Recontouring may require significant ceramic removal
Incorrect value or translucency
Rarely
Optical reassessment, possible remake
Lost facial anatomy
No
Texture cannot be restored by polishing alone
Gingival inflammation from emergence profile
No
Diagnose contour, margin, cement, and hygiene factors
This table is where I separate realistic maintenance from wishful dentistry.
A dull veneer is a surface problem only after the clinician proves that it is a surface problem.
Material Identification Comes Before the Polishing Kit
“How to polish dental veneers” is not a single protocol because “veneer” is not a single material.
The clinician should identify the restoration as accurately as possible before selecting instruments. At minimum, distinguish among:
Feldspathic porcelain
Lithium disilicate
Layered lithium disilicate
Zirconia
Layered zirconia
Zirconia-reinforced lithium silicate
Resin-matrix ceramic
Direct or indirect composite resin
The polishing system must match the exposed material, not merely the product category printed on the package.
Feldspathic porcelain
Hand-layered feldspathic porcelain can deliver very fine translucency, incisal characterization, surface texture, and enamel-like light behavior. It is also less forgiving of uncontrolled adjustment because characterization and glaze may exist in a thin surface zone.
Artist Dental Lab’s feldspathic veneer workflow is positioned around delicate incisal effects, custom texture, complex shade blending, and premium anterior esthetics. That means aggressive polishing can remove exactly the details that made the restoration valuable.
A smooth result is not enough if the central incisor becomes optically flat.
Lithium disilicate
Lithium disilicate is a silica-based glass ceramic commonly associated with SiO₂ and Li₂O-based crystalline chemistry. It generally offers more mechanical reserve than highly delicate feldspathic layering while retaining useful translucency for anterior restorations.
Artist Dental Lab’s E.max veneer option is intended to balance esthetic translucency, strength, consistent fit, and shade performance. When a lithium disilicate veneer is adjusted, a ceramic-specific multi-step system may restore a clinically smooth finish, but the final gloss still needs to match adjacent enamel and neighboring units.
Zirconia veneers
Zirconia is primarily zirconium dioxide, ZrO₂. Unlike silica-based glass ceramics, it is a polycrystalline ceramic. That difference affects bonding, grinding behavior, heat generation, crack formation, abrasive selection, and polishing response.
A polishing protocol designed for porcelain should not be assumed to perform identically on zirconia.
And a paste labeled “universal” should not end the discussion.
A Practical Veneer Repolishing Workflow
The correct clinical sequence depends on the material and manufacturer’s instructions, but the diagnostic logic should remain disciplined.
1. Identify the cause of the esthetic change
Ask when the change appeared.
Did it follow:
Occlusal adjustment?
Scaling or air polishing?
Whitening of adjacent teeth?
Trauma?
Bruxism?
Dietary staining?
Recession?
Dehydration?
Cementation?
A recent hygiene appointment?
Timing can distinguish surface roughness from substrate change, gingival recession, cement discoloration, or a fracture.
2. Inspect the veneer under magnification
Look for:
Marginal gaps
Microchips
Crack lines
Surface pits
Exposed layering ceramic
Deep rotary scratches
Cement remnants
Contact-area damage
Incisal wear
Delamination
Loss of characterization
Do not polish through uncertainty.
3. Record the existing surface before touching it
Take frontal, lateral, retracted, and 45-degree photographs. Record the adjacent teeth dry and hydrated. Note the original reflection zone and gloss level.
This step sounds excessive until one central incisor becomes shinier than the other.
The site’s discussion of value versus shade in veneer esthetics explains why a surface change can alter apparent brightness even when the ceramic’s underlying shade has not changed.
4. Use the least aggressive instrument that can remove the defect
The goal is not to grind the entire facial surface. It is to remove the damaged topography while preserving ceramic thickness, margins, contour, and characterization.
Deep scratches require progressive refinement. Jumping directly to a fine paste can polish the peaks while leaving the valleys.
That creates shine over damage.
5. Progress through the complete abrasive sequence
A typical material-specific progression may include:
Fine contour correction
Pre-polishing
Intermediate polishing
High-gloss polishing
Diamond paste or final polishing medium where indicated
Soft brush, felt wheel, or manufacturer-specified final applicator
Speed, pressure, time, water cooling, instrument condition, and access angle matter. Excessive pressure may generate heat and remove material unevenly. Worn polishers may create unpredictable contact.
6. Match gloss by zone
A natural veneer does not necessarily need identical gloss from cervical margin to incisal edge.
The clinician should compare:
Central facial highlight
Proximal transition zones
Cervical third
Incisal third
Adjacent enamel
Contralateral tooth
Neighboring veneers
Uniform mirror gloss can make a veneer look synthetic, especially beside mature enamel with softer reflection.
7. Recheck function and tissue response
After polishing, confirm:
Protrusive and lateral contacts
Incisal guidance
Centric contacts
Marginal smoothness
Floss passage
Tissue irritation
Patient comfort
Surface appearance after rehydration
A beautiful static photograph does not prove a successful restoration.
When Reglazing Is Better—and When It Is Not
Reglazing requires laboratory access, suitable firing parameters, compatible glaze materials, and confidence that another firing cycle will not produce unwanted optical or dimensional changes.
It may be considered when:
Large areas of glaze were removed
Surface characterization must be reapplied
Multiple units require consistent finishing
The veneer can be safely removed or has not yet been bonded
The material and glaze system are known
Laboratory correction is more controlled than chairside correction
For a bonded veneer, removal solely for reglazing may introduce more risk than careful intraoral polishing.
And even laboratory glazing is not automatically superior. Research has reported both polished surfaces that approach glazed roughness and glazed surfaces that show material-dependent irregularities or color changes. The honest answer is not “always polish” or “always reglaze.” It is “use the protocol that fits the ceramic and defect.”
The Industry’s Most Common Veneer-Polishing Mistakes
Treating every dull veneer as a polishing case
A veneer can look dull because its value is wrong, the adjacent teeth were whitened, the resin cement changed, the gingiva receded, or the ceramic is internally damaged.
Polishing the wrong diagnosis simply makes the mistake shinier.
Using diamond paste as the entire protocol
The 2021 feldspathic porcelain experiment should end this habit. Diamond paste alone produced a mean Ra of 2.361 μm, while a sequential kit followed by paste produced 0.438 μm.
Products do not replace sequence.
Erasing texture to create gloss
Overpolishing can flatten perikymata, soften developmental lobes, broaden facial reflections, and make a tooth appear wider or more artificial.
Original gloss may return while original esthetics disappear.
Ignoring heat
Dry polishing, excessive pressure, prolonged contact, and high rotational speed can generate heat. Thin ceramic veneers leave little room for careless material removal or thermal stress.
Polishing without knowing the ceramic
Feldspathic porcelain, lithium disilicate, layered ceramics, zirconia, and resin-matrix ceramics are not interchangeable surfaces.
A “ceramic polisher” is a category, not a diagnosis.
How Clinics Should Communicate a Repolishing Case to the Lab
When surface esthetics are uncertain, the laboratory needs more than “please make it shiny again.”
A better communication package includes:
Restoration material and product name, when known
Cementation date
Date the problem appeared
Description of any adjustment
Instruments previously used
Full-face and retracted photographs
45-degree reflection photographs
Dry and hydrated views
Macro photographs of the defect
Occlusal contact information
Desired gloss level
Areas that must not be altered
Whether texture, stain, glaze, or contour has already been removed
For a new case or trial workflow, clinics can submit scans, photographs, stump shade, bite information, and esthetic targets through the Artist Dental Lab consultation page.
FAQs
Can porcelain veneers be re-polished?
Porcelain veneers can be re-polished when the defect is limited to superficial roughness, minor scratches, lost gloss, or a small adjusted area, provided the clinician identifies the ceramic, preserves the veneer’s thickness and anatomy, and completes a material-specific abrasive sequence rather than relying on one polishing paste.
Repolishing cannot repair cracks, open margins, internal discoloration, debonding, large chips, or a fundamentally incorrect veneer contour.
Can veneer polishing restore the original shine?
Veneer polishing can restore a shine close to the original appearance when surface damage is shallow and the original contour, glaze, characterization, and ceramic thickness remain substantially intact, but it cannot perfectly recreate laboratory-applied texture or optical effects that were removed during aggressive grinding or prolonged wear.
The target should be integration with adjacent enamel, not maximum gloss.
Can polishing remove stains from porcelain veneers?
Polishing can remove or reduce superficial stains attached to microscopic surface roughness, but it cannot remove discoloration located inside the ceramic, beneath the veneer, within the resin cement, at a leaking margin, or in the underlying tooth structure without identifying and treating the actual source of the color change.
Cleaning and diagnosis should therefore come before abrasive treatment.
What is the best polishing system for dental veneers?
The best polishing system for dental veneers is the complete material-specific sequence recommended for the exposed ceramic, using progressively finer abrasives and a suitable final polishing medium, because feldspathic porcelain, lithium disilicate, zirconia, layered ceramics, and resin-matrix materials respond differently to identical instruments, pressure, speed, and polishing time.
No single paste is the best answer for every veneer.
Can repolishing damage a veneer?
Repolishing can damage a veneer when excessive pressure, heat, coarse abrasives, prolonged contact, incorrect rotary speed, or the wrong material-specific system removes too much ceramic, erases surface texture, rounds margins, exposes internal layers, creates new scratches, or changes the restoration’s facial contour and light-reflection pattern.
Thin feldspathic and layered veneers demand especially conservative handling.
How long does repolished veneer gloss last?
Repolished veneer gloss can remain stable for years when the ceramic is properly finished, the occlusion is controlled, oral hygiene procedures are non-abrasive, and the patient does not expose the surface to repeated grinding, harsh prophylaxis, damaging habits, or plaque-retentive roughness, although no universal clinical lifespan applies to every material or patient.
Maintenance depends on both the ceramic surface and the oral environment.
Can patients polish veneers at home?
Patients should not polish porcelain veneers at home because household abrasives, whitening pastes, rotary devices, polishing powders, and unverified kits cannot identify the ceramic or control material removal, and they may roughen the surface, damage margins, alter gloss, abrade adjacent enamel, or conceal a crack that requires professional assessment.
Home care should focus on gentle cleaning rather than surface modification.
Restore the Surface—or Diagnose the Real Failure
Veneer polishing is valuable when the problem is truly superficial.
It is also easy to misuse.
Before reaching for a rubber wheel or diamond paste, identify the ceramic, inspect the margin, rule out cracks, evaluate the reflection pattern, record the existing texture, and decide whether the veneer needs cleaning, repolishing, repair, laboratory reglazing, rebonding, or replacement.
Do not promise “original esthetics” from a polishing kit alone.
For material selection, surface-finish planning, anterior case review, or a trial veneer case, send Artist Dental Lab the STL files, stump shade, clinical photographs, bite records, existing restoration details, and the specific gloss or texture target through the case consultation form.