Dirigido a laboratorios dentales, clínicas, distribuidores y equipos de aprovisionamiento que deseen comparar coronas de circonio, coronas de disilicato de litio, carillas, servicios OEM o pedidos al por mayor de restauraciones.
Indícanos el tipo de producto, el material, el volumen mensual, el país de destino y si deseas solicitar una muestra, para que nuestro equipo de ventas pueda preparar el siguiente paso adecuado.
Comprobaciones oclusales tras la cementación en casos de carillas múltiples
Crear vínculos cambia las cosas.
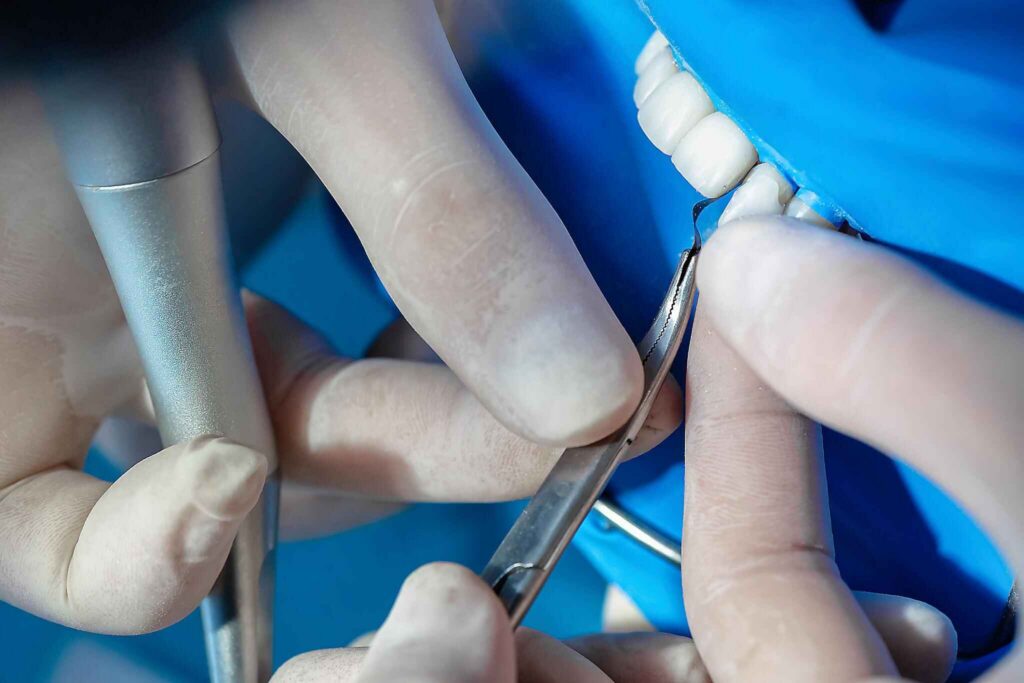
Una vez colocadas definitivamente seis, ocho o diez carillas, el odontólogo ya no comprueba un conjunto de carillas cerámicas sueltas con respecto a una oclusión provisional; la boca contiene ahora un sistema de restauración adherido en el que las diferencias microscópicas en el asentamiento, el grosor del cemento, la presión de contacto, la limpieza, la posición de los dientes y el contorno final de la cerámica pueden alterar la forma en que el paciente cierra la boca y la mueve.
Entonces, ¿por qué en algunos procesos de colocación de carillas se sigue tratando la comprobación final de la oclusión como una mera formalidad de treinta segundos?
Yo no lo haría.
La cruda realidad es que unas cerámicas bonitas pueden quedar bien en la fotografía y, aun así, funcionar mal. Un caso con varias carillas puede presentar una línea media nítida, una translucidez convincente y una excelente integración marginal, mientras que un incisivo central presenta un contacto aislado que nunca se pretendió que estuviera ahí.
Por ello El ajuste oclusal de las carillas debe comenzar con el diagnóstico, no con el pulido.
Y debería realizarse tras la cementación definitiva.
El análisis de Artist Dental Lab sobre el secuencia de cementación más eficaz para carillas múltiples Hace hincapié en el control centrado durante la colocación. Yo ampliaría esa misma disciplina a la comprobación funcional final: determinar qué ha cambiado, identificar dónde entran realmente en contacto las nuevas restauraciones y, solo entonces, decidir si hay que retocar la cerámica.
Una cita satisfactoria para la cementación no es lo mismo que una oclusión satisfactoria
Tras la colocación de un caso de carillas de gran envergadura, se produce un momento psicológico delicado.
Las carillas ya están colocadas.
Se han limpiado los contactos.
La encía tiene buen aspecto.
El paciente se mira en el espejo y sonríe.
Todo el mundo se relaja.
Es precisamente en ese momento cuando pueden pasarse por alto los errores funcionales.
Una prueba en seco nos proporciona mucha información sobre el ajuste, el color, los contactos, la posición incisal y la secuencia de colocación, pero no puede reproducir a la perfección el estado definitivo tras la cementación. El cemento de resina ocupa espacio. Las relaciones de contacto pueden cambiar tras la colocación definitiva. Las pequeñas variaciones entre varias restauraciones pueden acumularse.
En un caso de seis unidades que afecta a los dientes #6–#11 según la clasificación de Universal, o los dientes 13–23 según la clasificación de la FDI, no me interesa únicamente si cada carilla “se ajusta” por separado.”
Quiero saber si las seis restauraciones funcionan ahora como un único sistema anterior controlado.
Esa distinción es especialmente importante en los casos en los que el laboratorio ha dedicado un esfuerzo considerable a controlar la línea media, el predominio de los incisivos centrales, la posición incisal y la simetría. La guía de Artist Dental Lab sobre Cómo mantener la línea media y la simetría en casos con múltiples carillas Deja claro el problema de diseño: los dientes centrales establecen puntos de referencia que influyen en todo lo que se mueve lateralmente. La oclusión final merece el mismo enfoque «del centro hacia fuera».
Cómo comprobar la oclusión tras la cementación de las carillas
Utilizo una jerarquía sencilla.
Primero, la ubicación. Segundo, la carga. Tercero, el transporte.
El papel o el papel de aluminio articulado pueden ayudar a identificar los puntos de contacto, pero yo no me fijaría en la marca de tinta más grande para decidir automáticamente que representa la fuerza mayor.
Un estudio de 2012 indexado por la Biblioteca Nacional de Medicina de EE. UU. reveló que el tamaño de la marca en el papel articulador no era un indicador fiable del porcentaje de fuerza oclusal. Un estudio anterior llegó a una conclusión similar: el área de la marca por sí sola no debe considerarse una medida directa de la carga real.
Eso cambia mi forma de interpretar la mordida.
Una marca es una prueba de contacto.
No es una célula de carga.
1. Comprobar la intercuspación máxima
Empieza por el cierre normal del paciente.
No le pidas al paciente que realice movimientos exagerados de inmediato. Primero, comprueba qué ocurre cuando el paciente cierra la boca de forma natural hasta alcanzar la intercuspación máxima.
Busco:
contactos que aparecieron únicamente tras la cementación;
un diente restaurado que entra en contacto de forma notable antes que el resto de la arcada;
asimetría entre el lado derecho y el izquierdo;
contactos concentrados cerca de los bordes finos de la cerámica o de las zonas de transición;
un incisivo central o lateral restaurado que, de repente, presenta una relación incompatible con la oclusión prevista;
contactos posteriores que desaparecieron tras la colocación de las restauraciones anteriores.
El objetivo no es que todos los dientes tengan una marca idéntica.
Eso es odontología al estilo de un libro para colorear.
El objetivo es determinar si la anatomía restauradora final ha modificado la relación funcional de tal manera que sea necesario corregirla.
2. Comprobar el movimiento de protrusión
A continuación, haz que el paciente se incline hacia delante.
Un caso anterior de seis, ocho o diez unidades puede alterar la guía protrusiva simplemente porque los bordes incisales han cambiado de longitud, inclinación, grosor o posición facial-palatina.
Y un solo milímetro de mejora estética puede tener consecuencias funcionales si modifica el punto de contacto de los incisivos inferiores con las superficies palatinas o los bordes incisales.
Quiero comprobar si los contactos protuberantes son:
en consonancia con la orientación anterior prevista;
distribuida, en lugar de estar dominada por una unidad inesperada;
sin interferencias evidentes que provoquen desviaciones;
compatible con el patrón de desoclusión posterior existente del paciente, cuando dicho patrón forme parte del diseño del tratamiento.
Pero yo no limaría a ciegas todos los contactos anteriores.
Las carillas son restauraciones, no piezas de museo.
Si la guía anterior se incorporó intencionadamente al diseño de la restauración, eliminarla porque los contactos cerámicos inquietan al odontólogo puede comprometer la función que se había planificado deliberadamente.
3. Comprueba los movimientos laterales a la derecha y a la izquierda
Ahora muévete lateralmente.
La guía canina, la función del grupo, los patrones de desgaste previos, la posición de los dientes, la relación esquelética, las restauraciones posteriores existentes y las parafunciones influyen en la elección del tratamiento adecuado.
No existe ninguna regla universal que establezca que todas las carillas deban estar completamente sin contacto lateral.
Tampoco existe ninguna norma justificada que establezca que una carilla canina recién adherida deba soportar automáticamente cualquier contacto fuerte que se produzca en la cara de trabajo.
Todo depende del contexto.
Para mí, la señal de alerta es cambiar sin dar explicaciones.
Si el paciente presentaba un patrón estable antes del tratamiento y las nuevas carillas provocan una interferencia aislada, ya sea funcional o no funcional, que no se había diseñado ni previsto, conviene investigarla antes de que el paciente se marche.
4. Comprobar las posiciones de borde a borde y funcionales
Algunos pacientes nunca revelan el problema en cuestión durante las consultas que siguen al pie de la letra los esquemas de los libros de texto.
Pídeles que cierren como de costumbre.
Pídeles que se inclinen hacia delante de forma natural.
Observa las posiciones mandibulares relacionadas con el habla y las habituales cuando sea necesario.
En el caso de los pacientes con una relación «borde a borde», mordida profunda, desgaste anterior significativo o antecedentes de hábitos parafuncionales, la envolvente funcional merece mayor atención que un simple registro estático de la mordida.
Es aquí donde la oclusión con múltiples carillas pasa a ser específica para cada paciente, en lugar de basarse en un esquema genérico.
El patrón de contacto que analizaría antes de ajustar la cerámica
Resultados tras la cementación
Por qué me llama la atención
Lo que comprobaría antes de triturar
Una carilla sobresale respecto a los dientes adyacentes al cerrar la boca
Posible contacto prematuro o cambio relacionado con el asentamiento
Repite el cierre, comprueba el asentamiento, la posición de contacto y el diente opuesto.
Un diente central domina el movimiento de protrusión
La concentración de la orientación puede no ser intencionada
Comparar con el diseño aprobado y con la zona central contralateral
Nueva interferencia que impide el funcionamiento
Puede alterar el movimiento mandibular o concentrar la carga
Repite el movimiento varias veces antes de realizar el ajuste
Marca de papel articulado de aspecto grueso
El tamaño de la marca por sí solo no permite cuantificar la fuerza de forma fiable
Combina la localización, el cierre repetido, la evaluación táctil, la información proporcionada por el paciente y el análisis digital cuando esté indicado
El contacto se asienta sobre cerámica recientemente ajustada
Es posible que la superficie haya perdido su acabado original
Inspeccionar y volver a pulir utilizando el sistema específico para cada material
El paciente afirma que la mordida “toca primero” en una carilla.
La información subjetiva puede revelar un cambio real
Es mejor volver a comprobar el cierre habitual en lugar de desestimar la reclamación
Se modificaron varios contactos anteriores tras la cementación
Podría tratarse de un problema a nivel del sistema, en lugar de un problema de una sola unidad.
Vuelve a evaluar todo el segmento restaurado antes de tocar un solo diente
Síntomas del bruxismo y contacto cerámico concentrado
El riesgo funcional puede aumentar con el paso del tiempo
Evaluar el esquema oclusal y la estrategia de uso de aparatos protectores
Esa última fila merece más atención de la que suele recibir.
El bruxismo convierte un pequeño error oclusal en un problema empresarial más grave
Al sector de las carillas le gusta hablar de la resistencia de la cerámica.
Los pacientes no alteran los valores de resistencia a la flexión.
Provocan la rotura de las restauraciones.
A continuación, se presenta un estudio clínico prospectivo de 2020 364 carillas de feldespato colocadas en 64 pacientes, entre los que se incluían 40 pacientes con bruxismo, durante un periodo de hasta ocho años. La supervivencia global comunicada fue de 93,71 TP3T a los tres años, 911 TP3T a los cinco años y 87,11 TP3T a los ocho años. En el subgrupo de bruxismo, los pacientes que utilizaban una férula oclusal presentaron una supervivencia considerablemente mayor que los que no la utilizaban; las cifras a largo plazo comunicadas fueron de 89,1% frente a 63,9%.
Eso no significa que todas las personas que padecen bruxismo necesiten automáticamente el mismo aparato.
Esto significa que la parafunción no puede considerarse una cuestión secundaria.
En un estudio clínico anterior se analizó 323 carillas laminadas de porcelana en 70 pacientes, con 170 carillas colocadas en personas con bruxismo. Los investigadores registraron 13 fracturas y 29 desprendimientos; ocho fracturas y 22 desprendimientos se produjeron en pacientes con bruxismo.
Esas cifras no son un motivo para descartar las carillas.
Son un argumento a favor de respetar la función.
Y hacen que el enfoque informal de “ese bocado tiene buena pinta” sea cada vez más difícil de defender.
Ajuste oclusal de las láminas: lima menos de lo que te dicta el instinto
Esta es la opinión más firme que expongo en este artículo:
No persigas la tinta.
Si se comprueba repetidamente que un contacto supone una interferencia no deseada, puede ser conveniente realizar un ajuste. Sin embargo, la cerámica debe retirarse porque se ha detectado un problema de funcionamiento, no porque una marca parezca más oscura que la que tiene al lado.
Mi estrategia sería prudente:
Vuelve a crear el contacto.
Comprueba el movimiento de la mandíbula.
Determina si el contacto es intencionado.
Identifica la zona más pequeña responsable.
Realiza una corrección mínima siguiendo el protocolo aprobado para la cerámica.
Vuelve a comprobar el mismo movimiento.
Vuelve a revisar todo el arco.
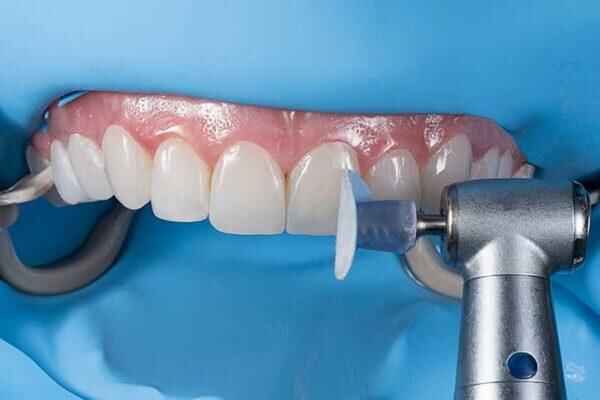
Recupera el acabado de la superficie cerámica.
Ese séptimo paso es lo que llama la atención de la gente.
Si se elimina una interferencia, cambia la distribución de la fuerza.
Hay que volver a comprobar la mordida.
Nunca consideres el pulido como una limpieza opcional
El ajuste de la oclusión de las carillas cerámicas modifica la superficie cerámica.
Eso importa.
En un estudio de laboratorio realizado en 2014 se compararon muestras de circonio y disilicato de litio ajustadas, ajustadas y pulidas, y ajustadas y esmaltadas. Un hallazgo clínicamente relevante fue que El desgaste del esmalte opuesto disminuyó tras pulir el disilicato de litio y la circonita ajustados..
Se trataba de un estudio in vitro, no de un ensayo clínico sobre la supervivencia de las carillas, por lo que no pretendería afirmar que demuestre un resultado concreto en los pacientes.
Pero respalda una regla muy práctica:
Si esmerilas cerámica, acaba bien la superficie.
Dejar una zona visiblemente tratada y dar por concluida la cita no constituye un protocolo de finalización.
Artículo de Artist Dental Lab sobre Chapas pulidas frente a chapas esmaltadas señala otro aspecto importante: el acabado superficial no solo influye en la rugosidad, sino también en la forma en que la restauración refleja la luz. Por lo tanto, un ajuste demasiado agresivo puede suponer un problema tanto funcional como estético.
El material es importante una vez que la broca entra en contacto con la chapa
Una instrucción genérica sobre el “pulido de porcelana” resulta demasiado imprecisa para la odontología restauradora moderna.
El disilicato de litio, la porcelana feldespática y la circonia no tienen microestructuras idénticas.
Por lo tanto, el tratamiento posterior al ajuste debe seguir las instrucciones vigentes para el sistema cerámico concreto.
Disilicato de litio
IPS e.max es, sin duda, la referencia por excelencia.
Actualmente, Ivoclar describe el IPS e.max CAD como una vitrocerámica de disilicato de litio y indica que su resistencia media a la flexión biaxial es de 530 MPa con una tenacidad a la fractura de 2,11 MPa·m¹ᐟ². El fabricante también documenta tanto los procesos de pulido como los de esmaltado, lo que constituye una prueba útil contra la idea simplista de que todas las superficies de E.max ajustadas deben tratarse de una única forma universal.
En el caso de las prótesis de disilicato de litio de varias unidades, la comparación realizada por Artist Dental Lab de Carillas E.max monolíticas frente a carillas E.max en capas Esto es especialmente relevante porque el ajuste no se produce en el vacío. Es posible que una zona incisal monolítica y una zona incisal con capas delicadas no toleren un remodelado informal de la misma forma desde el punto de vista estético.
Porcelana feldespática
Las carillas de feldespato pueden ofrecer un detalle óptico excepcional, pero el grosor reducido de la cerámica y la delicada morfología de la superficie dejan poco margen para realizar modificaciones improvisadas en la consulta.
Si el problema de contacto requiere una modificación sustancial de la longitud incisal, el contorno palatino o la geometría facial, dejaría de tratar el problema como “un simple ajuste oclusal”.”
En algún momento, te ves obligado a rediseñar la restauración.
Quizá sea mejor solucionarlo mediante una corrección en el laboratorio o una nueva confección, en lugar de ir reduciendo progresivamente el grosor de la cerámica hasta que desaparezca la marca de la mordida.
Zirconia
La circonia sigue otra lógica de acabado.
Su estructura cerámica de óxido difiere de la de las vitrocerámicas a base de sílice, por lo que los sistemas de acabado, las pulidoras y los protocolos de adhesión no deben adoptarse sin más del flujo de trabajo de E.max.
La misma cita.
Una química diferente.
Los datos a largo plazo sobre las carillas dentales demuestran por qué hay que prestar atención a los pequeños detalles
Las carillas cerámicas pueden ofrecer unos resultados excelentes cuando se controlan la indicación, la conservación del esmalte, la fabricación, la adhesión y el manejo funcional.
A continuación, se presentó un análisis retrospectivo de 2019 364 carillas laminadas de disilicato de litio moldeables en 41 pacientes durante 10 años. La tasa de supervivencia comunicada fue de 97.4%, con complicaciones en el 1,64% de las restauraciones: las fracturas representaron el 0,55% y los desprendimientos, el 1,09%.
Otro estudio a largo plazo sobre las carillas de porcelana feldespática reveló una supervivencia estimada de alrededor de 96% a los 10 y 20 años en su muestra aleatoria cuando se fijaron las carillas al esmalte preparado.
Es un resultado excelente.
Pero creo que las estadísticas de supervivencia se suelen utilizar de forma demasiado superficial.
Una cifra de supervivencia de 97% no significa que los profesionales clínicos puedan pasar por alto un contacto recién creado porque “E.max es resistente”.”
Esto significa que es posible obtener buenos resultados cuando todo el sistema de justicia restaurativa funciona correctamente.
Y la oclusión forma parte de ese sistema.
Cómo debe quedar la oclusión con carillas múltiples antes de que el paciente se marche
Me gustaría que el informe final respondiera a varias preguntas.
¿Están todas las carillas bien ajustadas?
Una comprobación funcional no sirve de mucho si una restauración no está colocada donde se supone que debe estar.
Lo primero son los márgenes, los contactos, la limpieza del cemento y el ajuste visual.
¿Es repetible la intercuspación máxima?
El paciente debería poder cerrar los ojos repetidamente sin tener que buscar una posición cómoda.
Una queja como “este diente es el primero en tocar” merece ser investigada.
No le digas al paciente de inmediato que tiene que “acostumbrarse”.”
A veces, la adaptación es real.
A veces, el coste de la restauración es elevado.
¿Son intencionados los contactos protusivos?
Si la nueva longitud incisal ha modificado la guía anterior, comprueba que dicho cambio forme parte del plan de tratamiento.
¿Son limpios los movimientos laterales?
Busca nuevas interferencias en lugar de seguir ciegamente un patrón oclusal de manual.
¿Ha cambiado el ajuste el aspecto?
Tras el ajuste y el repulido de la cerámica, examina la restauración bajo diferentes fuentes de luz.
Una zona lisa y pulida en un incisivo central puede alterar el patrón de reflexión, aunque el color no cambie.
¿Hemos creado un problema de mantenimiento para el futuro?
Los pacientes a los que se les colocan varias carillas necesitan una estrategia de mantenimiento.
Mi mejor protocolo oclusal para casos con varias carillas
En el caso de un tratamiento anterior de entre cuatro y diez unidades, esta es la secuencia que incorporaría al flujo de trabajo clínico:
Paso 1: Comprueba que se hayan retirado por completo los restos de cemento y que la superficie quede completamente limpia.
No se debe diagnosticar una oclusión en torno a la resina residual o a un asentamiento dudoso.
Paso 2: Registrar la intercuspación máxima habitual.
Utiliza un indicador de contacto adecuado y repite el cierre las veces necesarias para distinguir un contacto reproducible del ruido.
Paso 3: Comparar la distribución del contacto anterior y posterior.
Busca algo que haya cambiado tras la cementación.
Paso 4: Evaluar el movimiento protrusivo.
Identifica la línea de trabajo a lo largo de los nuevos bordes incisales y las superficies palatinas.
Paso 5: Evalúa las desviaciones laterales hacia la derecha y hacia la izquierda.
Comprueba las directrices previstas e investiga las interferencias de nueva aparición.
Paso 6: Reproduce los contactos sospechosos antes de tocar la cerámica.
Un punto azul no equivale a un diagnóstico.
Paso 7: Realiza el ajuste oclusal mínimo justificado de la carilla.
El objetivo es la corrección, no la remodelación.
Paso 8: Vuelve a comprobar que la oclusión sea completa.
Cada ajuste puede redistribuir los contactos.
Paso 9: Recupera la suavidad y el brillo de la superficie siguiendo el protocolo de acabado específico para cerámica.
No vuelvas a utilizar disilicato de litio rugoso, porcelana feldespática ni circonio.
Paso 10: Evaluar el riesgo de hábitos parafuncionales.
En el caso de los pacientes con bruxismo, apretamiento dental, desgaste grave o fractura previa de la cerámica, hay que valorar si es necesario incluir en el plan un aparato de protección y un seguimiento más estrecho.
Paso 11: Documenta el estado final.
Las fotografías clínicas, los registros de oclusión cuando sea necesario, las notas sobre las zonas de ajuste, la identificación de los materiales y la estrategia de protección facilitan enormemente la resolución de problemas en el futuro.
Esa es la diferencia entre “comprobar la oclusión” y gestionar un sistema de restauración.
Preguntas frecuentes
¿En qué consiste una revisión oclusal tras la cementación?
Una revisión oclusal tras la cementación consiste en la verificación sistemática de los contactos dentales estáticos y dinámicos una vez que las carillas se han cementado de forma definitiva, utilizando las restauraciones realmente colocadas en el paciente para identificar contactos prematuros, interferencias en la guía oclusal, cargas asimétricas o patrones de contacto recién creados que no resultaran evidentes durante la prueba previa a la cementación.
Debe incluir la intercuspidación máxima y los movimientos de excursión clínicamente relevantes, en lugar de un único cierre rápido sobre papel de articulación.
¿Cómo se comprueba la oclusión tras la cementación de las carillas?
Para comprobar la oclusión tras la cementación de las carillas, comprueba primero la intercuspidación máxima; a continuación, evalúa los movimientos de protrusión y los laterales derecho e izquierdo, las posiciones «borde con borde» cuando sea pertinente, y el cierre habitual del paciente, comparando el nuevo patrón de contacto con la guía anterior planificada y prestando especial atención a los contactos aislados intensos o de nueva aparición en la cerámica.
Es importante realizar verificaciones repetidas, ya que el tamaño de la marca en el papel de trazo no debe interpretarse por sí solo como una medida directa de la fuerza.
¿Cómo se ajusta la oclusión en las carillas de porcelana?
El ajuste oclusal de las carillas de porcelana es un proceso conservador y específico para cada material, en el que solo se reduce la cerámica que se ha comprobado que causa interferencias, se vuelve a evaluar al paciente en repetidas ocasiones mediante movimientos estáticos y excursivos, y cada superficie ajustada se restaura con un pulido o acabado liso adecuado, de acuerdo con las instrucciones vigentes del fabricante de la cerámica, en lugar de dejarla con una rugosidad visible o microscópica.
Cuando la corrección pudiera alterar de forma significativa el grosor, la anatomía o la estética de la cerámica, puede resultar más justificable realizar una corrección en el laboratorio o volver a fabricarla que proceder a un esmerilado agresivo en la consulta.
¿Deben entrar en contacto las carillas durante los movimientos de protrusión o laterales?
Las carillas pueden participar en la guía protrusiva o lateral cuando ese patrón de contacto se haya diseñado intencionadamente para el paciente, pero no se les deben asignar ni eliminar contactos funcionales siguiendo una regla universal; el odontólogo debe evaluar de forma conjunta la ubicación del contacto, la distribución de la fuerza, el diseño de la cerámica, la dentición opuesta, las parafunciones y el esquema oclusal previo al tratamiento.
El objetivo es que la función esté controlada, no que el contacto se ponga automáticamente a cero.
¿Los pacientes con bruxismo necesitan un protector nocturno después de las carillas?
Una férula oclusal es un aparato protector removible que puede estar indicado tras un tratamiento con carillas en pacientes con bruxismo diagnosticado o sospechado, especialmente cuando el plan de restauración conlleva un mayor riesgo funcional, ya que los estudios clínicos a largo plazo asocian la parafunción no tratada con un mayor número de complicaciones en las carillas y muestran una mejor supervivencia en las cohortes de pacientes con bruxismo que utilizaron de forma constante férulas protectoras.
Un estudio prospectivo de ocho años sobre carillas, realizado en 2020, reveló una diferencia notable en la supervivencia entre los pacientes con bruxismo que utilizaban una férula oclusal y los que no la utilizaban.
¿Cuál es el mejor protocolo oclusal para los casos de carillas múltiples?
El mejor protocolo oclusal para los casos de carillas múltiples consiste en una verificación por etapas tras la adhesión, en la que se comprueba el asentamiento completo y la limpieza del cemento, la intercuspidación máxima, la guía protrusiva y lateral, las relaciones de borde a borde cuando sea pertinente, la simetría de los contactos a lo largo del segmento restaurado, la comodidad del paciente y la calidad superficial final de cualquier cerámica ajustada antes de dar por finalizado el caso.
Los hallazgos funcionales de alto riesgo deberían incorporarse al seguimiento y a la planificación del uso de aparatos de protección, en lugar de tratarse como observaciones aisladas realizadas en la consulta.
Reflexiones finales: No dejes que la foto sonriendo ponga fin a la cita
Un caso con varias carillas no debe darse por terminado solo porque al paciente le guste lo que ve en el espejo.
Completa la función.
Comprueba la intercuspidación máxima. Prueba los movimientos de protrusión y laterales. Analiza los contactos que hayan cambiado. Realiza ajustes de oclusión en las carillas cerámicas únicamente cuando la interferencia sea repetible y esté clínicamente justificada. Y, si se ajusta la cerámica, restaura su superficie correctamente.
Los datos no nos dan muchos motivos para realizar un trabajo descuidado. La supervivencia de las carillas de disilicato de litio a diez años puede superar el 97% en series clínicas bien controladas; sin embargo, los datos sobre el bruxismo también muestran hasta qué punto el riesgo funcional puede alterar drásticamente los resultados.
Esa es la verdadera lección.
La cerámica resistente ayuda.
La oclusión controlada ayuda más de lo que a los departamentos de marketing les gusta admitir.
Las clínicas que tengan previsto realizar casos complejos de carillas de cuatro, seis, ocho o diez unidades deben enviar sus escaneos digitales, la arcada opuesta, los registros de oclusión, los colores de los muñones, las fotografías clínicas, el diseño de sonrisa aprobado, la preferencia de material y los requisitos funcionales a Laboratorio dental Artist.
El laboratorio puede fabricar la cerámica.
Pero la revisión oclusal final tras la cementación es la que determina cómo se adapta esa cerámica a la boca real del paciente.