What Are the Critical QC Points in a Digital Veneer Workflow from Scan to Delivery?
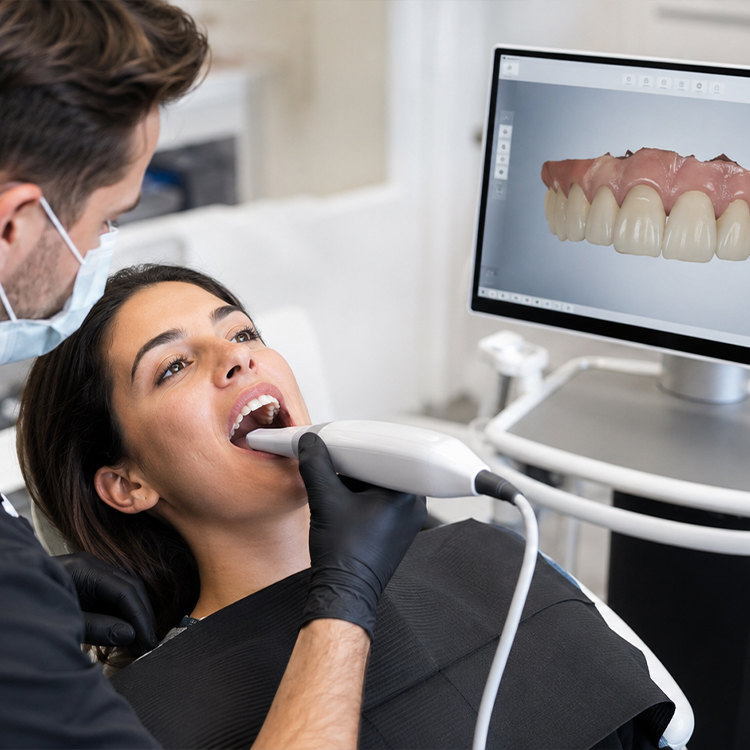
A digital veneer workflow is a controlled sequence that converts clinical records into a bonded ceramic restoration through scanning, digital smile planning, CAD design, manufacturing, finishing, inspection, and delivery. The most important quality-control points are the approval gates that stop inaccurate data or unsafe design decisions before they become expensive physical restorations.
Errors travel downstream.
Once a distorted proximal surface, incomplete finish line, inaccurate bite relationship, wrong stump shade, or poorly communicated esthetic target enters the case package, every later production stage can operate exactly as programmed and still manufacture the wrong veneer with impressive precision.
Why would anyone call that a milling problem?
My blunt view is that most digital veneer remakes are not created by one dramatic technical failure. They are created by several small compromises that nobody stopped: a scan accepted too quickly, a margin guessed instead of confirmed, a cement space copied from the previous case, or a “looks fine” approval given on an uncalibrated monitor.
Why a Perfectly Milled Veneer Can Still Be a Failed Case
Digital manufacturing improves repeatability, but repeatability is not the same as correctness. A milling machine can reproduce an incorrect CAD design with micron-level consistency. A furnace can crystallize the wrong material selection perfectly. A skilled ceramist can add beautiful characterization to a veneer that never should have passed the scan review.
That distinction matters.
A 2024 systematic review of digital esthetic veneer workflows identified 169 publications and selected 20 for detailed quality assessment. The authors concluded that digitally fabricated veneer workflows offered better predictability and accuracy than conventional methods, particularly when digital preparation and cementation guides were used. But the review also emphasized operator experience, case complexity, accurate preparation, and controlled data transfer. Digital tools reduce certain errors; they do not remove professional judgment.
A proper digital veneer workflow therefore needs independent approval gates. The person designing the veneer should not be the only person deciding whether the design is manufacturable. The technician finishing the case should not be the only person approving it for shipment.
That is why a documented dental lab quality control process should separate case review, production inspection, technician approval, final QC, and release. Artist Dental Lab states that submitted STL and PLY files are reviewed before production and that completed restorations receive both technician inspection and an additional in-house quality check before shipping.
Veneer
Table of Contents
QC Gate 1: The Case Package Must Be Complete Before CAD Begins
The first approval decision is not whether the scan looks attractive on screen. It is whether the clinical data are sufficient to design the restoration without guessing.
For a multi-unit digital veneer case, I would expect the submission package to include:
Prepared-arch scan with clearly captured margins
Opposing-arch scan
Accurate buccal bite record
Preoperative scan or diagnostic model
Approved wax-up or digital smile design
Retracted frontal and lateral photographs
Full-face smile photograph
Shade and stump-shade records
Requested material and translucency
Midline, incisal-plane, smile-line, and tooth-length instructions
Occlusal and parafunctional information
Approved temporary or mock-up references, when available
The E.max veneer workflow information on Artist Dental Lab’s site similarly asks for preparation, opposing, and bite scans together with stump shade, photographs, finish-line information, and esthetic reference goals. That is not administrative padding. Each item closes a decision gap that would otherwise be filled by assumption.
Scan completeness matters more than file size
A large scan file is not automatically an accurate scan. Dense mesh data cannot repair missing interproximal geometry, saliva over the finish line, moving soft tissue, duplicated surfaces, or a bite record captured while the patient is shifting into centric contact.
The laboratory should reject or query the case when it finds:
Voids at the cervical margin
Overlapping or doubled mesh surfaces
Uncaptured distal or mesial finish lines
Stitching distortion across a long anterior span
Tissue obscuring the preparation
Inconsistent occlusal contacts between bite records
Preparations that cannot be distinguished from adjacent anatomy
Abruptly trimmed scan borders near relevant landmarks
A 2024 University of Istanbul study found that both preparation design and scanning pattern significantly affected the accuracy of complete-arch laminate veneer scans, with differences reaching statistical significance at p < 0.05. The authors’ practical conclusion was direct: the scan path should be modified according to the preparation design rather than treated as a universal routine.
So no, “the scanner said complete” is not a QC protocol.
Bite records deserve their own approval gate
A digital bite can appear visually aligned while still being functionally wrong. Before design starts, the laboratory should compare the intercuspation against photographs, preoperative contacts, wear patterns, canine guidance, and the planned incisal-edge position.
For anterior veneers, the reviewer should ask:
Are the posterior contacts stable?
Does the recorded bite create an unexplained anterior open bite?
Has the software overclosed the arches?
Will the proposed lengthening interfere with protrusion?
Is canine guidance being changed intentionally or accidentally?
Does the case require an additional protrusive or lateral record?
I would rather request a new bite scan than grind away a ceramic guidance error after delivery. That adjustment may solve the contact. It does not restore the original thickness map, surface texture, glaze, or stress distribution.
QC Gate 2: Margin Identification Must Be Verified, Not Invented
Margin marking is one of the least glamorous and most consequential steps in a digital veneer workflow. When the finish line is vague, the software may still generate a clean-looking outline. That visual confidence is dangerous.
A margin should be approved only when:
The finish line is continuously visible
There is no soft-tissue overlap
The path does not jump onto the root surface
The proximal extension matches the preparation
The margin is consistent with the prescribed design
The proposed edge can be finished and polished safely
The restoration will not create an overcontoured cervical profile
The hard truth is simple: if the technician has to imagine the margin, the case is not ready for design.
Preparation design and scan strategy are connected
Window, butt-joint, incisal-overlap, and palatal-wrap preparations create different scanning and manufacturing challenges. A preparation with a thin, irregular incisal extension may be harder to capture and mill than a clean butt joint. A deep proximal extension may be visually hidden despite appearing present in the mesh.
Research comparing zirconia-reinforced lithium-silicate CAD/CAM veneers found that butt-joint margins produced better marginal accuracy than chamfer designs in that experimental setup. That does not make one design universally superior, but it does show why laboratories should not use one generic QC checklist for every preparation geometry.
QC Gate 3: CAD Approval Must Cover More Than Tooth Shape
Most CAD screenshots are approved from the facial view because that is where the case looks exciting.
That is also where reviewers become careless.
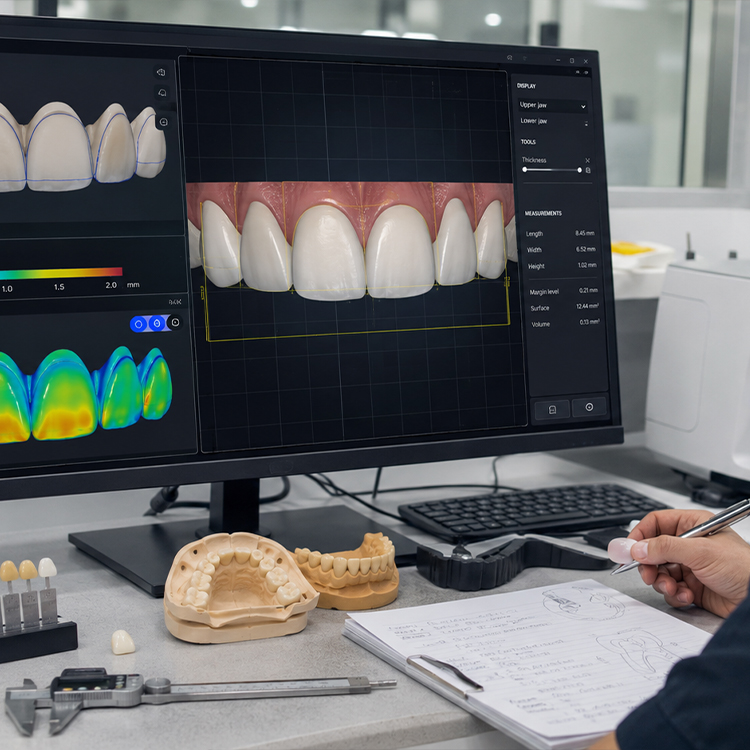
The digital design must be inspected from facial, incisal, palatal, proximal, and cross-sectional views. The reviewer should approve not only the smile but also the engineering underneath it.
Margin, internal fit, and cement space
The CAD review should verify:
Margin continuity
Spacer start position
Cervical cement-space setting
Internal relief
Proximal contact intensity
Insertion path
Undercut management
Localized binding areas
Overextended internal surfaces
Software compensation for milling tools
Cement space should never be selected because “60 µm is what we normally use.” Preparation geometry, material, milling system, scanner accuracy, margin type, and finishing process all affect the appropriate parameter.
In a micro-CT investigation of IPS e.max CAD occlusal veneers, increasing the digital cement-space setting from 30 to 40 and 50 µm significantly improved marginal fit, although not every measured internal region changed significantly. The useful lesson is not that 50 µm is always correct. It is that cement-space settings materially alter the result and must be validated for the specific production system.
Minimum thickness is a release criterion
Every design should be reviewed with a color-coded thickness map before it is approved for manufacturing. Thin zones often appear at:
Cervical margins
Proximal extensions
Incisal corners
Transition lines
Palatal wrap areas
Deep surface-texture cuts
Ivoclar currently lists a minimum thickness of at least 0.4 mm for IPS e.max CAD veneers and reports a mean biaxial flexural strength of 530 MPa after crystallization. The same material has only about 130 MPa strength in its pre-crystallized blue state. Those figures make one point painfully clear: material selection, design thickness, and completion of the specified thermal process must all be checked as separate items.
The American Dental Association’s summary of ANSI/ADA Standard No. 69 and ISO 6872 places monolithic ceramics for adhesively bonded veneers in Class 1, with a minimum flexural-strength requirement of 50 MPa. That is a classification threshold, not permission to design any material at any thickness. Manufacturer instructions and validated production parameters still govern the actual restoration.
Veneer
Esthetic approval requires calibrated information
The CAD file defines form. It does not define the complete optical result.
The laboratory still needs to control:
Overall value
Cervical chroma
Incisal translucency
Halo intensity
Mamelon visibility
Opalescence
Surface texture
Line angles
Emergence profile
Stump-shade masking
Cement-shade influence
Cross-unit consistency
A full-contour E.max veneer may be the lower-variance option when consistent anatomy, fit, and value across several units are the priority. A layered E.max veneer gives the ceramist more freedom to build incisal depth and internal characterization, but it also introduces additional hand-controlled stages that need inspection.
Neither route is automatically better. One is simply easier to standardize.
QC Gate 4: The Approved Design Must Survive Manufacturing
Once the CAD file is released, the laboratory should preserve a controlled record of:
Approved design version
Designer identity
Approval date
Material brand and lot
Block or ingot shade
Translucency level
Milling-machine identification
Bur set or tool condition
Nesting orientation
Furnace program
Firing cycle
Remake or adjustment history
Version control matters because a restoration can be milled from an obsolete file even when the current screenshot is correct. I have little patience for filenames such as Final, Final2, and Final-Revised-New. A case-management system should identify the one released design unambiguously.
Milling inspection
Immediately after milling, inspect for:
Cervical edge chipping
Bur marks
Unsupported thin projections
Incomplete internal milling
Connector or sprue damage
Distorted proximal surfaces
Incorrect unit numbering
Wrong block shade or translucency
Surface defects exposed during sprue removal
Do not postpone these checks until after characterization. Adding labor to a defective base restoration only raises the cost of rejecting it later.
Crystallization and firing control
For lithium disilicate, the technician should verify the correct furnace program, calibration status, loading configuration, firing temperature, holding time, cooling process, and completion of crystallization.
The material does not become “E.max finished” merely because it has left the milling machine. Ivoclar states that IPS e.max CAD develops its final strength, shade, and translucency during crystallization. A wrong program therefore creates a mechanical and optical risk at the same time.
Manufacturing method changes the fit profile
A 2025 study evaluated 100 ceramic veneers divided among four CAD/CAM manufacturing routes: milled lithium disilicate, pressed lithium disilicate made from 3D-printed wax patterns, milled zirconia, and 3D-printed zirconia, with 25 restorations in each group. All four methods produced clinically acceptable marginal and internal fit, but the measured gap behavior differed among techniques.
That is why a serious laboratory validates each material-machine-process combination instead of assuming that one successful milling protocol transfers perfectly to another material or manufacturing route.
Case identity, unit map, protection, documentation, tracking
Correct restoration arrives undamaged with complete records
Mix-up, transit fracture, missing instructions
The important word in that table is release. QC is not a casual visual check. It is a decision: proceed, correct, query, remake, or reject.
QC Gate 5: Final Veneer Inspection Must Be Independent
The technician who created the restoration naturally knows what the case was intended to become. That knowledge can also create confirmation bias.
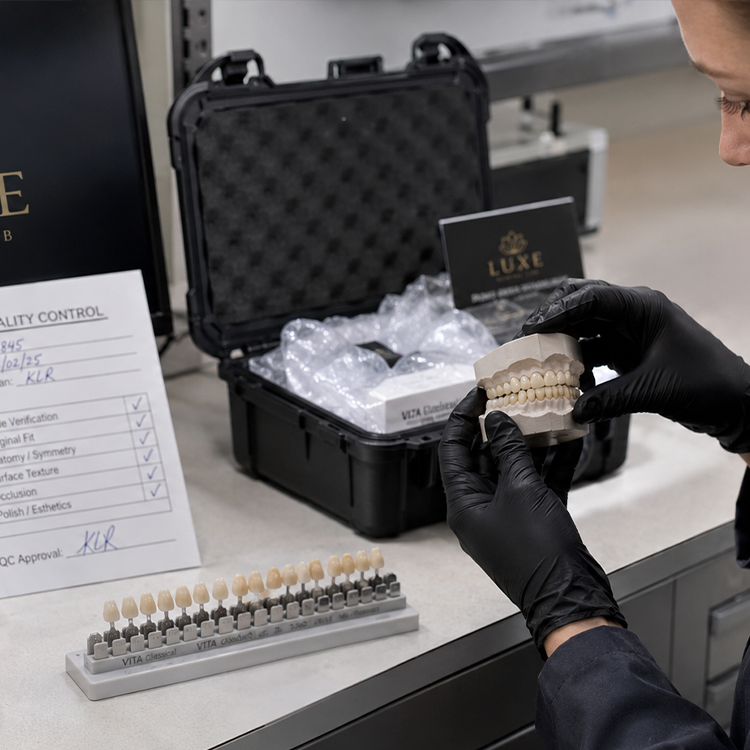
An independent final inspector should review the case against the prescription, approved CAD design, scan data, photographs, and unit map without relying only on the production technician’s explanation.
Mechanical and fit inspection
Final inspection should assess:
Margin continuity
Internal seating
Passive placement on the model or verified digital reference
Proximal contacts
Incisal-edge integrity
Surface cracks
Edge chipping
Glaze defects
Sharp internal angles
Unsupported ceramic
Correct unit identification
A veneer should never be forced onto a printed model to make it appear seated. Printed models have their own manufacturing tolerances, and forcing a thin restoration can conceal the original fit issue while introducing a fracture.
Esthetic inspection
For multi-unit cases, inspect the veneers together rather than as isolated units. Compare:
Central-incisor symmetry
Width-to-length relationships
Incisal progression
Line-angle position
Surface texture direction
Translucency distribution
Cervical saturation
Contact-area progression
Midline and embrasure development
Gloss consistency
Inspect under more than one light condition. A case that looks balanced under a warm bench lamp may show a value mismatch under neutral daylight illumination.
And photograph the result.
A final QC image set creates an objective record of the restoration’s condition before packaging. It helps distinguish manufacturing defects from handling damage, clinical adjustment, contamination, or transit problems.
Veneer
QC Gate 6: Enamel Preservation and Bonding Risk Must Be Flagged Before Delivery
The laboratory cannot perform the clinical bonding procedure, but it can identify design and prescription risks that should be communicated before the case is shipped.
A 2025 retrospective study followed 672 ceramic veneers placed in 189 patients for periods ranging from 1 to 15 years. The estimated 15-year survival rate was 96%, while any dentin exposure was associated with an odds ratio of 3.47 for failure; failure increased significantly when dentin exposure exceeded 30%.
That is not a minor academic detail. It means the laboratory should flag preparations showing extensive dentin exposure, inadequate enamel margins, questionable retention, severe discoloration, or insufficient restorative space.
A digital workflow cannot compensate for biological overpreparation.
The laboratory should also confirm that the selected material, translucency, and restoration thickness are compatible with the stump shade and planned resin cement. Thin veneers are optically influenced by everything beneath them. Changing cement shade at insertion is not a reliable rescue plan for a material-selection error made days earlier.
QC Gate 7: Delivery Is Part of Manufacturing Quality
I consider delivery the final production stage, not a logistics afterthought.
Before shipment, the laboratory should verify:
Patient or case identifier
Tooth numbers
Number of units
Material and shade
Right-left orientation
Included models or printed verification aids
Try-in or bonding information
Final QC photographs
Protective separation between units
Package impact protection
Tracking details
Customs and destination information
Thin veneers should be immobilized individually and protected from direct pressure. Placing several units loosely in one container invites edge collision. A restoration that leaves the laboratory intact but arrives chipped is still a failed delivery workflow.
The case record should also preserve the design file, manufacturing parameters, QC result, material lot, and shipping confirmation. When a clinic reports a fit issue, the laboratory should be able to investigate the exact case rather than debate it from memory.
What the Evidence Really Tells Us
The evidence does not say digital veneer workflows are automatic.
It says they can be more predictable when the clinical data, scan protocol, preparation strategy, CAD design, manufacturing route, material instructions, and cementation plan are controlled as one connected system.
The 2024 systematic review found better predictability and accuracy for digital workflows but also reported limits in the available literature and differences in study quality. The 2024 complete-arch scanning study demonstrated that scan accuracy changed with preparation design and scan pattern. The 2025 long-term survival study showed that enamel preservation remained strongly associated with outcome despite all the available digital technology.
That combination should make laboratories and clinicians less impressed by isolated equipment claims.
The scanner matters. The software matters. The mill matters. The furnace matters.
But the approval system matters more.
FAQs
What are the most important QC points in a digital veneer workflow?
The most important QC points are case-data completeness, intraoral scan accuracy, bite verification, finish-line approval, CAD thickness and cement-space control, material and translucency confirmation, validated milling and firing, independent final inspection, secure packaging, and traceable delivery records that connect the manufactured veneers to the clinician’s approved prescription.
Each point should function as a release gate. When a requirement is not met, the case should be corrected or returned for clarification rather than allowed to continue.
How do you ensure intraoral scan accuracy for veneers?
Intraoral scan accuracy for veneers is ensured by exposing and drying the finish lines, following a scan path suited to the preparation design, capturing stable proximal and incisal geometry, verifying the opposing arch and bite, checking the mesh for stitching errors, and rescanning any area the laboratory cannot interpret without guessing.
For long anterior spans, the clinician should examine cross-arch consistency and repeat the bite record when the occlusion shown in software does not match the clinical contacts.
What should a dental lab check before milling CAD/CAM veneers?
Before milling CAD/CAM veneers, the laboratory should verify the approved design version, margin continuity, insertion path, cement-space parameters, minimum ceramic thickness, proximal contacts, occlusal clearance, material brand, block shade, translucency, nesting orientation, milling-tool condition, and whether the selected manufacturing process follows the material manufacturer’s validated instructions.
The technician should also confirm that the design can be milled without creating unsupported edges or tool-access limitations.
How can a laboratory reduce veneer remake risk before delivery?
A laboratory can reduce veneer remake risk by separating design approval from final inspection, rejecting incomplete scan data, validating material-specific CAD settings, recording furnace and milling parameters, comparing finished units against approved photographs and digital designs, documenting final condition with QC images, and packaging every veneer so that thin margins cannot contact another restoration.
The final inspector should review fit, contacts, shade, symmetry, surface integrity, tooth numbers, case identity, and included documentation before release.
How do you ensure quality in a digital veneer workflow?
Quality in a digital veneer workflow is ensured through documented approval gates that prevent incomplete records, scan distortion, incorrect margins, unsafe thickness, inappropriate materials, manufacturing defects, esthetic inconsistency, and shipping errors from moving to the next stage without correction, technical clarification, or formal approval by an authorized reviewer.
A workflow becomes reliable when every decision can be traced to an approved file, prescription, material record, production parameter, and inspection result.
Put the Workflow on Trial Before Sending High-Volume Cases
Do not judge a veneer laboratory by one polished photograph.
Send a controlled trial case. Provide complete scan data, clear stump-shade records, an approved design reference, and measurable expectations for margins, contacts, surface texture, value, translucency, turnaround, packaging, and technical communication.
Then audit what comes back.
Artist Dental Lab supports digital E.max veneer cases, multi-unit workflows, file review, manufacturing QC, and international delivery. Use the contact and trial-case request page to submit your case specifications, scan format, material choice, number of units, esthetic target, and required delivery date.