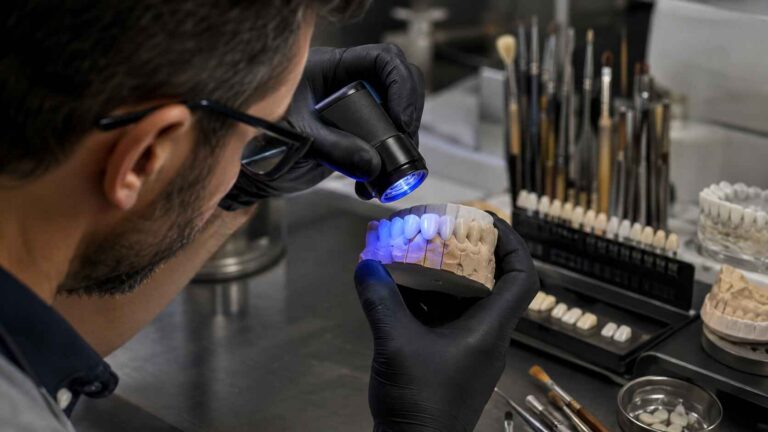
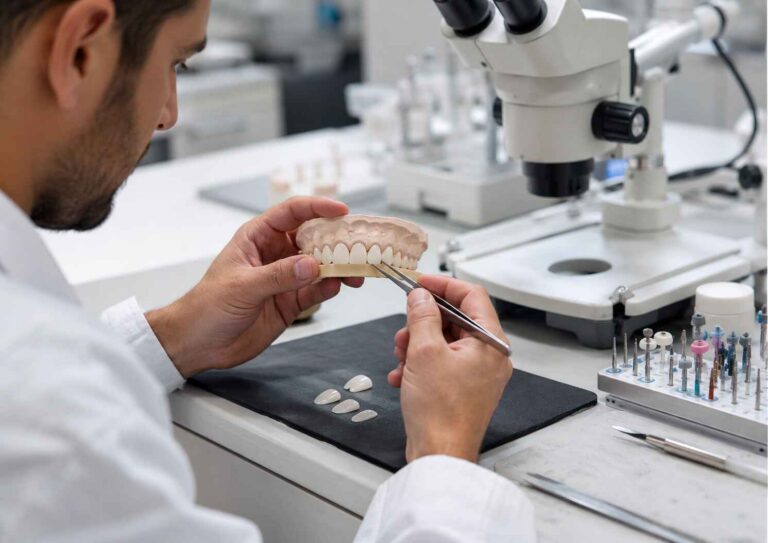
Writing a Veneer Lab Prescription for Natural Texture and Light Behavior
Texture changes everything.
When a veneer lab prescription contains only “A1, natural texture, slight translucency,” the technician is being asked to make dozens of interconnected decisions about value, facial contour, ceramic thickness, incisal diffusion, line angles, surface gloss, and age-related detail without enough clinical evidence.
Why are we surprised when the result looks generic?
The uncomfortable truth is that many veneer failures are prescribed before they are fabricated. The ceramic may fit. The contacts may be acceptable. The selected shade tab may even match under operatory lighting. Yet the veneers still look flat, bright, opaque, glassy, or strangely symmetrical because nobody defined how light should move across their surfaces.
A serious veneer lab prescription must be more than a shade request. It should function as a manufacturing brief.
A Shade Code Is Not a Dental Veneer Prescription
Shade tabs compress a complicated optical structure into a short commercial code. Natural teeth do not.
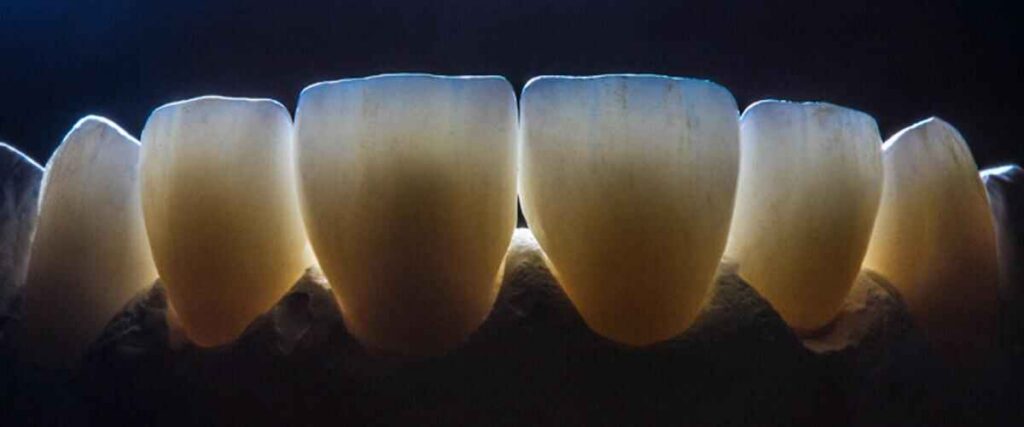
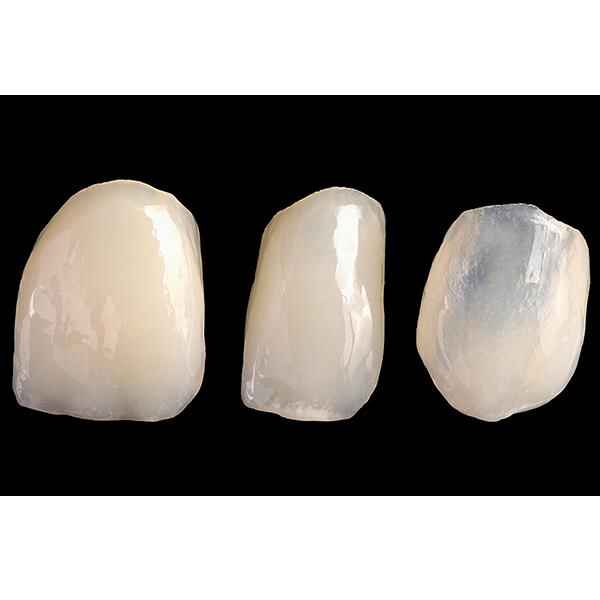
Enamel and dentin produce different levels of scattering, absorption, reflection, fluorescence, and transmission. The cervical third usually behaves differently from the body, while the incisal third may show translucency, opalescent effects, a halo, mamelon structure, or varying degrees of internal diffusion. Surface contour then alters how those internal properties are perceived.
That is why our guide to why value matters more than the shade tab in veneer esthetics treats shade as only one part of the optical prescription. Value, chroma, translucency, stump shade, thickness, cement, texture, and lighting must be considered together.
The weakness of visual shade selection is not theoretical. In a 2024 clinical study, researchers measured 2,768 natural teeth from 294 patients using Vita Classical, Vita Toothguide 3D-Master, and a Vita Easyshade Compact spectrophotometer under approximately 5,500 K illumination. The reported reproducibility value was 0.177 for Vita Classical and 0.805 for the spectrophotometer. Human observers also tended to classify teeth in categories A and B, while the device more frequently recorded B and C categories. The authors concluded that spectrophotometric measurements were more reproducible, though objective readings still required visual confirmation. See the full clinical shade-measurement study.
That data should end one lazy habit: treating “A1” as a complete esthetic instruction.
It is not.
The Prescription Must Describe Three Different Things
A usable porcelain veneer lab prescription separates the case into three related systems:
External morphology: facial convexity, developmental lobes, line angles, embrasures, incisal edge position, and surface texture.
Surface finish: macrotexture, microtexture, polish, gloss distribution, and the way reflections should appear under directional light.
Blurring these systems produces vague language. “Natural” does not tell a ceramist whether the requested tooth should have pronounced vertical anatomy, restrained horizontal perikymata, a satin body surface, a brighter incisal edge, or a narrow reflective zone.
Natural is an outcome. It is not an instruction.
Natural Light Behavior Is Built, Not Painted On
Veneer translucency and light behavior are often discussed as if they can be added during final staining. That is a dangerous simplification.
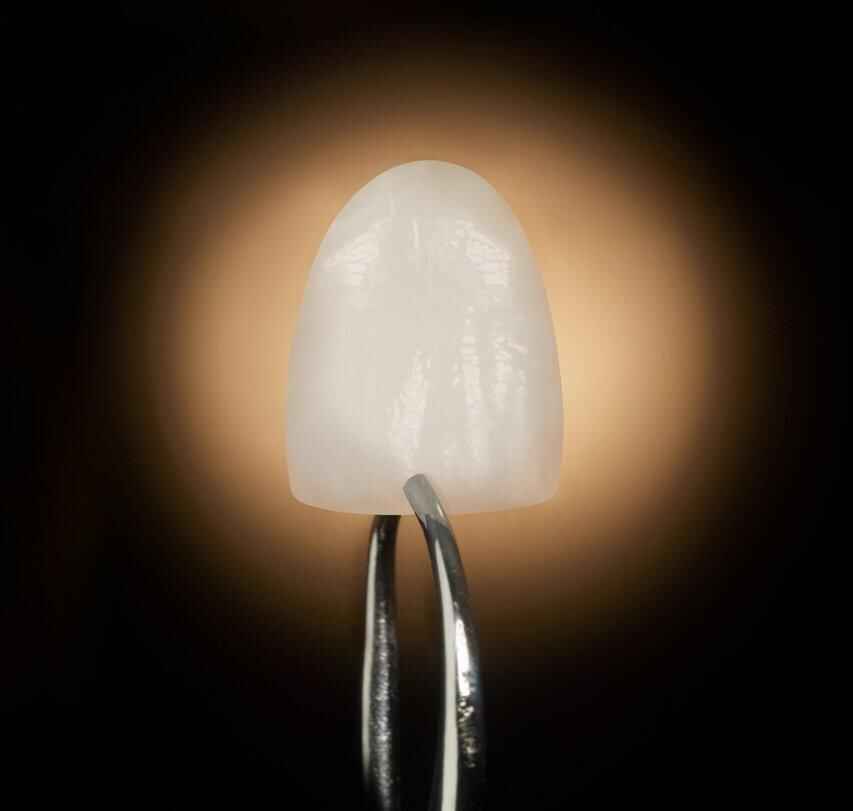
The final appearance is already being shaped by the preparation depth, remaining substrate, ceramic system, ingot or block translucency, layering strategy, ceramic thickness, surface contour, try-in paste, resin-cement shade, and final polishing method.
Value Must Be Prescribed Before Characterization
Value is the perceived lightness or darkness of the restoration. It is commonly the first mismatch noticed across a room and the hardest error to disguise with localized stain.
A high-value veneer with broad facial convexity and mirror-like gloss may appear wider and brighter than its actual dimensions. A lower-value restoration with heavy surface texture may scatter light unevenly and look gray. Neither problem is solved by quoting another shade tab.
The prescription should therefore state:
The target value relative to adjacent teeth
Whether the contralateral tooth is higher, equal, or lower in value
Whether the restoration should maintain value under backlighting
Whether the cervical third requires increased chroma without appearing darker
Whether the incisal third should lose value through translucency
Whether the provisional has already been approved as the value reference
Do not write “match No. 8.” Write what must match and where.
Thickness and Translucency Cannot Be Separated
A technician cannot intelligently select a translucent ceramic without knowing the available thickness and substrate color.
A laboratory study evaluating different core-and-veneer combinations found that increasing total ceramic thickness reduced translucency parameter values. When overall thickness became lower, the translucency of the core material exerted a greater influence on the result. Read the core-veneer thickness study.
This is why “high translucency” can be the wrong prescription for a dark stump, a metal post, a heavily discolored tooth, or a case with uneven preparation depths. It may also be excessive when neighboring teeth have dense enamel and limited incisal transmission.
The lab needs:
Preparation photographs
Stump-shade photographs
Approximate reduction by facial zone
Information about posts, cores, composite build-ups, or discolored dentin
The intended resin-cement family and shade range
Confirmation of whether masking or maximum vitality has priority
Surface finish is not merely a hygiene or polishing issue. It changes reflection and transmission.
In a 2014 experiment, researchers fabricated 224 IPS e.max Press specimens in A1, A3, high-translucency, and high-opacity shades at 0.5 mm and 1.0 mm thicknesses. Sandblasting and liner application made the specimens more opaque, while hydrofluoric-acid treatment did not significantly change the translucency parameter. The highest reported TP value was 22.59 for a 0.5 mm high-translucency specimen after HF treatment; the lowest was 4.97 for a 1.0 mm high-opacity specimen after sandblasting. The original porcelain laminate veneer study makes the point clearly: surface condition, thickness, and ceramic opacity interact.
So when a prescription asks for “strong texture and high gloss,” it may contain an internal contradiction. Pronounced texture breaks reflections into smaller highlights. Heavy polishing can flatten those details. A uniform glaze may make an otherwise well-shaped veneer look artificial.
The technician needs to know which effect has priority.
How Surface Texture Controls Apparent Tooth Shape
Dental veneer surface texture does more than make porcelain look detailed. It changes the size, direction, and intensity of reflected light.
A flat facial surface tends to create one broad reflection. That reflection can increase apparent width and value. A more complex surface breaks the highlight into smaller zones, making the tooth appear less monolithic.
This is why transitional line angles in veneers deserve explicit prescription language. Moving the line angles inward can narrow the apparent facial surface without physically narrowing the full tooth. Moving them outward can make the tooth appear broader.
But there is a limit.
Over-textured veneers do not look natural. They look decorated. Deep horizontal grooves, exaggerated mamelons, repeated craze lines, and identical perikymata across six or ten units create a laboratory signature rather than patient-specific enamel.
Our detailed guide to matching veneer surface texture with age, expression, and facial character recommends using age as a starting reference, not as an automatic design formula. Adjacent teeth, approved provisionals, photographs, lip dynamics, wear, and the patient’s stated preference carry more weight.
Prescribe Texture in Layers
I would divide texture instructions into four levels:
Texture Level
What It Controls
Useful Prescription Language
Common Failure
Primary form
Overall facial convexity and silhouette
“Maintain a restrained facial convexity with the height of contour in the middle third”
Bulky or flat facial profile
Secondary anatomy
Developmental lobes, depressions, line angles
“Three-lobe structure visible under oblique light, not from the frontal view”
Over-carved anatomy
Tertiary texture
Perikymata, fine ridges, localized irregularity
“Subtle cervical and middle-third perikymata; reduce toward the incisal third”
Repetitive horizontal striping
Surface finish
Gloss, satin zones, final polish
“Medium enamel-like gloss; slightly softer within depressions”
Uniform glass-like reflection
The phrase “visible under oblique light, not from the frontal view” is particularly useful. It gives the ceramist a testable visual threshold.
The same applies to perikymata. Our article on when perikymata add realism to veneers explains that restrained micro-detail can interrupt an artificial highlight, but it cannot rescue poor contour or incorrect value.
The Records a Laboratory Actually Needs
A laboratory cannot reproduce information it never receives.
And yet incomplete prescriptions remain common. A 2011 audit of dental prescriptions exchanged between clinics and laboratories found that approximately two-thirds were non-compliant with the ethical and legal requirements assessed by the researchers. The authors described a clear breakdown in dentist-technician communication even within a close working environment.
A separate fixed-prosthodontic study found recurring omissions involving marginal design, pontic design, staining diagrams, porcelain selection, and the requested glaze. These were not artistic disagreements. They were missing manufacturing information. The communication-quality study concluded that communication between dentists and technicians was sometimes inadequate.
For anterior veneer cases, I would consider the following records the practical minimum.
1. Full-Face and Smile Photographs
Provide:
Full-face photograph at rest
Full smile
Retracted frontal view
Right and left retracted lateral views
Twelve-o’clock view when incisal edge position matters
Profile or three-quarter view when facial inclination is uncertain
The face matters because the laboratory must understand midline position, smile cant, tooth display, lip mobility, and how much surface texture remains visible at conversational distance.
2. Cross-Polarized Color Records
Cross-polarized photography reduces surface glare and helps reveal internal value, chroma, crack lines, hypocalcification, mamelons, and incisal translucency.
But do not send only cross-polarized images. The technician also needs ordinary reflected-light photographs to understand gloss and surface topography. One record shows internal color more clearly; the other shows external reflection.
Both matter.
3. Shade-Tab Photographs
Use at least one correctly exposed photograph with the shade tab:
In the same vertical plane as the tooth
Close to the tooth being matched
With the tab code visible
Without saliva glare hiding the facial surface
Before dehydration changes the tooth
With neutral exposure and white balance
Where possible, include one darker and one lighter reference tab. A single tab tells the technician what the clinician selected. A bracketed set helps show the direction and size of the difference.
4. Stump-Shade Records
Photograph every prepared tooth individually when the substrates differ.
Do not assume that six visually similar preparations will behave identically beneath 0.5 mm veneers. A composite core, sclerotic dentin, endodontically treated tooth, dark cervical area, or localized discolored substrate can produce a visible mismatch after bonding.
5. Provisionals and Approved Design
If the patient has approved the provisional tooth length, line angles, incisal edge, dominance, or embrasure progression, say so clearly.
The laboratory should also know what the patient rejected. “Do not copy the provisional surface texture” may be as valuable as “copy the provisional length.”
A Copy-Ready Veneer Lab Prescription Framework
The best veneer prescription for natural-looking results is specific enough to guide fabrication but flexible enough to let the ceramist respond to the ceramic system and available space.
A prescription can follow this structure:
Case objective: Produce six maxillary veneers with natural integration rather than uniform whitening. Maintain central-incisor dominance and avoid an identical, machine-made appearance.
Approved dimensions: Copy provisional incisal-edge position and overall length. Refine the distal line angles of the central incisors slightly inward to reduce apparent width.
Value: Match the adjacent premolars in the body third. Centrals may be approximately one controlled value step brighter, without a chalky cervical third.
Chroma: Moderate cervical warmth, reducing gradually through the body. Avoid concentrated orange or brown cervical staining.
Translucency: Restrained incisal translucency extending approximately 1.0–1.5 mm from the edge. Maintain enough opacity to control the recorded stump shades.
Internal effects: Soft mamelon structure visible mainly under backlighting. Thin, irregular incisal halo. No symmetrical white spots.
Surface form: Defined but restrained developmental lobes. Narrow central reflective zone. Keep transitional line angles similar to the approved provisional.
Microtexture: Fine, irregular horizontal texture in the cervical and middle thirds. Reduce texture toward the incisal third. Texture should appear under oblique illumination, not as grooves from the frontal view.
Gloss: Medium natural-enamel gloss. Slightly softer gloss in developmental depressions. Avoid a uniformly glazed, mirror-like surface.
Reference hierarchy: Follow the retracted texture photographs first, approved provisionals second, and diagnostic wax-up third. Contact the clinic before changing length, dominance, or translucency.
The laboratory should be allowed to recommend a different ceramic strategy when the prescription conflicts with the substrate or thickness.
Feldspathic Porcelain
Feldspathic porcelain can provide detailed layering, fine surface control, localized translucency, and delicate enamel-like effects. It is often attractive for minimally invasive cases with favorable substrates and strong enamel support.
But it is not a universal answer. A compromised preparation, dark substrate, limited bonding surface, or aggressive functional environment may change the risk calculation.
Lithium Disilicate
Lithium disilicate systems can support pressed, milled, cut-back, layered, stained, or combination workflows. The prescription should state whether the case prioritizes:
Maximum vitality
Substrate masking
Monolithic consistency
Layered incisal depth
Strength at limited thickness
Matching one adjacent natural tooth
For monolithic cases, morphology and surface finishing carry even more visual responsibility because there may be less internal layering to soften the appearance.
Zirconia
Zirconia may be selected when masking or strength demands outweigh the optical benefits of more translucent glass ceramics. But “use translucent zirconia” is still incomplete. Zirconia composition, layer position, thickness, substrate, sintering, stain, and surface finish can change the final appearance.
The hard truth is simple: the material name does not guarantee natural light behavior.
The prescription still does.
Create a Closed Feedback Loop Before Final Glaze
Complex veneer cases should not move from scan to final delivery through one-way communication.
For demanding single-central, high-smile-line, discolored-substrate, or full-smile cases, establish checkpoints:
Confirm the records are complete.
Approve material and translucency strategy.
Confirm incisal edge position and facial contour.
Review texture under directional light before final polish.
Review dry and wet try-in photographs when practical.
Record any requested correction by zone, not by vague adjectives.
Instead of saying, “The veneers look too fake,” identify the optical cause:
Facial reflection is too broad.
Body value is too high.
Cervical chroma is too concentrated.
Incisal translucency extends too far cervically.
Line angles are too far facial.
Surface gloss is too uniform.
Texture is too regular.
Incisal halo is too white.
Centrals lack dominance.
Lateral incisors are visually too heavy.
Specific feedback can be fabricated. Emotional feedback cannot.
FAQs
What should be included in a veneer lab prescription?
A veneer lab prescription should define the clinical objective, tooth dimensions, target value, chroma distribution, stump shade, ceramic thickness, material preference, translucency zones, internal characterization, line angles, surface texture, gloss level, incisal effects, photographic references, provisional-design instructions, cement considerations, and the approval hierarchy for resolving conflicting records.
The prescription should also identify which features the laboratory may modify and which require direct clinician approval.
How should a dentist describe veneer surface texture?
Veneer surface texture should be described as a hierarchy of facial contour, developmental anatomy, line-angle position, fine enamel detail, and gloss distribution, using visible reference teeth or approved provisionals rather than subjective terms such as “young,” “natural,” “soft,” or “high-end,” which different technicians may interpret in completely different ways.
State where the texture should appear, how strong it should be, and under which lighting direction it should become visible.
How do you communicate veneer translucency to a dental lab?
Veneer translucency should be communicated by defining the desired cervical, body, and incisal optical behavior while supplying stump-shade photographs, preparation depth, substrate information, ceramic thickness, adjacent-tooth references, masking requirements, cement plans, and backlit photographs so the laboratory can balance transmission, diffusion, opacity, value, and internal characterization.
“High translucency” alone is not enough because the same ceramic behaves differently at 0.5 mm and 1.0 mm thicknesses.
What photographs are needed for a porcelain veneer lab prescription?
A porcelain veneer lab prescription should include full-face, full-smile, retracted frontal, retracted lateral, shade-tab, stump-shade, cross-polarized, ordinary reflected-light, profile, and provisional photographs, with consistent exposure and clear reference orientation so the technician can evaluate color, contour, inclination, texture, gloss, tooth display, and facial integration.
For a single anterior restoration, macro photographs of the contralateral tooth under frontal and oblique illumination are especially valuable.
What is the best veneer material for natural-looking results?
The best veneer material for natural-looking results is the ceramic system that provides sufficient optical control, substrate masking, bondable surface area, fracture resistance, and fabrication flexibility at the actual preparation thickness, rather than the material with the most aggressive marketing claim or the highest nominal translucency.
Feldspathic porcelain, lithium disilicate, and zirconia each become appropriate under different clinical conditions.
How do line angles affect the appearance of porcelain veneers?
Veneer line angles are transitional surface boundaries that control the width and position of the main facial reflection, meaning inward line angles can make a tooth appear narrower while outward line angles can make it appear broader, even when the physical mesiodistal dimensions of the restoration remain almost unchanged.
They should be communicated through photographs, provisionals, scans, or marked design images rather than text alone.
Why do correctly shaded veneers still look too white?
Correctly shaded veneers can still look too white when their facial contour is too broad, value is excessive, surface gloss is uniform, texture is insufficient, line angles are positioned too far outward, ceramic thickness differs from the planned thickness, or the resin cement and underlying stump increase the final restoration’s brightness.
Shade matching fails when the team treats color, contour, and reflection as separate problems.
Can a dental technician copy texture from the adjacent tooth?
A dental technician can copy texture from an adjacent tooth when the clinician supplies sharp frontal, oblique, cross-polarized, and reflected-light photographs, but the copied pattern must still be adjusted for the veneered tooth’s size, facial convexity, wear, position, ceramic thickness, line angles, and intended gloss rather than transferred as an identical surface map.
The goal is optical integration, not mechanical duplication.
Final Thoughts: Send a Manufacturing Brief, Not a Shade
A natural veneer is not created by adding random translucency, carving grooves, and applying a glossy final glaze.
It is created when the clinic and laboratory agree on what the tooth should do with light.
Write the value by zone. Record the stump shade. State the available thickness. Define the reflection width. Describe line angles. Explain where texture should appear and where it should disappear. Provide both polarized and reflected-light photographs. Identify which provisional features have been approved. And tell the laboratory what must not be changed without a conversation.
Before submitting your next anterior case, review the prescription from the ceramist’s side of the bench. Remove every word that depends on guesswork. Replace it with a photograph, measurement, hierarchy, comparison, or testable optical instruction.
Then send the case to Artist Dental Lab for material planning, veneer fabrication, and technician feedback based on the actual substrate, preparation design, esthetic target, and clinical records.