What to Include in a Veneer Purchase Specification for Premium Esthetic Results
Specifications prevent remakes.
A serious veneer lab prescription should tell the technician not merely what shade the dentist wants, but what the restoration is expected to do optically, dimensionally, mechanically, and visually once a thin ceramic shell is placed over a specific preparation, substrate, resin cement, and smile.
So why are premium veneer cases still being ordered with instructions such as “A1, natural, slight translucency”?
That is not a premium specification.
It is a request for the technician to guess.
And I take a fairly hard position on this: when a buyer demands premium esthetics while supplying ordinary information, the laboratory has been handed an impossible quality-control problem. The technician can make excellent porcelain, but excellent porcelain cannot recover clinical information that was never recorded.
This matters because veneers themselves are not casual restorations. A 2024 systematic review and meta-analysis indexed by the U.S. National Library of Medicine and published in 2025 evaluated 29 studies and reported pooled survival rates at approximately 10.4 years of 96.13% for feldspathic veneers and 96.81% for lithium disilicate veneers. The authors found no statistically significant material difference in survival, although lithium disilicate showed lower reported long-term complication rates in the included evidence.
Those numbers tell us something useful.
The material can last.
But “still bonded after ten years” is not the same as “still looks like an untouched central incisor.”
Premium esthetics demands a different specification.
A Veneer Lab Prescription Is a Manufacturing Brief, Not a Shade Request
The strongest porcelain veneer prescription separates the case into three systems:
That distinction sounds academic until a case goes wrong.
A technician receives “BL2, natural texture.”
What does “natural” mean?
Narrow mesial and distal transition lines? Faint cervical perikymata? Strong vertical developmental lobes? A satin middle third? Young enamel? Mature enamel? A bright incisal halo? Almost no halo? Soft lateral incisors? Dominant centrals?
Nobody knows.
The phrase sounds specific because everybody recognizes the words. Technically, it is almost empty.
The purchase specification should define the result before defining the material
I would begin every premium esthetic specification with the clinical target:
Restore teeth #6–#11 with natural integration rather than uniform whitening. Preserve central-incisor dominance. Maintain the approved incisal-edge position. Avoid identical lateral incisors and excessive facial brightness.
That tells the laboratory what success means.
Only then should the prescription move into shade, ceramic, translucency, morphology and surface finish.
The 12 Items I Would Require in a Premium Veneer Purchase Specification
A professional dental lab prescription should be detailed enough that a second technician could understand the intended case without sitting beside the clinician.
Controls perceived brightness more accurately than one shade code
Stump shade
Individual preparation shade for every unit
Determines masking and translucency requirements
Material
Feldspathic, lithium disilicate, zirconia or approved alternative
Controls fabrication and optical possibilities
Thickness
Available ceramic space by region
Affects opacity, strength and final shade
Translucency
Cervical, middle and incisal zones
Controls depth and vitality
Morphology
Length, width, line angles, contacts, embrasures
Defines visible tooth form
Texture
Macrotexture and microtexture by zone
Controls reflection and perceived realism
Gloss
High, medium, selective or matched to references
Changes reflection width and perceived value
Reference records
Photos, video, scans, provisionals, shade tabs
Gives the technician visual evidence
Acceptance criteria
What may be modified and what requires approval
Prevents unapproved interpretation
This is the difference between ordering “veneers” and purchasing a controlled esthetic result.
Veneer Shade Specification: Stop Treating A1 as a Complete Color
Shade tabs are useful.
They are also badly overtrusted.
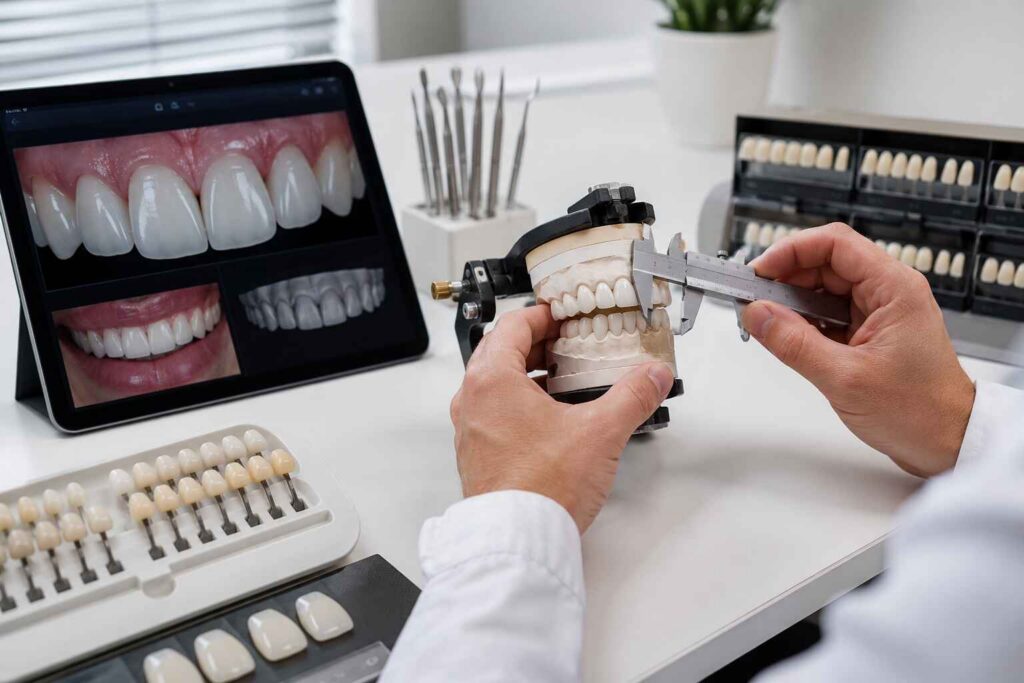
A shade designation such as VITA Classical A1 or VITA 3D-Master 1M2 cannot by itself describe cervical chroma, middle-third value, incisal translucency, stump color, ceramic thickness, fluorescence, surface texture or resin-cement influence.
Value is the relative lightness or darkness of the tooth.
And value errors are unforgiving.
A veneer may technically sit within the correct hue family and still look obviously wrong because its middle third reflects too much light. Broad facial convexity, excessive gloss and wide transition lines can make that same restoration appear even brighter.
That is why I would document:
Cervical value
Middle-third value
Incisal value
Cervical chroma
Hue family
Incisal translucency
Local white or amber characterization
Desired halo strength
Adjacent-tooth reference
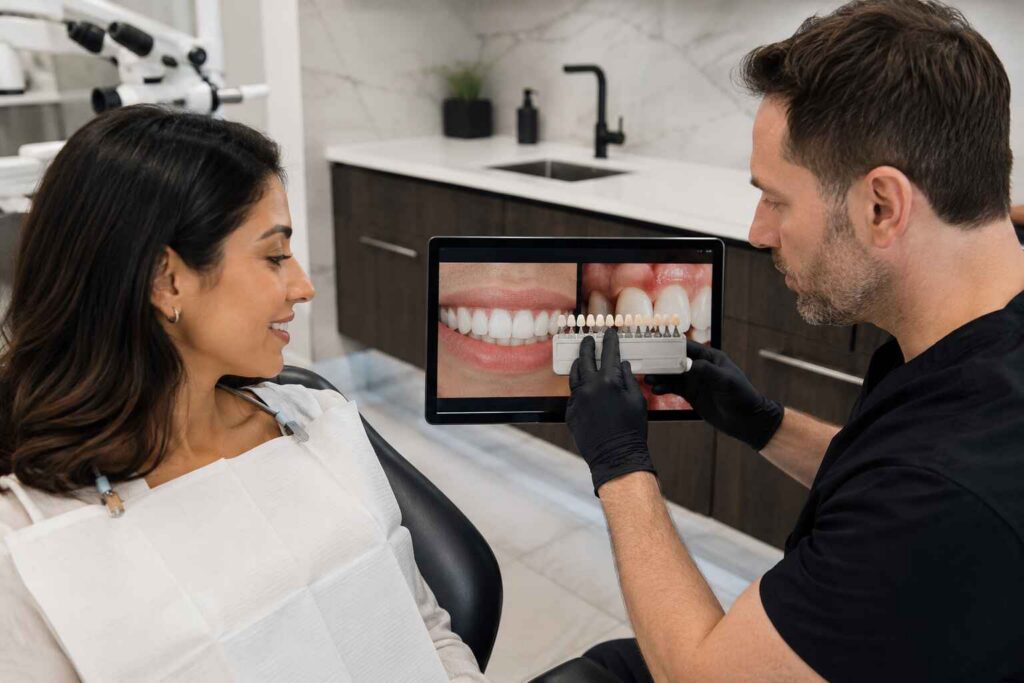
Final shade-tab photograph
A 2022 review indexed in PubMed Central reported that combining digital photography and spectrophotometric measurements could reduce color differences and incorrect shade matching compared with relying on less controlled methods alone.
But instruments are not magic.
A separate clinical study found method-dependent differences between visual and spectrophotometric shade matching, which is precisely why I dislike the argument that one device can replace clinical judgment. The strongest specification combines named shade references, objective measurement when available, calibrated photographs and human visual confirmation.
Record every stump shade
This is non-negotiable for thin ceramic.
A final BL3 target over a light enamel preparation and the same BL3 target over a dark endodontically treated stump are not the same manufacturing problem.
Thin ceramic transmits light.
The underlying preparation, ceramic thickness and cement layer become part of the final optical system.
If units #8 and #9 have different substrates, write two stump shades.
Do not write “stumps: ND2 approximately.”
Photograph them individually.
Veneer Material Selection Must Be Connected to the Esthetic Problem
The veneer material selection line should never be filled out as a habit.
“Use E.max” is not a diagnosis.
Lithium disilicate, commonly represented by the crystalline phase Li₂Si₂O₅, offers a combination of strength and optical control that explains its popularity. Feldspathic ceramics are glass-rich systems commonly containing oxides such as SiO₂, Al₂O₃, K₂O and Na₂O. Zirconia is primarily ZrO₂, normally stabilized with additional oxides.
Those chemistry differences matter.
But chemistry alone does not tell us which material belongs in a particular mouth.
Specify what the material needs to accomplish
The purchase specification should state:
Masking requirement
Available reduction
Desired translucency
Desired internal characterization
Required surface-texture freedom
Existing substrate color
Opposing dentition
Functional concerns
Whether restorations must match existing ceramic units
Whether a monolithic or layered approach is acceptable
A case requiring heavy masking presents a different problem from a minimally prepared enamel case requiring high translucency.
Likewise, full-contour and layered lithium disilicate are not esthetically identical strategies. Artist Dental Lab’s comparison of full E.max veneers versus layered E.max veneers is useful when a buyer needs to decide whether repeatability or additional characterization freedom deserves priority.
The mistake is asking, “Which ceramic is best?”
Best for what?
The Veneer Surface Texture Specification Is Where Premium Cases Separate Themselves
Texture gets dismissed as finishing detail.
It is not.
Natural enamel is primarily hydroxyapatite, Ca₁₀(PO₄)₆(OH)₂, but the observer does not experience a central incisor as a chemical formula. The eye sees light moving across convexities, developmental lobes, transition lines, shallow depressions, wear facets and areas of different gloss.
Two veneers can have the same nominal shade and still look radically different.
Sometimes adding 0.5 mm in the wrong place is exactly what makes an otherwise accurate veneer look artificial.
Photographs Are Part of the Specification, Not Decoration
I would reject the idea that a premium anterior case can be adequately prescribed from an STL file and one shade code.
A scan captures geometry extremely well.
It does not capture the entire face.
For premium esthetic veneer specifications, I would require:
Full-face photograph at rest
Natural full-smile photograph
Maximum-smile photograph
Retracted frontal view
Right and left retracted oblique views
Profile view
45-degree facial views
Shade-tab photograph
Individual stump-shade photographs
Close-up reflected-light photograph
Cross-polarized image when available
Approved mock-up or provisional photographs
Approved provisional STL
Short video of natural smile and speech for demanding cases
Why so much?
Because a technician judging only an intraoral scan cannot see lip mobility, facial midline relationships, smile dynamics or whether an incisal edge that looks correct on the digital model disappears when the patient speaks.
Do not alter final incisal length, midline or central-incisor width without clinician approval.
Technician may refine minor texture and internal characterization within the prescribed esthetic direction.
That is a best veneer lab prescription for esthetic results because the technician can actually act on it.
FAQs
What should be included in a veneer lab prescription?
A veneer lab prescription is a complete fabrication specification that should identify the clinical objective, final shade and value distribution, individual stump shades, ceramic material, thickness, translucency, tooth dimensions, line angles, contacts, surface texture, gloss, incisal characterization, photographic references, approved provisional design, cement considerations and the hierarchy used when clinical records conflict.
The more demanding the esthetic case, the less useful vague instructions become. For premium anterior work, the laboratory should know not only what the teeth should measure, but also how they should reflect light and which aspects of the design have already received patient approval.
How do you write a porcelain veneer prescription for premium esthetic results?
A premium porcelain veneer prescription is a structured manufacturing brief that converts the patient’s approved esthetic target into specific instructions for value, chroma, hue, substrate masking, ceramic type, thickness, translucency, morphology, surface texture, gloss, incisal effects, contacts, line angles, photographs, digital scans and acceptance criteria before laboratory fabrication begins.
Start with the desired clinical result rather than a material name. Then define the evidence that supports that target: stump-shade records, calibrated shade photographs, approved mock-up, facial photographs, STL files and written limits on technician interpretation.
What information is needed for veneer shade specification?
A veneer shade specification is an optical record that should document the named shade system, cervical, middle and incisal value, chroma distribution, hue, individual stump shades, translucency, masking requirement, ceramic thickness, shade-tab photographs, lighting conditions and intended resin-cement strategy instead of communicating the restoration with one code such as A1 or BL2.
For thin veneers, the prepared tooth and cement become part of the visible optical system. That is why two preparations receiving the same final shade may require different ceramic opacity or layering strategies.
What is the best veneer material for premium esthetics?
The best veneer material is the ceramic system that provides the required balance of substrate masking, translucency, strength, available thickness, surface characterization and laboratory control for the individual case; feldspathic porcelain and lithium disilicate can both deliver excellent esthetic results, while zirconia may be selected when different masking or mechanical requirements dominate.
Long-term evidence is strong for established ceramic veneer systems. A recent meta-analysis reported approximately 96.13% pooled survival for feldspathic veneers and 96.81% for lithium disilicate veneers at about 10.4 years, reinforcing that case selection and design matter alongside material choice.
How should veneer surface texture be specified to a dental lab?
A veneer surface texture specification is a zone-by-zone description of facial contour, developmental lobes, transition lines, microtexture, perikymata, incisal detail and gloss distribution that tells the technician how the ceramic should reflect light and visually integrate with the patient’s adjacent teeth, approved smile design, age-related wear pattern and overall facial appearance.
Avoid labels such as “natural,” “young,” or “medium texture” without references. A photograph showing directional reflection, an approved provisional, and explicit cervical, middle and incisal texture instructions are far more reproducible.
What photographs should be sent with a veneer lab prescription?
A premium veneer photography set is a standardized visual record containing full-face, natural-smile, maximum-smile, retracted frontal, retracted oblique, profile, 45-degree, shade-tab, individual stump-shade and close-up surface photographs, supplemented when possible by cross-polarized images, an approved mock-up or provisional record and short smile or speech video for complex anterior cases.
The technician uses different photographs for different decisions. Retracted images show dental relationships, facial images reveal integration with the patient, shade images support optical mapping, and directional-light photographs expose line angles and surface texture that flat lighting can hide.
Why can veneers with the correct shade still look artificial?
Correctly shaded veneers can still appear artificial when their value, facial convexity, reflective width, line angles, texture, translucency, incisal characterization or gloss distribution does not match the surrounding dentition, because the human eye reads the complete pattern of reflected and transmitted light rather than judging a restoration solely by its printed VITA shade designation.
This is why many supposed “shade problems” are actually contour or reflection problems. Before requesting a remake in another shade, evaluate middle-third value, facial projection, transition-line position, surface gloss and incisal translucency.
Send a Specification the Laboratory Can Actually Manufacture
If the case is being sold as premium, prescribe it as premium.
Do not send only “A1, natural.”
Send the final objective. Send the stump shades. Send the value map. Define the ceramic strategy. Define the surface. Mark the line angles. Scan the approved provisional. Supply the facial photographs. State what the technician can change and what requires approval.
And make the acceptance criteria visible before fabrication begins.
For clinics, dental laboratories and sourcing teams planning demanding anterior cases, you can send your STL files, photographs, stump-shade records, provisional design and veneer lab prescription through the Artist Dental Lab contact and trial-case page for technical review, material discussion and case planning.
Premium porcelain should not depend on interpretation.