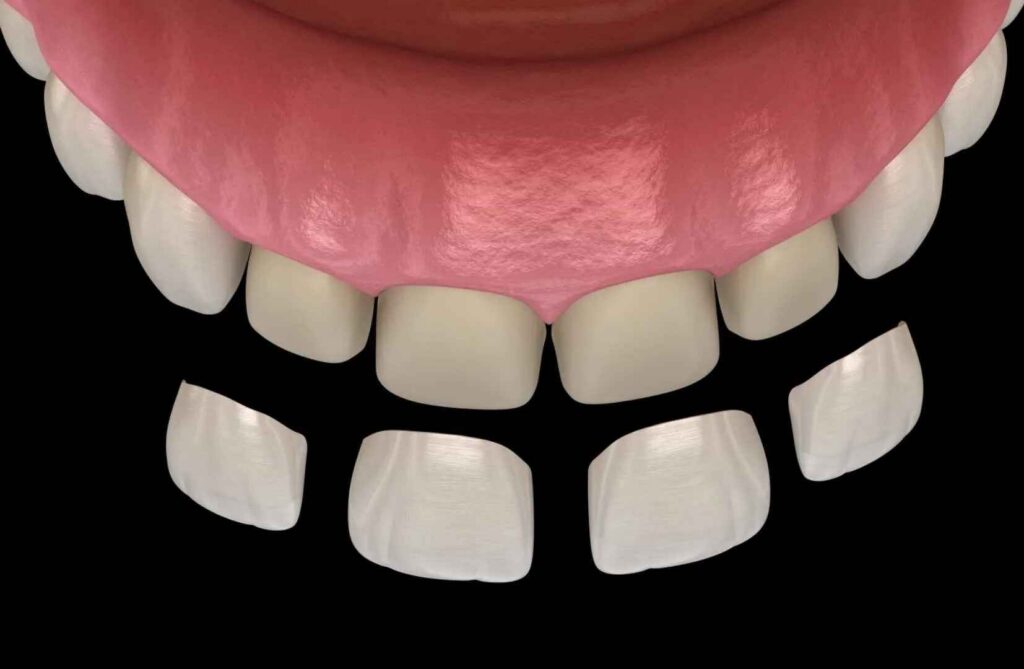
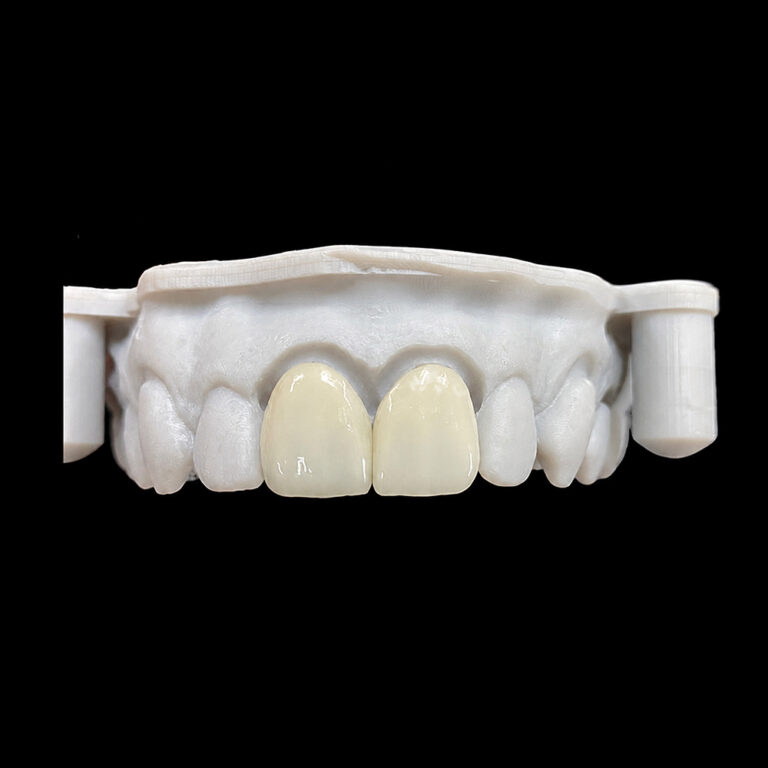
Perikymata in Veneers: When Micro-Detail Adds Realism
Micro-detail changes everything.
A veneer can carry the correct shade, acceptable translucency, symmetrical dimensions, and clean margins yet still fail visually because its facial surface reflects light like polished ceramic rather than the irregular enamel of the teeth standing beside it.
Why?
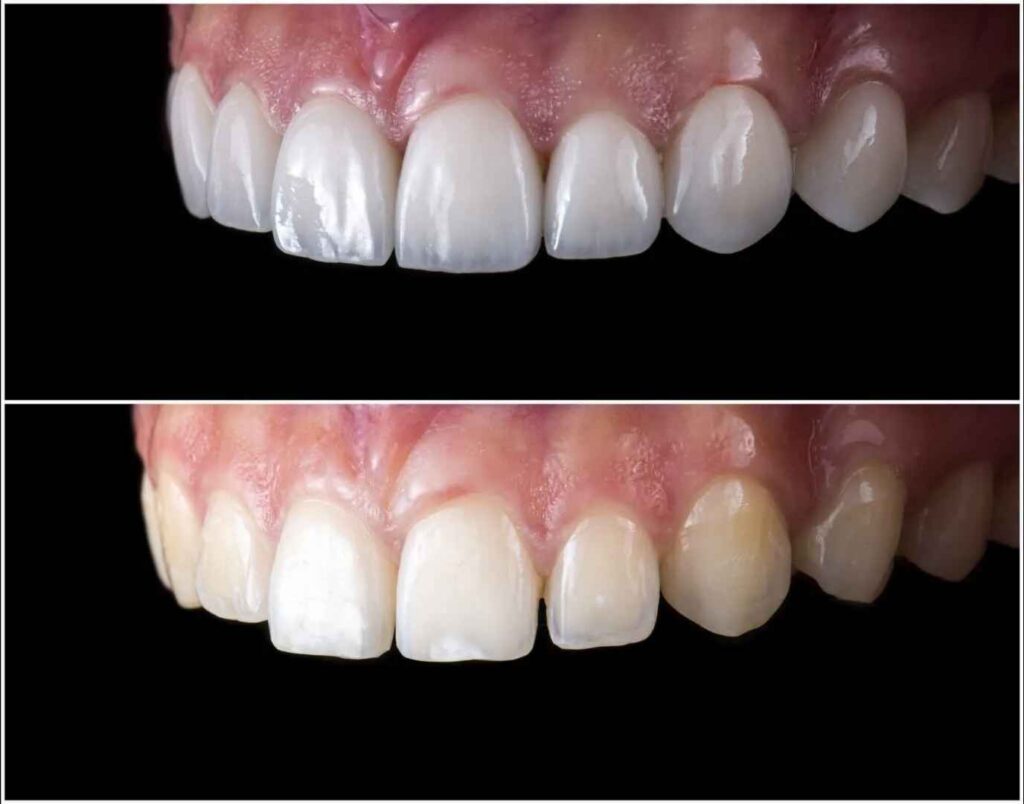
Because natural enamel is not uniformly smooth. It carries developmental lobes, shallow depressions, transitional line angles, wear, selective gloss, and fine horizontal features known as perikymata.
But here is my unpopular opinion: adding more texture does not automatically create natural-looking veneers. Sometimes it creates expensive stripes.
Perikymata work only when their location, scale, intensity, direction, and gloss belong to the patient. Used carelessly, they become a technician’s signature stamped across every case.
Perikymata Are Biology, Not Decorative Scratches
Perikymata are shallow, generally horizontal ridges and grooves representing the surface expression of the striae of Retzius—incremental growth lines formed during enamel development.
A National Institutes of Health review on dental enamel shape and hardness describes the striae of Retzius terminating at the enamel surface as shallow furrows running horizontally around the crown. Natural enamel consists predominantly of hydroxyapatite, Ca₁₀(PO₄)₆(OH)₂, but its visible appearance depends on far more than mineral chemistry.
Its surface has history.
The Oxford Reference definition of perikymata describes incremental lines approximately 30–40 µm apart. That number is useful for understanding biological scale, but it should not be converted into a universal laboratory specification.
Spacing is not depth. And neither is equivalent to average surface roughness, or Ra.
Perikymata also do not appear with equal strength across every tooth or every crown region. They are generally more concentrated toward the cervical area and may become less visible through abrasion, erosion, toothbrushing, function, and age.
That is why a smooth older incisor can be completely natural.
Tertiary anatomy must remain tertiary
I separate anterior tooth anatomy into four working levels:
Primary anatomy: outline, length, width, incisal position, and facial convexity.
Secondary anatomy: lobes, developmental grooves, line angles, and transition zones.
Tertiary anatomy: perikymata and other fine enamel micro-details.
Surface finish: gloss, polish, and the way small features survive reflected light.
The sequence matters.
If tertiary anatomy becomes the most visible feature, something has gone wrong. The observer should register “natural enamel,” not count grooves.
The evidence for natural perikymata is strong. The evidence for one universal ceramic replication formula is not.
That distinction gets ignored.
A 2001 study of perikymata spacing and distribution examined 115 unworn modern human anterior teeth, 30 African great-ape anterior teeth, 27 Australopithecus teeth, and 33 Paranthropus teeth. Researchers divided the buccal crown height into ten sections and calculated perikymata counts per millimeter.
The important restorative lesson is not the anthropological comparison. It is that perikymata distribution changes across the crown. Natural enamel does not carry one evenly spaced CAD pattern from cervical margin to incisal edge.
Then tactile perception enters the argument.
In a 2004 British Dental Journal experiment involving 25 volunteers, 60% correctly ranked restorative samples by roughness. Participants could distinguish Ra differences between 0.25 and 0.50 µm using their tongues, and the authors recommended keeping restorative roughness at or below approximately 0.50 µm when the surface should not be perceptible.
Those numbers describe measured roughness amplitude. They do not contradict perikymata spacing around 30–40 µm. They measure different properties.
This matters because some technicians confuse “visible microtexture” with “leave the ceramic rough.” That is bad thinking. A veneer can carry controlled topography while still receiving a refined, comfortable final surface.
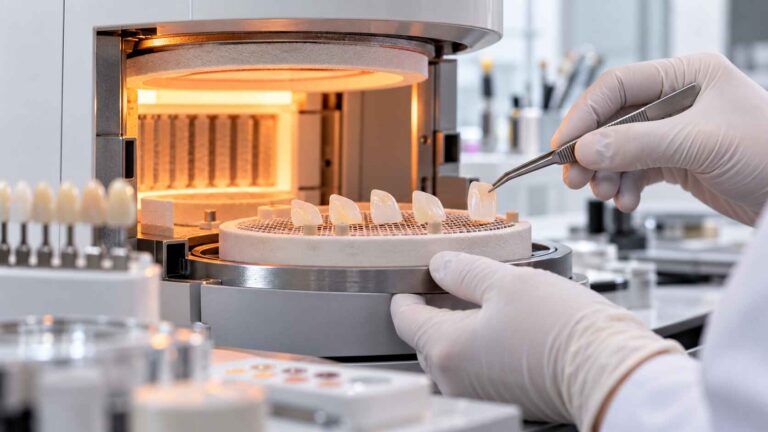
That does not prove that one polishing method produces better clinical veneers. It shows something narrower and more useful: finishing is an optical manufacturing stage, not mere cleanup.
Surface treatment changes how the material behaves under light.
So I would reject two common claims:
“The right ceramic automatically looks natural.”
“Perikymata alone make a veneer realistic.”
Neither survives serious scrutiny.
When Perikymata in Veneers Add Realism
Perikymata provide the most value when the restoration must integrate beside visible natural enamel rather than replace an entire uniform smile zone.
Clinical context
Suggested micro-detail
Why it may work
Main risk
Single central incisor beside unworn enamel
Closely reference the adjacent central
Even small texture differences are exposed
Mirroring the wrong tooth or exaggerating the pattern
Two-to-four anterior veneers
Individualized, low-to-moderate detail
Preserves variation across a small natural grouping
Giving every unit identical horizontal bands
Young patient with visible enamel texture
Fine, irregular perikymata supported by photographs
Coordinates with less-worn adjacent enamel
Creating a cartoon version of “young teeth”
Older or visibly worn dentition
Minimal, softened, or absent perikymata
Reflects natural abrasion and reduced tertiary anatomy
Producing suspiciously youthful ceramic
High-value smile makeover
Restrained texture with controlled gloss
Breaks overly broad reflections without dark banding
Excess texture lowering perceived cleanliness
Patient requesting highly uniform veneers
Low texture unless references show otherwise
Respects the approved esthetic direction
Adding laboratory artistry the patient never requested
Single central incisors expose everything
A single central incisor is the strongest indication for tooth-specific dental veneer microtexture because the restoration is surrounded by evidence.
The adjacent central provides a direct reference for:
Horizontal feature density
Facial lobe development
Mesial and distal reflective zones
Incisal wear
Surface gloss
Cervical texture
Craze lines and white effects
Value distribution
No generic texture library should override that evidence.
If the untreated central has almost no visible perikymata, the restoration probably should not display a field of crisp horizontal ridges. The goal is integration, not demonstrating that the technician owns a fine diamond.
Small anterior cases need controlled variation
Two, four, or six veneers can benefit from a related texture family, but “related” does not mean duplicated.
Natural teeth are siblings, not clones.
The central incisors may carry broader facial anatomy. Laterals can show quieter, less organized texture. Canines often present stronger convexity and different light behavior. Repeating one horizontal pattern across every unit creates a machine-made rhythm that the eye detects even when the observer cannot explain the problem.
Perikymata can break an artificial highlight
Flat veneers often produce a broad, continuous reflection that increases apparent width and value. Restrained micro-detail can interrupt that highlight, creating smaller transitions that feel closer to enamel.
But texture cannot rescue incorrect contour.
If the line angles are misplaced, the facial surface is overbuilt, or the value is too high, adding perikymata merely decorates the error. The related analysis of why value matters more than a shade-tab code explains why reflection and brightness must be evaluated together.
When Micro-Detail Makes Veneers Look Worse
More detail means more ways to fail.
The grooves are too regular
Perfectly parallel, evenly spaced lines read as machining marks. Biological enamel contains variation in prominence, spacing, continuity, and visibility.
I would rather see five nearly invisible interruptions than twenty obvious stripes.
Every tooth receives the same map
A duplicated texture file may save production time, but it destroys individuality. At minimum, centrals, laterals, and canines should not carry one identical microtexture pattern scaled to different outlines.
That is factory symmetry pretending to be anatomy.
Age and wear are ignored
Perikymata can become less visible as enamel wears. An older patient with smooth adjacent teeth, flattened incisal edges, and reduced facial anatomy usually does not need aggressive youthful texturing.
Age is not an automatic prescription, however. Some younger patients have limited visible texture; some older teeth preserve it. Photographs beat assumptions.
Surface detail fights incisal design
Perikymata belong primarily to the facial enamel surface. They should not compete with the incisal halo, translucency, mamelons, or wear facets.
When horizontal detail runs too strongly into the incisal third, the veneer may appear scratched or segmented. The laboratory should coordinate microtexture with the planned incisal translucency pattern, not design each feature in isolation.
The final gloss erases or exaggerates the work
Heavy glaze can visually fill delicate texture and create broad specular reflections. Aggressive mechanical finishing can erase intentional details or leave uncontrolled roughness.
The answer is not “always glaze” or “always polish.” The finishing protocol must match the ceramic system, manufacturer instructions, available thickness, characterization method, and approved appearance.
A Veneer Texture Prescription the Lab Can Use
“Add natural texture” is not a prescription.
It transfers every decision to the technician while giving the clinic no objective basis for approval or remake discussion.
Record the surface under useful light
A defensible reference set should include:
Full-face smile photograph
Retracted frontal image
Right and left 45-degree views
Close macro image of adjacent enamel
Unpolarized photographs with lateral or raking light
Cross-polarized images for internal color
Incisal-edge view
Patient-approved provisional or mock-up
Short video showing the smile under moving light
Cross-polarized photography is valuable for shade and internal effects, but it suppresses reflections. It cannot replace unpolarized raking-light photographs when the technician needs to read surface texture.
The site’s anterior veneer case-submission checklist covers the wider record package, including scans, bite data, stump shades, preparation images, functional notes, and approved designs.
Describe intensity, location, and finish
A useful instruction might read:
Match the untreated central incisor. Preserve broad mesial and distal reflective zones, moderate vertical lobe anatomy, faint irregular perikymata concentrated in the cervical and middle thirds, reduced horizontal detail incisally, and medium mechanical gloss without visible banding at smile distance.
That can be evaluated.
“Make it natural” cannot.
Establish macro-form before microtexture
The sequence I trust is straightforward:
Confirm silhouette and tooth proportions.
Establish facial convexity and three-plane contour.
Position the transitional line angles.
Develop secondary lobes and grooves.
Add restrained tertiary anatomy.
Apply the validated glaze or polishing sequence.
Recheck the surface under diffuse and raking light.
Perikymata should be one of the final anatomical decisions, but they should not be improvised after every other surface decision has been locked.
Inspect at three viewing distances
A veneer can look impressive at 2× magnification and absurd at conversational distance.
I would check it at:
Macro distance, to inspect tool marks and continuity
Approximately 30–50 cm, to judge reflected zones and tooth integration
Normal smile distance, to determine whether the detail disappears into realism
If the viewer notices “horizontal texture” from normal smile distance, it is probably too strong.
Material Choice Does Not Eliminate the Texture Problem
No ceramic owns realism.
Feldspathic porcelain
Feldspathic porcelain offers fine control over localized layering, translucency, internal effects, contour, and external characterization. This makes custom feldspathic veneers a logical option for selected cases requiring delicate enamel reproduction.
But the material does not protect the case from poor judgment. Excessive perikymata still look excessive.
Lithium disilicate
Lithium disilicate, commonly represented by Li₂Si₂O₅ and associated with IPS e.max workflows, can receive controlled external texture whether the veneer is pressed, milled, monolithic, or layered.
The available thickness and fabrication route matter. A monolithic veneer may depend more heavily on external contour, staining, glazing, and polishing, while a layered design provides additional control over internal depth. Neither approach justifies ignoring the manufacturer’s minimum-thickness and finishing instructions.
Zirconia and higher-opacity systems
When zirconia is selected for a veneer indication, masking, value, reflectance, and thickness may dominate the optical result before perikymata enter the discussion.
Fine texture can help. It cannot turn a poorly selected opaque restoration into enamel.
Material selection establishes what is possible. Case records determine what is appropriate. The technician’s finishing discipline determines what survives delivery.
FAQs
What are perikymata in veneers?
Perikymata in veneers are deliberately reproduced, shallow horizontal enamel-growth features that imitate the external expression of the striae of Retzius on natural teeth, helping the ceramic surface break up reflected light and integrate with adjacent enamel when their scale, location, density, and final gloss are matched to the patient.
They belong to tertiary anatomy and should normally remain less visually dominant than contour, facial lobes, line angles, and incisal form.
When should perikymata be added to porcelain veneers?
Perikymata should be added to porcelain veneers when untreated reference teeth show visible horizontal tertiary anatomy, the patient’s age and wear pattern support it, and the restoration will be judged beside natural enamel, especially in a single central incisor or a small anterior case where surface mismatch is immediately exposed.
They should be reduced or omitted when adjacent teeth are smooth, worn, or intentionally designed around a highly uniform finish.
Do perikymata make veneers look natural?
Perikymata can make veneers look more natural because shallow, patient-specific horizontal features divide broad reflections into smaller, less uniform highlights, but realism depends on their relationship with facial lobes, transitional line angles, incisal wear, ceramic value, and gloss rather than on the mere presence of grooves.
Overly deep, regular, or repeated perikymata make veneers look machined instead of biological.
How are perikymata created on veneers?
Perikymata are created on veneers through controlled tertiary-anatomy finishing, in which the ceramist first establishes the crown form and reflective zones, then adds restrained horizontal micro-detail from photographic references before completing a material-approved glazing or mechanical polishing sequence that preserves both optical variation and a comfortable, cleanable surface.
Exact instruments and finishing sequences should follow the selected ceramic manufacturer’s instructions rather than one universal technique.
What is the best surface texture for porcelain veneers?
The best surface texture for porcelain veneers is the lowest-intensity combination of primary contour, secondary lobes and grooves, tertiary perikymata, and selective gloss that reproduces the patient’s remaining enamel under diffuse light, raking light, and normal smile distance without creating visible bands, tactile roughness, or a standardized laboratory signature.
The right target is patient-specific, not simply youthful, glossy, or highly detailed.
Can perikymata be reproduced on E.max veneers?
Perikymata can be reproduced on feldspathic and lithium-disilicate veneers, including E.max-type restorations, because both can receive controlled external characterization; however, the available ceramic thickness, fabrication route, surface treatment, strength requirements, and manufacturer instructions determine how aggressively the technician may texture and refinish each restoration.
Material choice changes the working limits, but photographic references and surface judgment still determine whether the result looks natural.
Send a Texture Prescription, Not the Word “Natural”
Before submitting the next anterior veneer case, photograph the adjacent enamel under raking light and define four items: texture intensity, crown location, tooth-to-tooth variation, and final gloss.
Then connect those instructions to the approved provisional, shade map, stump shade, material, and incisal design.
For a single central, premium smile case, or clinic–laboratory trial workflow, use the Artist Dental Lab case consultation form to send your scans, clinical photographs, material preference, texture references, unit count, and required finish.