How Much Incisal Translucency Is Appropriate in Veneer Design?
There is no universal percentage.
In routine porcelain veneer design, I would use an incisal translucent zone of approximately 1 to 2 mm, or roughly 10% to 20% of the visible crown height, as an initial laboratory reference—not as a biological law—and then modify it according to the adjacent teeth, age, stump shade, ceramic thickness, incisal position, smile line, and lighting conditions.
That is the answer.
But it is also where the easy answer ends, because incisal translucency is not a blue band painted across the bottom of a veneer. It is an optical interaction involving enamel thickness, underlying dentin, internal mamelons, ceramic chemistry, surface texture, cement shade, stump value, and the amount of dark oral space visible behind the edge.
So why do so many veneer prescriptions still say only “A1, natural translucency”?
That is not a specification. It is a request for the technician to guess.
The Honest Answer: Appropriate Translucency Is Patient-Specific
Incisal translucency is appropriate when the veneer allows enough light transmission to reproduce natural depth without creating a grey edge, visible darkness, excessive blue fluorescence, or a sharp optical boundary between the incisal and body thirds.
More is not better.
A highly translucent veneer can photograph beautifully on a model and still look weak inside the mouth. Once the restoration is placed against a dark oral background, the incisal edge may lose value and appear grey. Conversely, an overly opaque veneer may maintain brightness but look flat, dense, and unmistakably artificial.
The right question is not, “How translucent should the veneer be?”
The better questions are:
How much translucency exists in the adjacent natural teeth?
Where is that translucency located?
Is it a straight band, an irregular edge, or a proximal-incisal pattern?
How dark is the prepared tooth?
How much ceramic thickness is available?
Will the veneer be feldspathic porcelain, lithium disilicate, layered lithium disilicate, or zirconia?
How much dark oral space will sit behind the new incisal edge?
Until those questions are answered, prescribing a percentage is mostly theatre.
Table of Contents
Natural Teeth Do Not Follow One Incisal Pattern
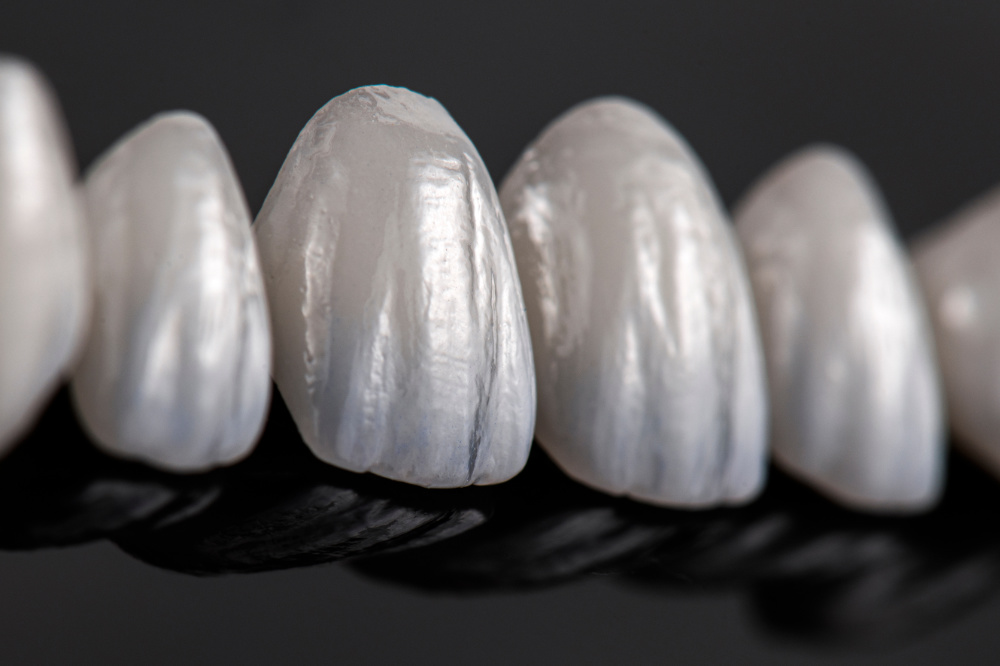
Natural enamel does not behave like a uniform sheet of frosted glass. Incisal translucency can be concentrated at the edge, extend into proximal areas, surround internal mamelons, or appear asymmetrically across the same tooth.
A 2012 clinical study of 120 subjects examined unrestored maxillary central incisors, lateral incisors, and canines across five age groups and four racial or ethnic categories. The investigators found statistically significant interactions involving age, race, and gender, while identifying several distinct translucency patterns rather than one universal design.
That finding should kill the “standard translucent band” mentality.
The study classified patterns broadly as:
Type A: translucency was difficult to define or extended across much of the coronal surface.
Type B: translucency appeared mainly in the incisal portion.
Type C: translucency appeared in both incisal and proximal regions.
In other words, natural incisal edge translucency is often irregular.
A later 2021 in-vivo study of 106 individuals reported a mean translucency parameter, or TP, of 8.22 for maxillary central incisors. The average absolute difference between the left and right central incisors in the same person was 1.33 TP units.
Even paired central incisors are not always identical.
Why would eight manufactured veneers be?
Translucency Parameter Is Not a Percentage
This distinction matters.
Scientific studies often quantify translucency with the translucency parameter, calculated from the CIE L*a*b* color difference of a specimen measured over white and black backgrounds:
A higher TP generally indicates greater translucency. A contrast ratio may also be used, with lower contrast ratios generally representing greater light transmission.
Neither measurement tells a technician to make “20% of the tooth translucent.”
The percentage or millimetre description is a spatial design instruction. TP is an optical measurement. Confusing the two creates false precision.
The Practical Incisal Translucency Range I Would Prescribe
For everyday laboratory communication, the following ranges are more useful than asking for “high,” “medium,” or “low” translucency.
These are practical design starting points, not published biological standards.
Clinical situation
Practical visible translucent zone
Recommended optical direction
Main risk
Young, unworn central incisors
1.5–2.0 mm or about 15%–20%
More visible mamelon separation, edge halo, and irregular proximal translucency
Excessive blue-grey effect
Mature adult dentition
1.0–1.5 mm or about 10%–15%
Moderate translucency with softened internal effects
Copy the neighboring tooth rather than using a preset
Match the actual pattern, not only the shade tab
Bilateral mismatch
Dark stump or endodontically treated substrate
Usually 0.5–1.0 mm of visually controlled translucency
Mask the body first, then create surface depth without exposing darkness
Grey incisal third
Bleach-shade multi-unit case
Approximately 0.5–1.5 mm
Keep the incisal third bright; use subtle opalescence rather than transparent blue
Low-value “icy” appearance
Extended incisal length with dark oral space behind it
Case-dependent, usually less transparent than expected
Use internal dentin support and a controlled halo
Dark-line show-through
High-detail premium anterior case
1.0–2.0 mm with customized internal anatomy
Individual mamelons, halo, warmth, craze lines, and proximal effects
Inconsistency across units
My bias is simple: start with less translucency, evaluate it under multiple backgrounds, and add optical depth carefully.
Removing excess greyness after firing is not always elegant. Preventing it is.
Ceramic Thickness Changes the Result Faster Than Most Prescriptions Admit
Thickness is not a minor variable.
A 2023 laboratory study compared 60 laminate veneers made from lithium disilicate and highly translucent monolithic zirconia at thicknesses of 0.5, 0.7, and 1.0 mm. The zirconia specimens showed significantly lower translucency than lithium disilicate, with a reported p-value below 0.001.
The material name mattered. Thickness mattered too.
A 0.5 mm high-translucency ceramic does not behave like the same material at 1.0 mm. And a 0.7 mm lithium disilicate veneer does not transmit light like a 0.7 mm zirconia veneer merely because both products are marketed as “high translucency.”
That phrase is almost useless without context.
Thin Veneers Expose the Substrate
Thin veneers are optically honest. Sometimes brutally so.
At approximately 0.3 to 0.5 mm, the restoration may transmit enough light for the stump shade and resin cement to influence final value, chroma, and incisal appearance. That can be an advantage when the underlying enamel is bright and healthy. It can be a disaster over a dark stump.
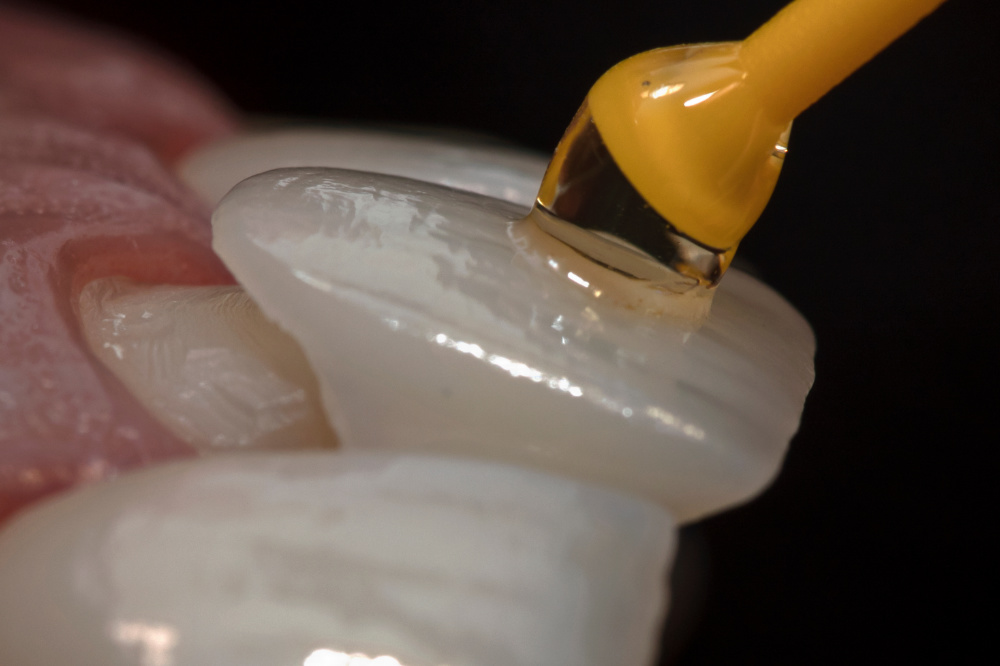
When working with a conservative E.max veneer workflow, the prescription should therefore include:
Final target shade
Stump shade
Ceramic thickness or reduction map
Proposed cement shade
Retracted photographs
Cross-polarized photographs when available
Adjacent-tooth incisal close-ups
Desired value and translucency level
Without those inputs, the technician is not controlling veneer translucency. The technician is estimating it.
Material Choice Determines How Much Optical Freedom You Actually Have
Material selection should happen before detailed characterization, not after the technician discovers that the prescribed ceramic cannot achieve the requested masking and translucency at the available thickness.
Feldspathic Porcelain: Maximum Optical Freedom, Minimum Room for Sloppy Planning
Hand-layered feldspathic porcelain veneers remain one of the strongest options for delicate incisal characterization, enamel-like layering, subtle craze lines, individualized mamelons, halo control, and micro-texture.
Pretty? Absolutely.
Forgiving? No.
Feldspathic porcelain makes sense when the preparation remains primarily in enamel, the substrate is favorable, the laboratory receives strong photographic records, and the case genuinely needs hand-built optical detail.
I would not use its high translucency as an excuse to under-plan the stump shade. Nor would I prescribe it automatically for every premium case. The optical ceiling is high, but so is the dependence on the ceramist, preparation design, bonding environment, and communication quality.
Layered E.max: More Characterization Without Abandoning a Lithium Disilicate Core
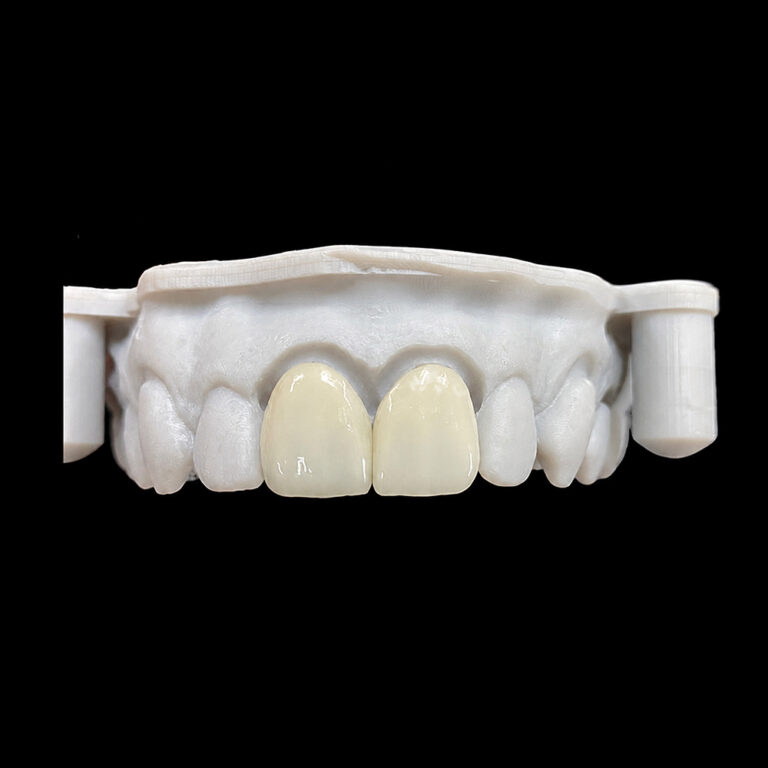
Layered E.max veneers combine a lithium disilicate base with a porcelain build-up. That allows the ceramist to create more depth, halo, warmth, surface texture, and incisal edge translucency than a purely monolithic design usually permits.
But another layer means another variable.
Layered E.max is attractive for one to four highly visible anterior units, demanding single-central cases, and premium smile designs where subtle incisal characterization materially improves the result. In broad multi-unit cases, however, aggressive layering can increase cross-unit variation.
My opinion may annoy some people: hand-layered does not automatically mean better.
It means more adjustable. It also means more dependent on execution.
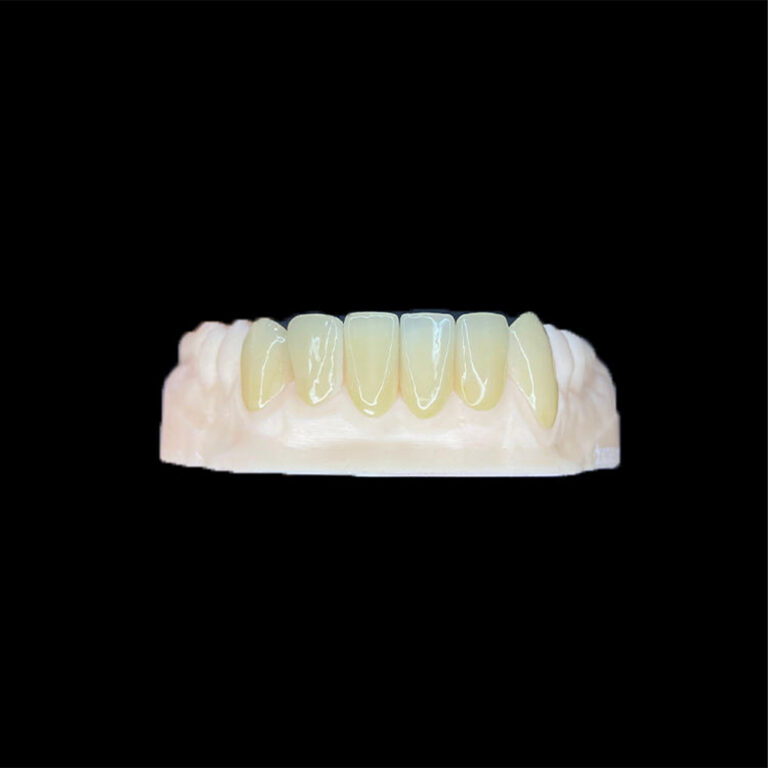
Full E.max: Less Drama, More Cross-Unit Control
A full E.max veneer uses a monolithic lithium disilicate body, with final staining, glazing, texture, and selective characterization applied without building a large veneering-porcelain layer.
That often makes sense for six-, eight-, or ten-unit cases where consistent value, fit, shape, and translucency across the arch matter more than highly individualized internal effects.
It may have a lower artistic ceiling than a masterfully layered veneer.
But the floor is often higher.
For many commercial cosmetic workflows, that is a smart trade.
Material Survival Does Not Support Fan-Club Dentistry
93.70% for leucite-reinforced glass-ceramic veneers
96.81% for lithium disilicate veneers
The review found no significant survival difference among these main groups, although long-term complication profiles varied and long-term zirconia data remained limited.
That is inconvenient for marketing.
It also supports a more mature conclusion: the best translucency for porcelain veneers cannot be selected independently from substrate, bonding, preparation, function, ceramic thickness, and laboratory control.
Ceramic Veneer Shade Matching Is More Than Picking A1
Shade tabs describe only part of the target.
A serious veneer prescription separates at least six variables:
Hue: the basic color family.
Chroma: color intensity or saturation.
Value: perceived brightness.
Translucency: the degree of light transmission and diffusion.
Opalescence: the blue appearance in reflected light and warmer appearance in transmitted light.
Fluorescence: the material’s response to ultraviolet-containing light.
Value usually deserves first priority.
A veneer with the correct hue but low value looks grey. A veneer with beautiful incisal translucency but poor cervical chroma looks detached from the tooth. A veneer with heavy blue characterization may appear impressive under a ring light and strange in daylight.
That last one happens more than the industry likes to admit.
Photograph the Tooth Against More Than One Background
For a single-unit or limited anterior case, I would request:
Full-face photograph
Full-smile photograph
Retracted frontal photograph
Right and left lateral retracted photographs
Incisal close-up
Shade-tab photograph in the same plane as the tooth
Stump-shade photograph
Cross-polarized image when possible
Photograph with a black background behind the incisors
Photograph with a neutral grey reference
The black-background image helps expose the true location and intensity of incisal translucency. The polarized image reduces surface reflection and reveals internal color structure. The smile and face photographs prevent the technician from designing a beautiful tooth that does not belong to the patient.
A uniform blue-grey strip placed across every incisal edge may create obvious contrast in photographs, but natural incisors frequently show uneven translucency, proximal variation, dentin lobes, edge wear, and asymmetric halo intensity.
Uniformity can look less natural than controlled variation.
The Transparent Edge Over Dark Oral Space
When a veneer extends beyond the original tooth length, the new edge may have little or no dentin behind it. Dark oral space becomes the background.
A transparent ceramic edge over darkness loses value.
The correct answer may involve stronger internal dentin support, a controlled halo, more opalescent enamel, or less overall transparency—not another layer of blue stain.
The Same Design on Every Tooth
Central incisors, lateral incisors, and canines should not necessarily receive identical translucency.
Central incisors often carry the main optical statement. Laterals may tolerate more individual variation. Canines usually carry greater chroma and often show less dramatic edge translucency.
Copying one internal map across all six anterior teeth can create a manufactured “set.”
The teeth may be technically excellent.
They still look like veneers.
Ignoring Patient Age
Highly visible mamelons and a broad translucent edge can make sense in a young, unworn dentition. Applying the same design to an older patient with shortened, polished, or heavily worn natural teeth may create an age mismatch.
Age characterization does not mean making teeth dull.
It means respecting wear, enamel thickness, texture, chroma distribution, and edge anatomy.
Asking Cement to Repair a Ceramic Error
Try-in pastes and resin cement can shift final value and chroma, especially under thin restorations. They are not reliable rescue devices for a fundamentally wrong opacity or ceramic thickness.
Cement can fine-tune.
It cannot rebuild missing dentin anatomy, remove an oversized transparent zone, or turn the wrong ingot into the right optical system.
A Veneer Prescription That Removes Guesswork
I would send the following instructions for any case in which incisal translucency materially affects the outcome:
Restoration: Veneers on teeth #___ Material: Feldspathic / layered lithium disilicate / monolithic lithium disilicate Final shade: ___ Stump shade: ___ Approximate facial thickness: ___ mm Approximate incisal ceramic thickness: ___ mm Visible translucent zone: ___ mm from the final edge Pattern: Incisal only / proximal-incisal / irregular / copy contralateral tooth Value target: Higher / equal / lower than adjacent teeth Mamelons: None / subtle / moderate / defined Halo: None / subtle / medium / strong Opalescence: Low / medium / high Internal warmth: Low / medium / high Surface texture: Smooth / age-appropriate / pronounced Dark oral-space exposure: Low / medium / high Reference tooth: ___ Functional notes: Guidance, edge-to-edge contact, parafunction, wear facets Photographs included: Face, smile, retracted, stump, shade tab, polarized, black background
Specific beats poetic.
A prescription saying “natural, youthful, not too translucent” sounds reasonable, but it gives the laboratory no measurable edge position, no optical reference, and no explanation of how the final tooth should behave against the mouth.
FAQs
How much incisal translucency should a veneer have?
Appropriate incisal translucency in veneer design is the controlled transmission and diffusion of light through the incisal portion of the restoration, usually concentrated within roughly 1 to 2 mm of the edge but adjusted to the neighboring teeth, patient age, stump shade, ceramic thickness, and selected material.
For many mature adult cases, a restrained 1.0 to 1.5 mm zone is a safer starting point than a broad transparent band. Young teeth may support more visible depth, while worn teeth, dark substrates, and bleach-shade cases often need tighter value control.
Can a veneer have too much incisal translucency?
Excessive incisal translucency occurs when the ceramic transmits enough dark background or stump influence to lower the restoration’s apparent value, producing a grey, blue, hollow, or weak-looking edge that no longer integrates with the body of the veneer or the adjacent natural teeth.
This usually becomes obvious against black oral space, under side lighting, or after cementation. The correction may require greater internal dentin support, a different ceramic opacity, reduced translucent-zone width, or stronger halo control.
Does veneer thickness affect incisal translucency?
Veneer thickness directly affects incisal translucency because increasing ceramic thickness changes the amount of light transmitted, scattered, absorbed, and reflected by the restoration, while thin ceramics allow the stump shade, resin cement, and oral background to influence the final color more strongly.
The effect varies by material. Lithium disilicate, feldspathic porcelain, and translucent zirconia do not behave identically at 0.5, 0.7, or 1.0 mm, so thickness and material must be prescribed together.
Which veneer material produces the most natural incisal translucency?
The veneer material producing the most natural incisal translucency is the material that matches the available thickness, substrate color, bonding conditions, functional risk, and required characterization; feldspathic porcelain offers high layering freedom, layered E.max offers adjustable depth, and monolithic E.max offers stronger cross-unit consistency.
There is no automatic winner. A well-planned monolithic veneer may look more natural than a poorly controlled layered restoration, while a difficult single-central case may justify feldspathic or layered porcelain artistry.
Should every veneer in a smile makeover have the same translucency?
Veneers in a smile makeover should share a coherent optical family but should not necessarily have identical translucency patterns, because natural central incisors, lateral incisors, and canines differ in chroma, enamel distribution, edge anatomy, wear, mamelon visibility, proximal effects, and the amount of oral darkness behind them.
Consistency should apply to value, material family, and overall design intent. Controlled individual variation prevents the restorations from looking like six or ten copies of the same tooth.
How should a dentist communicate incisal translucency to the dental lab?
Incisal translucency should be communicated to the dental lab with a measured zone in millimetres, a named pattern, stump-shade data, ceramic-thickness information, reference photographs, desired halo and mamelon intensity, oral-background exposure, and a clear statement of whether the goal is youthful, mature, restrained, or highly characterized.
Do not rely on “natural translucency” alone. A laboratory can reproduce a defined target far more predictably than it can interpret an adjective.
Your Next Step: Prescribe the Light, Not Just the Shade
Before sending the next veneer case, stop at the prescription screen.
Measure the intended incisal zone. Photograph the neighboring teeth against a dark background. Record the stump shade. State the material, thickness, halo strength, mamelon visibility, value target, and whether the incisal pattern should be uniform or asymmetric.
Then ask the laboratory one uncomfortable question: Will this design still hold its value when the patient opens their mouth and dark oral space sits behind the veneers?