What Information Must Be Submitted to the Lab for Anterior Veneer Cases?
For an anterior veneer case, the dental laboratory should receive a complete prescription, definitive impressions or full-arch scans, an opposing arch, an accurate bite, preparation and margin records, final shade, stump shade, standardized clinical photographs, functional notes, material preferences, and a patient-approved provisional, wax-up, or smile design whenever one exists.
That is the direct answer.
But a truly predictable veneer case requires more than checking those boxes, because the technician must understand not only where the margins are, but also what the patient approved, what the underlying tooth color will do to the ceramic, and how the restorations must behave during protrusive and lateral movement.
Why leave any of that to interpretation?
Veneer
Table of Contents
The Lab Cannot Manufacture Information It Never Received
Records decide outcomes.
When an anterior veneer prescription reaches the laboratory with one intraoral scan, the notation “B1,” and a request to “make it natural,” the laboratory is not receiving an esthetic plan; it is receiving permission to guess about value, translucency, tooth length, surface texture, incisal position, line angles, contact form, masking, and functional risk.
That is the hard truth.
A skilled technician can improve a clearly defined plan. The technician cannot reconstruct a patient conversation that was never documented.
This distinction becomes more important with anterior veneers because the restoration may be only a fraction of a millimeter thick. The final result can be affected by:
The remaining enamel and exposed dentin
The shade and value of the prepared tooth
Ceramic thickness
Ceramic translucency or opacity
Resin cement shade
Preparation depth
Margin location
Adjacent tooth characteristics
Lip position and smile line
Incisal edge position
Occlusal and parafunctional forces
Artist Dental Lab separates lithium-disilicate E.max veneers, feldspathic veneers, layered E.max veneers, and zirconia-based options because these materials solve different optical and functional problems. Selecting one without documenting the substrate, preparation, and esthetic target turns material selection into speculation.
The Complete Anterior Veneer Case Submission Checklist
The following table shows what I consider a defensible submission package for anterior veneer cases.
Submission Item
What the Lab Needs
Why It Matters
Laboratory prescription
Patient or case ID, tooth numbers, restoration type, material request, final shade, due date, and special instructions
Establishes the legal and technical scope of work
Prepared arch
Accurate full-arch scan or conventional master impression
Provides margins, preparation geometry, contacts, emergence profile, and seating information
Opposing arch
Complete scan or impression of the opposing dentition
Allows the technician to evaluate clearance, tooth position, and opposing contacts
Bite registration
Accurate maximum intercuspation record, plus additional records when the bite is unstable
Positions the arches and reduces occlusal adjustment
Preoperative scan
Unprepared dentition before treatment
Preserves original anatomy and helps compare tooth position and required reduction
Approved provisional or mock-up scan
Scan or impression of the design accepted by the patient and clinician
Gives the laboratory a verified reference for length, contour, phonetics, and smile appearance
Preparation photos
Frontal and lateral close-ups showing margins and reduction
Reveals information that may not be obvious in a scan
Stump shade
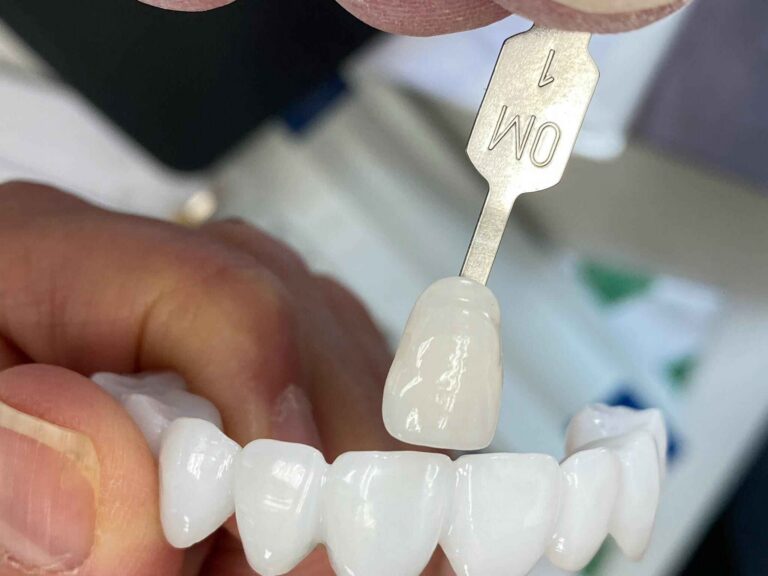
Shade of every prepared tooth, preferably photographed with a named shade tab
Helps control final value, opacity, and masking
Final restoration shade
Shade-guide system, selected tab, shade map, and any value adjustments
Defines the intended ceramic result
Facial photographs
Full face at rest, natural smile, broad smile, profile, and 12-o’clock view when useful
Establishes facial midline, occlusal cant, smile arc, and lip relationships
Retracted photographs
Frontal, right lateral, left lateral, maxillary occlusal, and mandibular occlusal views
Shows gingival levels, tooth proportions, contacts, and arch form
Helps prevent thin or overloaded ceramic from being placed in a high-risk position
Esthetic instructions
Desired length, width, line angles, embrasures, translucency, halo, texture, and characterization
Converts vague preferences into manufacturable instructions
Cementation plan
Intended bonding approach and resin cement information when it affects value
Allows ceramic opacity and thickness to be coordinated with the clinical plan
Digital restorative workflows have long been built around full-arch maxillary and mandibular records combined with a digital laboratory prescription, not an isolated preparation scan. The JADA case report on the digital transition between clinic and laboratory specifically describes full-arch digital impressions and prescription data that include the tooth number, material, stump shade, and final restoration shade.
Write an Anterior Veneer Lab Prescription That Cannot Be Misread
A good anterior veneer lab prescription should answer four questions:
What is being restored?
What should it look like?
What mechanical conditions must it survive?
Which decisions have already been approved?
At minimum, identify the tooth numbers and whether each unit is a veneer, three-quarter restoration, or crown. Do not assume that the preparation automatically communicates the prescription.
Then record the requested material. “Porcelain veneer” is not specific enough.
A practical prescription might state:
Teeth #6–11: lithium-disilicate veneers. Final shade BL3 with slightly lower value at the cervical third. Reproduce the approved provisional scan. Maintain medium incisal translucency, subtle halo, rounded line angles, youthful surface texture, and canine-protected lateral guidance. Tooth #8 has a darker stump and may require additional opacity.
That gives the ceramist a starting position.
“Make them white but natural” does not.
For difficult material decisions, use the clinical variables rather than brand loyalty. Artist Dental Lab’s anterior veneer material selection guide compares E.max, zirconia, and feldspathic options according to enamel availability, stump shade, preparation design, occlusion, masking requirements, and the intended optical result.
Digital Impressions for Veneers Require More Than One Attractive Scan
A high-resolution preparation scan can still be clinically useless.
The laboratory needs:
A complete prepared arch
The full opposing arch
An accurate bite scan
Clearly visible finish lines
Complete interproximal surfaces
Palatal or lingual preparation anatomy
Unprepared adjacent teeth
Stable soft-tissue capture around the margins
A preoperative scan when original anatomy matters
The approved provisional, mock-up, or wax-up scan when the design must be copied
Inspect the scan before submitting it. Magnify every margin.
A blurry distal margin on a lateral incisor does not become clearer when it reaches the CAD department. Neither does missing palatal anatomy, stitched tissue, a double margin, or a bite recorded while the patient is sliding into position.
For conventional impressions, the same rule applies. The master impression must capture the entire finish line without pulls, bubbles, tears, tray exposure, or tissue collapse. Include an opposing model and a stable bite record.
A 2024 systematic review of digital veneer workflows found that digital systems are being applied across diagnosis, preparation guidance, restoration design, fabrication, and cementation, but it also emphasized that the evidence base remains heterogeneous. In other words, digital tools can improve control, yet they do not excuse incomplete records or poor clinical capture. See the systematic review of digitally designed and fabricated esthetic veneers.
Submit the Approved Design as a Separate Dataset
When the patient has approved a mock-up or provisional restoration, scan it before removing it.
This is one of the highest-value records in the entire case.
The approved provisional can communicate:
Incisal edge position
Central incisor dominance
Tooth width and length
Midline correction
Facial surface contour
Buccal corridor
Smile arc
Phonetic acceptance
Lip support
Patient-approved compromises
But be precise about what should be copied.
“Copy provisional” can mean three different things:
Copy the design exactly
Use only the length and general proportions
Improve the contours while preserving the approved smile position
Write which one you mean.
Final Shade and Stump Shade Are Different Records
The final shade describes what the restoration should look like.
The stump shade describes what is underneath it.
Both matter.
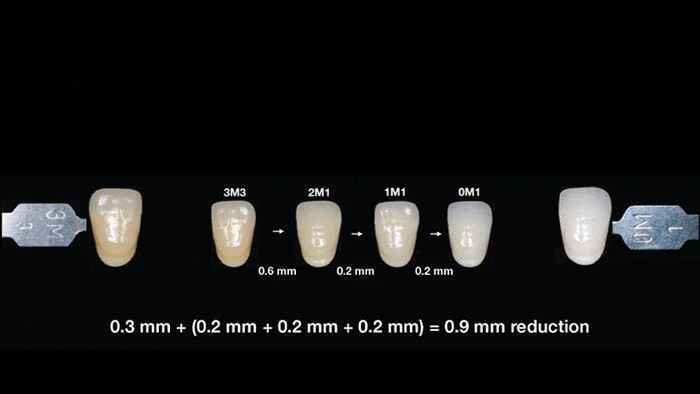
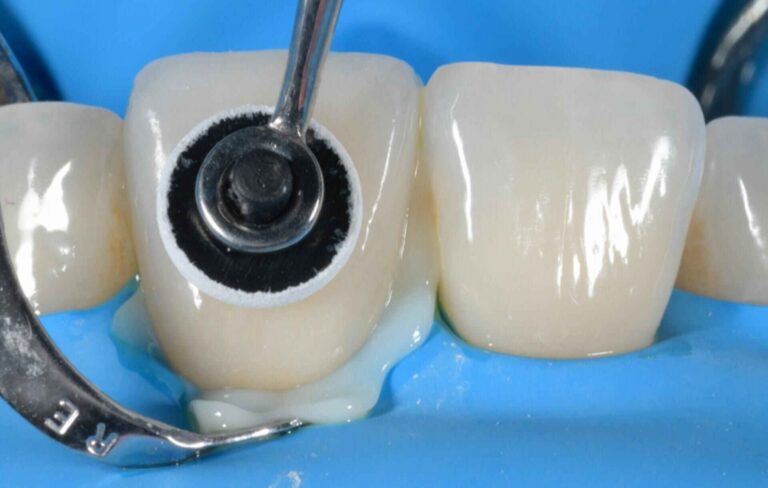
A thin veneer is not an opaque wall. Light travels through the ceramic, interacts with the prepared tooth and resin cement, and returns through the restoration. A dark, discolored, metallic, or endodontically treated substrate can raise the masking requirement substantially.
For every prepared tooth, submit:
Stump-shade tab and shade-guide system
A photograph of the tab beside the prepared tooth
Tooth number
Whether the stump is wet or dry
Areas of localized discoloration
Existing composite or core material
Any difference between adjacent preparations
Do not write one stump shade for an entire ten-unit case when the teeth are visibly different.
The laboratory also needs to know whether the final target is A1, B1, BL3, OM2, or another shade within a named system. Shade designations are not reliably interchangeable across different guide systems.
Photograph the Shade Instead of Merely Typing It
A shade photograph should show the selected tab in the same vertical plane as the tooth, close to the tooth surface, with the identification code visible.
Take the photograph before prolonged dehydration whenever possible. Teeth become brighter and less chromatic as they dry, which can shift the clinical impression.
The photograph should also communicate the shade distribution:
Cervical hue and chroma
Middle-third value
Incisal translucency
Mamelons
Halo
Opalescence
White or amber internal effects
Hypocalcification
Craze lines
Surface gloss and texture
A clinical study involving 50 participants compared visual shade selection, spectrophotometry, and standardized digital photography. Digital photography showed statistically significant agreement with the spectrophotometer, with a reported mean color difference of ΔE 1.69, but the protocol depended on controlled photography, consistent illumination, and calibration—not casual smartphone snapshots taken under an operatory light. Read the clinical evaluation of photographic and conventional shade selection.
That distinction matters.
Photography works when it is standardized.
Veneer
A Useful Anterior Shade Photo Series
For demanding anterior cases, submit:
Full-face natural smile
Full-face broad smile
Retracted frontal view
Retracted right lateral view
Retracted left lateral view
Close-up with final shade tab
Close-up with stump-shade tab for each preparation
Cross-polarized image when available
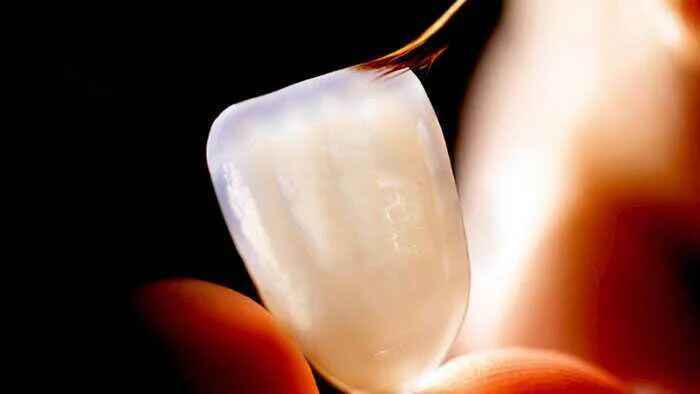
Black-background incisal image when translucency is important
Photograph of the approved provisional
Photograph showing the patient’s requested reference tooth
Preoperative image before preparation
The incisal translucency planning guide provides a useful communication framework covering halo strength, opalescence, internal warmth, surface texture, dark oral-space exposure, functional notes, and reference photographs.
Facial References Prevent Straight Teeth in a Crooked Frame
An intraoral scan does not reliably tell the technician whether the dental midline is aligned with the facial midline.
It does not show the natural head position, interpupillary line, lip asymmetry, smile arc, incisal display at rest, or how much gingiva appears during a full smile.
The minimum facial series should include:
Full face at rest
Full face with a natural smile
Full face with a broad smile
Profile view
Three-quarter view
12-o’clock view when evaluating the smile arc and incisal plane
Short video of natural smiling and speech for complex cases
The face must be level in the image. Avoid tilted camera angles and cropped photographs that remove the eyes, chin, or facial outline.
For multi-unit anterior veneers, document:
Facial midline
Dental midline
Midline deviation that will remain
Occlusal cant
Central incisor length
Incisal edge position
Gingival zeniths
Width-to-length targets
Buccal corridor
Lip dynamics
Desired tooth dominance
A technically symmetrical restoration can still look wrong when it is symmetrical to the scan rather than to the face.
Record Preparation Design, Enamel Availability, and Margin Location
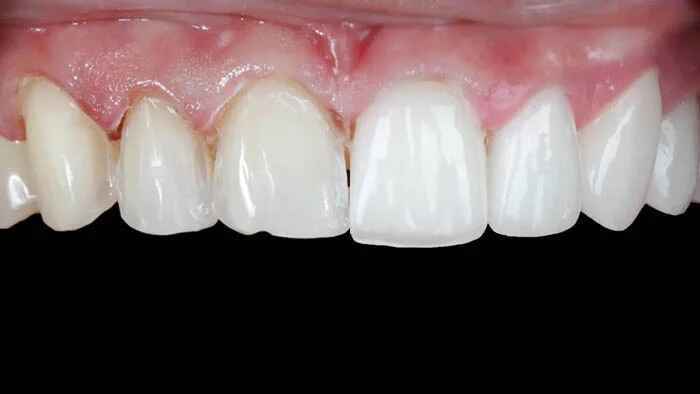
The laboratory should know whether each preparation remains primarily in enamel, includes exposed dentin, has an incisal overlap, uses a butt-joint design, or extends interproximally to close a diastema.
Photographs are especially helpful when:
The margin is subgingival
The preparation crosses an existing restoration
One tooth is much darker than the others
There is limited reduction
A proximal extension is intended to move the contact
The veneer must correct rotation
A black triangle must be managed
One preparation is significantly more aggressive
Do not ask the laboratory to create a major positional correction without documenting available space. A minimal-preparation veneer over a facially positioned tooth can become overcontoured, while an overly translucent veneer over a dark preparation can reproduce the discoloration underneath it.
The evidence also supports taking enamel preservation seriously. A 2024 narrative review reported veneer survival above 90% beyond ten years and identified preserved enamel and minimal- or no-preparation glass-ceramic veneers as favorable factors. Fracture was the leading reported failure mechanism, followed by debonding and color change. See the clinical survival and laboratory failure review of dental veneers.
Artist Dental Lab’s guide to enamel preservation in veneer preparation places these findings into a practical material-selection context, especially for thin feldspathic and lithium-disilicate restorations.
Occlusion Is Part of the Prescription, Not a Chairside Surprise
Anterior veneers do not exist only in a smiling photograph.
They enter protrusion. They enter lateral movement. They may oppose natural enamel, ceramic, composite, or severely worn teeth. They may also enter the mouth of a patient who clenches at night and denies doing it.
Send the laboratory functional information, including:
Maximum intercuspation
Overbite and overjet
Anterior guidance
Canine guidance or group function
Edge-to-edge contacts
Crossbite
Deep bite
Protrusive contacts
Lateral interferences
Wear facets
Chipping history
Bruxism or clenching
Existing nightguard use
Planned occlusal changes
Whether posterior support is stable
For high-risk cases, a static bite scan may not communicate enough. Add photographs, mounted records, jaw-motion data, or a clear written description of the functional plan.
The 2024 veneer survival review noted that fractures increased in the presence of parafunctional activity. That does not mean every patient who clenches is automatically excluded from veneer treatment, but it does mean parafunction should be disclosed before the technician designs thin incisal ceramic.
Here is my blunt position: hiding the functional risk from the lab does not make the case more esthetic. It only postpones the argument until something chips.
Show the Lab What “Natural” Means for This Patient
“Natural” is not a laboratory specification.
A 22-year-old patient asking for youthful translucency, soft line angles, pronounced mamelons, and high surface texture is not asking for the same result as a 58-year-old patient who wants smoother surfaces, reduced incisal translucency, and minimal characterization.
Define the target.
Useful esthetic instructions include:
Square, ovoid, triangular, or mixed tooth form
Strong or soft line angles
Dominant or restrained central incisors
Rounded or flat incisal edges
Open or closed incisal embrasures
Low, medium, or high translucency
No halo, subtle halo, or pronounced halo
Low, medium, or strong surface texture
Warm, neutral, or bright cervical character
Symmetrical or deliberately individualized anatomy
Youthful or age-appropriate appearance
Matte, natural, or high-gloss surface finish
Reference photographs can help, but identify what the patient likes about them. Is it the shade, tooth length, incisal shape, texture, or overall smile composition?
Otherwise, the technician may copy the wrong feature.
Common Submission Gaps That Put a Veneer Case on Hold
Missing or Unclear Record
Likely Laboratory Consequence
No opposing arch
Clearance and occlusion cannot be evaluated reliably
No bite registration
Arches may be mounted incorrectly
Margin not visible
Case must be rescanned, reimpressed, or fabricated with avoidable uncertainty
Final shade without shade-guide system
Shade designation may be interpreted incorrectly
No stump shade
Opacity and masking cannot be selected predictably
One photograph under operatory lighting
Value and color information may be distorted
No preoperative or provisional record
Original anatomy and patient-approved design are lost
“Make natural” with no characterization notes
Technician must choose texture, translucency, and anatomy
No bruxism or guidance information
Incisal thickness and contact design may be inappropriate
Mixed preparation shades with one stump record
Individual units may finish at different values
No indication of which design was approved
Laboratory may copy an outdated wax-up or provisional
Unclear tooth numbers or restoration types
Wrong units or designs may enter production
A professional laboratory should pause a case when the missing information can materially change the outcome.
That is not inefficiency. It is quality control.
The American Dental Association’s professional-risk guidance also identifies diagnostic records, clinical photographs, study models, and laboratory work orders documenting materials and shades among the records that should be maintained. See the ADA’s guidance on dental record documentation.
Veneer
A Practical Submission Template for Anterior Veneer Cases
Use the following format in the prescription or case notes.
Case Identification
Patient or case ID:
Dentist:
Clinic:
Due date:
Teeth being restored:
Restoration type for each tooth:
Material and Shade
Requested ceramic:
Final shade:
Shade-guide system:
Stump shade for each tooth:
Required masking:
Intended resin cement shade, when known:
Desired translucency:
Characterization notes:
Design Instructions
Approved design reference:
Copy exactly or modify:
Central incisor length:
Midline instruction:
Incisal edge position:
Tooth form:
Line angles:
Embrasure pattern:
Surface texture:
Halo and internal effects:
Contact and diastema instructions:
Clinical Records Included
Prepared maxillary or mandibular arch:
Opposing arch:
Bite scan or bite registration:
Preoperative scan:
Provisional or mock-up scan:
Diagnostic wax-up:
Facial photographs:
Retracted photographs:
Shade-tab photographs:
Stump-shade photographs:
Cross-polarized photographs:
Video or dynamic smile record:
Functional Information
Overbite:
Overjet:
Anterior guidance:
Lateral guidance:
Edge-to-edge contacts:
Bruxism or clenching:
Wear facets:
Existing nightguard:
Planned occlusal changes:
Special functional concerns:
Approval Status
Design approved by clinician:
Design approved by patient:
Shade approved:
Requested changes after provisional trial:
Person authorized to approve laboratory modifications:
FAQs
What information does a dental lab need for anterior veneers?
An anterior veneer lab submission is a complete clinical and technical record that identifies the teeth, restoration design, material, final shade, stump shade, preparation margins, opposing dentition, bite relationship, facial references, functional risks, and the patient-approved esthetic target so the technician can fabricate rather than guess.
The minimum package should include a prescription, full prepared and opposing arches, bite registration, preparation photos, shade records, stump-shade photos, facial and retracted photographs, and a provisional, mock-up, or wax-up reference when one has been approved.
Why must stump shade photography be submitted for veneers?
Stump shade is the color and value of the prepared tooth beneath a translucent veneer, and it must be submitted because thin feldspathic and lithium-disilicate ceramics allow the underlying substrate and resin cement to influence the restoration’s final brightness, chroma, warmth, and required masking level.
Photograph each prepared tooth with an identified stump-shade tab. A single written shade for the entire arch is not sufficient when individual preparations differ in color or value.
What photographs should be sent for an anterior veneer case?
At minimum, an anterior veneer case should include a full-face photo, natural smile, broad smile, retracted frontal view, right and left lateral views, preparation photos, stump-shade photos, shade-tab photos, and close-ups of adjacent teeth, with consistent lighting and the shade tab positioned in the same plane as the tooth.
Complex cases may also require profile, three-quarter, 12-o’clock, cross-polarized, black-background incisal, provisional, and dynamic smile records.
What digital scans are needed for a veneer case?
A digital veneer case normally requires a clean maxillary scan, mandibular scan, accurate buccal bite registration, readable preparation margins, complete proximal and palatal anatomy, and either the approved provisional or wax-up scan when the final design is expected to reproduce a validated shape.
A preoperative scan should also be included when the original tooth anatomy, position, or gingival relationship may help guide the final design.
How should a dentist choose between E.max, feldspathic, and zirconia veneers?
Veneer material should be selected from the remaining enamel, substrate color, required masking, available ceramic thickness, functional load, bonding conditions, number of units, and desired optical character, rather than from a blanket request for the strongest or most esthetic ceramic for every patient.
Feldspathic porcelain may suit conservative, high-esthetic cases. Lithium disilicate often offers a balance of strength and translucency. Zirconia may provide greater masking or strength in selected cases but requires a different bonding and optical strategy.
Can the laboratory begin without a patient-approved provisional or wax-up?
A laboratory can fabricate straightforward veneers without an approved provisional or wax-up, but doing so removes the clearest reference for tooth length, smile arc, phonetics, lip support, midline, contour, and patient expectations, making the technician responsible for design decisions that should ideally be validated clinically.
For multi-unit transformations, diastema closure, major length changes, or midline correction, an approved mock-up or provisional scan should be treated as a core record rather than an optional extra.
Submit a Better Anterior Veneer Case
Before sending the next anterior veneer case, verify the margins, full-arch scans, opposing dentition, bite, stump shades, final shade, facial photographs, preparation images, functional risks, and patient-approved design.
Then state exactly what should be copied and what may be changed.
For material review, digital file evaluation, trial cases, or B2B veneer production, submit the prescription, scans, photographs, shade records, and technical requirements through the Artist Dental Lab contact page.
The laboratory should not have to interpret “natural.”