Adjusting Veneer Incisal Edges Without Destroying Surface Character
A porcelain veneer can be technically smooth, structurally intact, and still look dead after chairside adjustment.
I consider that one of the least discussed failures in anterior restorative dentistry. The restoration does not fracture. The margin remains closed. The shade tab still appears correct. Yet the adjusted central incisor suddenly reflects light like a flat piece of ceramic rather than natural enamel.
Small cuts compound.
When a clinician shortens an incisal edge without tracking the facial plane, line angles, incisal halo, developmental anatomy, translucency, and localized gloss, a seemingly harmless adjustment can erase hours of laboratory characterization in less than a minute.
So was the veneer really “just a little too long”?
The Hard Truth: Incisal Length Is Only One Part of the Problem
Porcelain veneer adjustment should begin with diagnosis, not a diamond bur.
An incisal edge can appear too long because it is vertically overextended. But it can also look long because the facial reflective zone is too narrow, the edge sits too far labially, the central incisors dominate the smile incorrectly, or the incisal embrasures are too shallow.
Those are different problems. They demand different corrections.
A clinician who treats all of them by grinding the edge horizontally will shorten the restoration without correcting the reason it looked wrong.
The position of the maxillary incisal edge affects:
Resting tooth display
Smile-arc continuity
Lower-lip interaction
“F” and “V” phonetics
“S” sound production
Anterior guidance
Protrusive movement
Apparent tooth proportion
Incisal translucency
The transition between facial and palatal contours
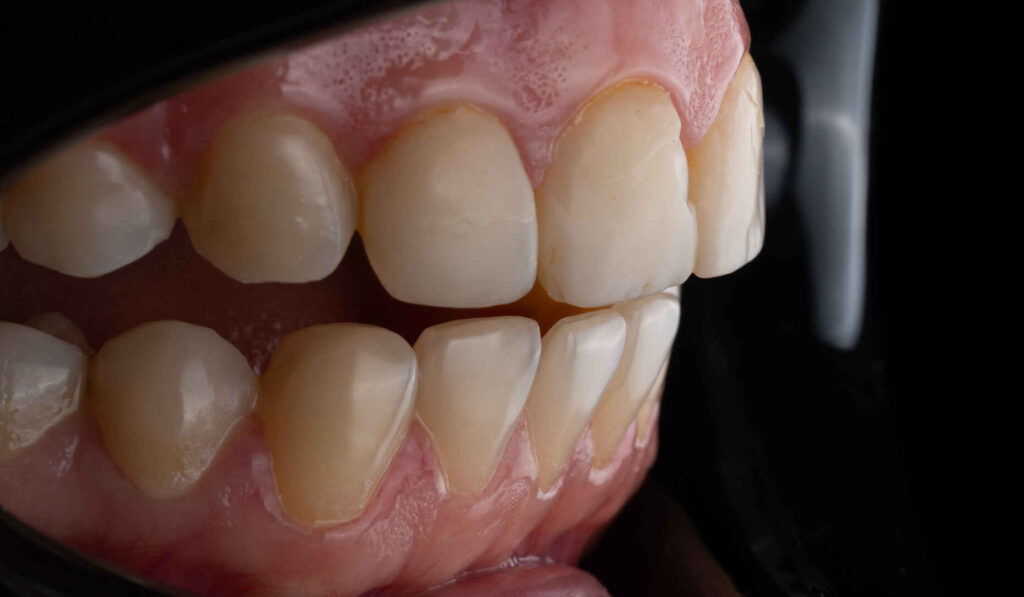
Clinical literature on incisal-edge positioning emphasizes that vertical and horizontal position must work with the patient’s envelope of function, lower lip, speech pattern, facial proportions, and anterior guidance. An edge positioned too far facially can interfere with lip closure and phonetics, while a lingually positioned edge may contact too early during mandibular closure.
My position is blunt: a veneer should not be shortened merely because the patient points at it and says, “This tooth feels longer.” That complaint is useful evidence, but it is not a diagnosis.
Diagnose the Incisal Edge Before Touching the Ceramic
Before any veneer incisal edge adjustment, I would separate the complaint into five possible categories.
Observed problem
Likely source
Diagnostic check
Wrong correction
Edge looks vertically too long
Excessive incisal display or incorrect smile arc
Repose, full smile, “E” position, lower-lip curve
Flattening the entire incisal edge
Edge feels too far forward
Excessive facial position or over-contour
Profile view, lip closure, “F” and “V” sounds
Shortening without correcting the facial-palatal position
One veneer looks longer than its neighbor
Unequal reflection, line-angle position, or gingival asymmetry
Directional light and mirrored photographs
Removing ceramic based only on silhouette
Edge catches during movement
Functional interference
Protrusive and lateral movements, envelope of function
Polishing only the contact mark
Tooth looks bulky after shortening
Lost incisal taper or altered facial plane
Incisal and 45-degree views
Further horizontal grinding
Use the Provisional as a Diagnostic Record
A tested provisional is not temporary plastic that can be ignored once the final ceramic arrives. It is a functional design record.
It can document the patient-approved incisal length, facial prominence, smile arc, phonetics, lip support, central-incisor dominance, embrasure progression, and functional envelope. Artist Dental Lab’s guide to submitting anterior veneer case records explains why an approved provisional should be scanned before removal and why the prescription must state whether the laboratory should copy it exactly or merely use it as a positional reference.
That distinction matters after delivery too. When the definitive veneer differs from an approved provisional, the clinician should identify the dimensional difference before adjusting by eye.
A Real Case Shows Why Length Alone Can Mislead
One published clinical case involved maxillary central incisors measuring more than 14 mm. The treatment plan reduced the final restored central-incisor length to 11.5 mm, with approximately 0.3 mm of facial reduction intended to preserve enamel where possible.
The important point is not that 11.5 mm is a universal target. It is not.
The case succeeded because the team assessed the excessive vertical length, horizontal edge position, diastema distribution, gingival embrasures, facial proportions, occlusion, provisionals, and material choice as one system. The ceramic was not shortened casually after delivery; the intended edge position was designed before fabrication.
A number without context is not treatment planning.
Why Minor Grinding Can Destroy Veneer Surface Character
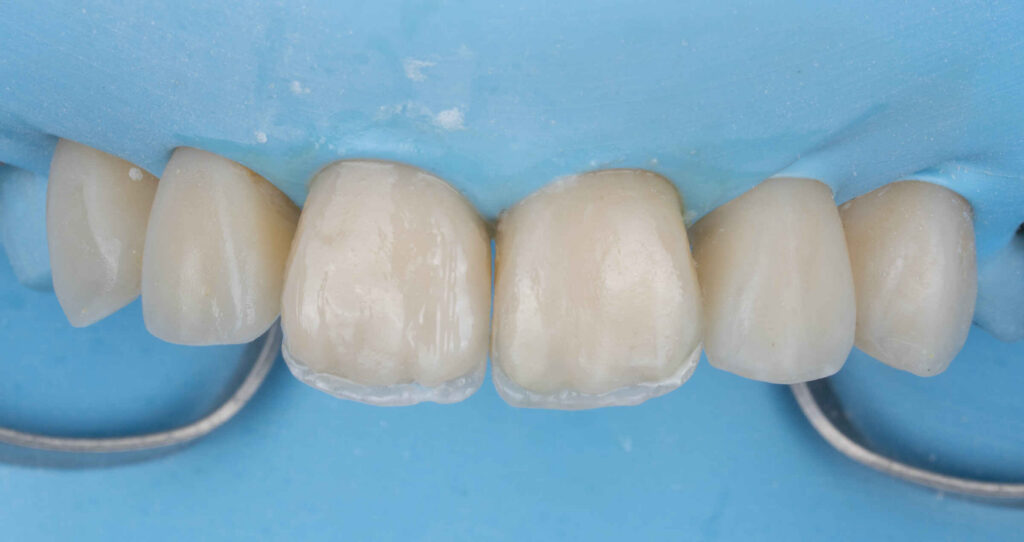
Surface character is the combined optical result of macro-contour, microtexture, line angles, translucency, characterization, and gloss.
It includes far more than visible grooves.
The eye reads:
Mesiofacial and distofacial line angles
Facial convexity
Reflective and deflective zones
Primary developmental lobes
Secondary vertical texture
Horizontal perikymata
Incisal halo
Mamelon expression
Localized translucency
Edge thickness
Gloss variation
Artist Dental Lab’s article on matching veneer surface texture to age and expression correctly treats texture as a pattern of facial contour, developmental detail, wear, and gloss rather than as decorative scratches placed on the porcelain.
Grinding Removes More Than Length
A diamond instrument changes the ceramic surface in three ways at once.
First, it removes material. Second, it replaces the finished surface with a roughened surface. Third, it changes the geometry that directs light toward or away from the observer.
That third effect is routinely underestimated.
When an instrument crosses the facial-incisal transition too broadly, it can move or flatten the line angles. A 0.2 mm change may be visually louder than a larger reduction placed within a less reflective area, although no universal 0.2 mm optical formula applies to every patient.
The site’s guide to transitional line angles in veneers explains that moving the line angles inward narrows the central reflective zone, while moving them outward broadens it. Broad polishing across those zones can therefore make a veneer appear wider, flatter, brighter, or shorter even when its measured width has not changed.
The Glaze Is Not the Entire Surface
Another hard truth: “I polished it until it shined” is not proof that the original surface was restored.
Gloss and roughness are related, but they are not identical. A surface can look glossy under the operatory light while still containing directional scratches, flattened microanatomy, or a reflection pattern that no longer matches the adjacent tooth.
And a heavily glazed veneer can be smooth yet look artificial because the glaze has flooded subtle surface detail.
Natural integration requires control, not maximum shine.
What Surface-Roughness Research Actually Tells Us
Laboratory evidence cannot reproduce every bonded veneer, operator, bur, saliva condition, edge geometry, or functional load. It can, however, expose the danger of treating every ceramic and polishing kit as interchangeable.
A 2026 Study Tested 135 Ceramic Specimens
A 2026 Frontiers in Materials study evaluated 135 specimens divided among IPS e.max ZirCAD zirconia, IPS e.max CAD lithium disilicate, and Vita Enamic hybrid ceramic.
The researchers simulated adjustment with a fine diamond at 20,000 rpm for 10 seconds under water cooling, followed by material finishing with OptraFine, Diasynt, or furnace glazing. The polishing sequence was standardized at approximately 60 seconds per specimen.
OptraFine produced the lowest overall surface roughness, and the lithium-disilicate group reached a mean Ra of 0.119 ± 0.031 µm. Diasynt performed differently across materials, confirming that a polishing system successful on one ceramic may not produce the same surface on another.
Do not turn those laboratory settings into a universal chairside recipe. The valuable finding is material specificity, not the number 20,000.
The Often-Cited Plaque Threshold Is 0.2 µm
A widely cited review comparing oral hard materials reported an approximate Ra threshold of 0.2 µm for bacterial retention. Below that level, further smoothing was not consistently associated with a major reduction in plaque accumulation.
That does not mean every veneer measuring 0.19 µm is esthetically acceptable. The threshold addresses bacterial retention, not whether the incisal edge still matches the contralateral tooth’s reflection, gloss, texture, and anatomical character.
Clinical smoothness and optical integration are different endpoints.
Feldspathic Porcelain Can Be Refinished Chairside
A 2021 in-vitro investigation fabricated 50 feldspathic porcelain discs, then compared glazed, reglazed, and chairside-polished surfaces. The combination of a porcelain adjustment kit followed by diamond polishing paste produced a finish considered comparable with glazed or reglazed groups within the study’s limits.
That is useful evidence. But it does not give clinicians permission to remove a feldspathic veneer’s incisal characterization and assume diamond paste will recreate it.
Polishing can reduce roughness. It cannot automatically restore the ceramist’s contour map.
A Controlled Protocol for Chairside Veneer Adjustment
The safest porcelain veneer adjustment is the smallest correction that resolves a confirmed esthetic, phonetic, or functional problem without spreading into unaffected anatomy.
1. Record the Surface Before Adjustment
Before touching ceramic, take:
A direct frontal photograph
Right and left 45-degree photographs
An incisal-view photograph
A full-smile photograph
A repose photograph
A directional-light facial photograph
A short video of speech and lip movement
Directional light reveals line angles, convexity, surface texture, and gloss changes that flat ring lighting can hide.
Mark the intended correction on a photograph or duplicate digital scan. “Shorten number 8 slightly” is not precise enough.
2. Verify the Problem in Three Dimensions
Evaluate the restoration from the front, profile, and incisal views.
Then test:
“F” and “V” sounds
Repeated “S” sounds
Lip closure
Protrusive movement
Right and left excursions
Maximum intercuspation
Patient comfort during normal speech
The lower lip should interact naturally with the incisal edge during “F” and “V” sounds. Published guidance warns that an excessively long or facially positioned edge may contact the cutaneous portion of the lower lip instead of the inner vermilion area.
3. Identify the Ceramic Before Selecting the Polisher
Do not assume every white restoration is lithium disilicate.
The restoration may be:
Feldspathic porcelain
Pressed lithium disilicate
Milled IPS e.max CAD
Layered lithium disilicate
Zirconia
Layered zirconia
A hybrid ceramic
Lithium disilicate is commonly described by the crystalline formula Li₂Si₂O₅ within a glass-ceramic matrix. In the 2026 study, the IPS e.max CAD composition included approximately 57%–80% SiO₂ and 11%–19% Li₂O, while zirconia specimens contained predominantly ZrO₂ with yttria and other oxides. Their microstructures did not respond identically to finishing systems.
Use a polishing system approved for the specific material and follow its current instructions for use.
4. Adjust the Correct Plane
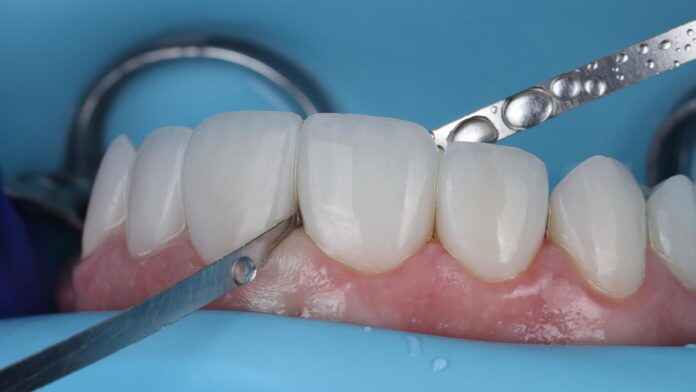
For simple vertical shortening, reduce from the incisal aspect rather than dragging a diamond broadly across the facial surface.
Use light, controlled, intermittent strokes. Maintain cooling where the instrument and material protocol require it. Recheck after each small reduction.
Do not create a single flat table across both central incisors. Natural incisal edges usually contain subtle changes in plane, embrasure depth, wear, and edge thickness.
And do not chase symmetry at the expense of identity. The two central incisors should relate to each other, but they do not need to become mirror-polished CAD duplicates.
5. Preserve the Facial-Incisal Transition
The facial-incisal transition often carries the last expression of developmental lobes, line angles, and halo.
When shortening removes that transition, the clinician may need to re-establish:
Mesial and distal edge curvature
Central lobe prominence
Incisal embrasure progression
Facial-to-palatal taper
Line-angle termination
Edge thickness
Localized texture
This is where many technically competent adjustments fail. The operator restores smoothness but leaves the edge visually blunt.
6. Rebuild Microtexture Conservatively
Microtexture should be restored only where it existed before adjustment.
The article on perikymata in porcelain veneers makes an important point: horizontal enamel detail can improve realism, but excessive or uniformly carved texture makes a veneer look manufactured.
Do not carve decorative lines merely because the ceramic now looks flat.
First restore macro-contour. Then line angles. Then secondary anatomy. Microtexture comes last.
Shape first. Always.
7. Polish Through the Full Material-Specific Sequence
A complete ceramic polishing sequence normally moves from contour refinement to pre-polishing and then to high-gloss finishing. The exact instruments, pressure, speed, cooling, and paste depend on the ceramic and manufacturer.
Skipping directly from a diamond bur to polishing paste is usually poor practice. Paste can brighten the peaks of a rough surface while deeper scratches remain.
Rapid loss of layering detail or thin unsupported ceramic
Keep reduction highly localized; consider laboratory refinishing when characterization is involved
Monolithic lithium disilicate
Glaze, stain, milled contour, and polished glass-ceramic surface
Roughness, flattened line angles, loss of external stain or halo
Use a lithium-disilicate-specific sequential system
Layered E.max
Interface between stronger core and veneering ceramic
Exposing or thinning the layered ceramic unpredictably
Confirm the layer map before substantial adjustment
Monolithic zirconia veneer
Stain/glaze layer over a polycrystalline ceramic
Different polishing response from glass ceramics
Use a zirconia-specific system; never assume an E.max kit is equivalent
Layered zirconia
Veneering ceramic over zirconia framework
Uneven removal or exposure of the substructure
Return to the laboratory when correction reaches beyond superficial contouring
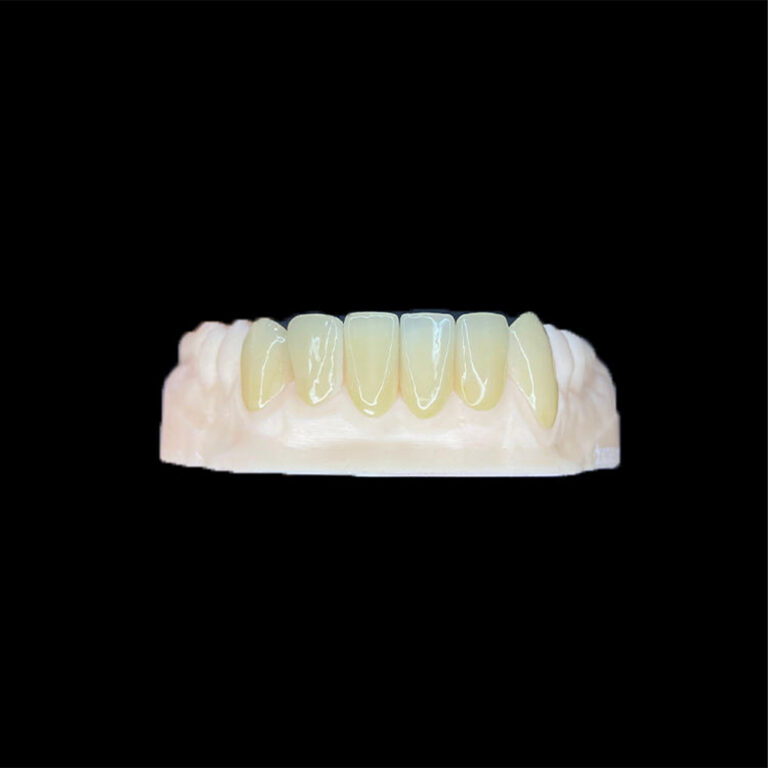
Material selection also affects how much optical character can be placed within a thin restoration. The comparison of E.max and feldspathic veneers for ultra-thin cases explains that lithium disilicate offers greater mechanical reserve and production consistency, while feldspathic porcelain allows highly granular control of translucency, halo, warmth, and surface texture in carefully selected enamel-supported cases.
That same freedom makes feldspathic characterization easier to damage.
When the Veneer Should Go Back to the Laboratory
There is no universal millimeter threshold that separates a safe chairside adjustment from a laboratory correction.
The decision depends on where the ceramic must be removed, not only how much.
I would strongly consider laboratory correction when:
The required change extends onto the facial surface
Multiple line angles must be repositioned
Incisal translucency or halo will be removed
External characterization must be recreated
A layered ceramic may be thinned unpredictably
The adjusted unit no longer matches adjacent gloss
The patient requests a significant change in tooth proportion
More than one veneer requires coordinated redesign
The edge problem originates from the digital design or provisional transfer
Functional correction would materially alter the palatal contour
A crack, chip, unsupported area, or questionable ceramic thickness is present
Chairside adjustment is not a test of bravery. Returning a veneer to the laboratory is sometimes the most conservative decision.
Better Laboratory Communication Prevents Destructive Adjustments
Most serious adjustment problems begin before the veneer is fabricated.
A prescription that says “A1, natural, slightly longer” leaves the technician guessing about the patient’s facial proportions, surface age, gloss, line angles, edge position, and functional risk.
For any anterior veneer case, the laboratory package should include:
Full-face and retracted photographs
Right and left 45-degree images
Incisal-view photographs
Directional-light texture images
Intraoral scans or accurate impressions
Opposing arch and bite records
Preparation photographs
Stump-shade records
Approved provisional or mock-up scan
Target incisal-edge position
Functional and parafunctional notes
Ceramic material request
Surface-texture reference
Gloss target
Features that must not be altered
Do not ask the laboratory to make a veneer “natural.”
Define what natural means in this patient.
FAQs
Can porcelain veneers be shortened after they are bonded?
Porcelain veneers can be shortened after bonding when the correction is localized, the ceramic remains structurally sound, the clinician has confirmed the vertical and horizontal incisal-edge problem, and a material-specific finishing and polishing sequence can restore a smooth surface without erasing important facial anatomy, translucency, line angles, or functional contours.
The adjustment should be preceded by photographic documentation, phonetic testing, occlusal evaluation, and confirmation of the ceramic material. Larger changes may be more predictable through laboratory correction or veneer replacement.
What is the best way to polish an adjusted porcelain veneer?
The best porcelain veneer polishing method is a complete, manufacturer-approved sequence designed for the identified ceramic, moving from controlled contour refinement through pre-polishing to final gloss while preserving the original reflection pattern, line angles, edge curvature, and microtexture instead of merely making the adjusted area appear shiny under the operatory light.
Research shows that polishing performance varies by ceramic and system. A kit that performs well on IPS e.max CAD may not produce the same roughness on zirconia, feldspathic porcelain, or hybrid ceramic.
Does adjusting a veneer remove the glaze?
Veneer adjustment removes glaze wherever the rotary instrument contacts the restoration, exposing a newly roughened ceramic surface that must be refinished and polished; however, the esthetic damage may extend beyond glaze loss because grinding can also alter external stain, incisal halo, facial convexity, developmental anatomy, line angles, and localized gloss.
A properly polished ceramic surface may equal or outperform a glazed surface in smoothness under some study conditions, but polishing does not automatically recreate removed characterization.
How can veneer surface texture be preserved during shortening?
Veneer surface texture is preserved by recording the original anatomy, restricting ceramic removal to the diagnosed incisal plane, avoiding broad facial grinding, maintaining mesial and distal line-angle termination, rebuilding macro-contour before microtexture, and matching the adjacent tooth’s direction of reflection and gloss rather than copying random grooves into the polished surface.
Texture should be evaluated under directional light and from multiple views. A ring-light photograph alone can flatten visible anatomy and hide differences in surface reflection.
Are feldspathic and lithium-disilicate veneers adjusted the same way?
Feldspathic and lithium-disilicate veneers should not be adjusted as though they were identical because feldspathic porcelain is often hand-layered with delicate localized characterization, while lithium disilicate such as Li₂Si₂O₅ has a different crystalline glass-ceramic microstructure, mechanical profile, surface response, and manufacturer-specific finishing system.
Both materials can be polished successfully, but their reduction tolerance, layering, stain, glaze, and characterization maps differ. The laboratory should identify the material and construction before a substantial correction.
When should an adjusted veneer be returned to the dental laboratory?
A veneer should be returned to the dental laboratory when the correction affects facial line angles, incisal translucency, layered ceramic, multiple coordinated units, external characterization, palatal function, or overall tooth proportion, or whenever chairside polishing cannot reliably reproduce the adjacent teeth’s surface character and the restoration’s intended optical behavior.
There is no universal safe reduction measured in millimeters. Location, material, thickness, anatomy, function, and the remaining ceramic structure determine whether chairside correction is defensible.
Protect the Character Before You Shorten the Edge
A successful veneer incisal edge adjustment should solve the patient’s complaint without leaving evidence that an instrument touched the restoration.
That requires more than shortening and shining.
Document the original surface. Diagnose the vertical and horizontal position. Verify phonetics and function. Identify the ceramic. Remove as little material as possible. Restore macro-contour before microtexture. Complete the full material-specific polishing sequence. And know when the laboratory should take over.
For a veneer case requiring incisal-edge planning, texture mapping, material review, or coordinated laboratory correction, submit the scans, provisional reference, clinical photographs, stump shade, occlusal records, and adjustment objective through the Artist Dental Lab consultation form.