How Important Is Enamel Preservation in Veneer Preparation?
Enamel changes everything.
When I review published veneer failures, laboratory workflows, and preparation protocols together, I keep returning to one uncomfortable conclusion: a clinician can buy a stronger ceramic, a newer adhesive, or a more expensive digital system, but none of those purchases fully recreates the bonding behavior of intact enamel once excessive preparation has removed it.
So why is tooth reduction still discussed as if it were merely a space-making step?
Enamel preservation is one of the strongest controllable predictors of long-term veneer performance. It affects bond durability, marginal stability, resistance to debonding, preparation sensitivity, ceramic thickness, final color, and whether a future failure remains repairable or becomes biologically expensive.
That does not mean every tooth should receive a no-prep veneer. It means every fraction of a millimeter removed during veneer preparation should have a defined restorative purpose.
The Hard Answer: Enamel Is the Adhesive Asset
Enamel is highly mineralized, relatively dry, and structurally more uniform than dentin. After phosphoric-acid conditioning, its hydroxyapatite-rich surface develops a predictable microporous pattern into which resin can penetrate.
Dentin is different. It contains more water and organic material, has dentinal tubules, and changes as preparation depth increases. Bonding to dentin can work, but it introduces more technique sensitivity, more dependence on moisture control, and more potential for long-term interface degradation.
That difference is not theoretical.
A landmark retrospective study followed 580 porcelain laminate veneers placed in 66 patients for up to 12 years. Forty-two veneers failed. The overall cumulative 12-year survival rate was 86%, but veneers prepared entirely within enamel achieved a reported 99% survival rate. Veneers with enamel retained only at the margins achieved 94%.
Most concerning, veneers bonded substantially to dentin or finished with margins in dentin were approximately 10 times more likely to fail than those bonded to enamel. The most common failure was fracture.
That is a large difference for a treatment often marketed around ceramic brand names, smile simulations, and shade tabs.
My blunt view? The substrate usually matters more than the logo printed on the ceramic box.
Veneer
Table of Contents
What the Bond-Strength Data Actually Show
A 2022 BMC Oral Health study used 70 extracted maxillary central incisors, divided into seven groups with 100%, 80%, 60%, 50%, 40%, 20%, or 0% preserved enamel on the bonding surface.
The results were difficult to dismiss:
Preserved Enamel on Bonding Surface
Mean Shear Bond Strength
Practical Interpretation
100% enamel
19.93 ± 4.55 MPa
Highest measured bond strength
80% enamel
19.03 ± 3.66 MPa
Close to complete-enamel bonding
60% enamel
18.44 ± 3.65 MPa
Strong laboratory performance
50% enamel
18.18 ± 3.41 MPa
Still within the stronger group
40% enamel
17.83 ± 3.01 MPa
Lowest level the authors considered acceptable
20% enamel
11.32 ± 3.42 MPa
Significant decline
0% enamel
9.63 ± 3.46 MPa
Roughly half the strength of complete enamel
The complete-enamel group produced almost twice the shear bond strength of the all-dentin group. No statistically significant difference was found among the 40% to 100% enamel groups, while the 20% and 0% groups performed significantly worse than the 40% group.
It came from a controlled in-vitro study, not a clinical permission slip to expose 60% dentin in every veneer case. Real mouths add contamination, thermal cycling, occlusal loading, parafunction, aging resin, variable preparation geometry, and operator error.
The lesson is simpler: bond performance remains relatively strong while a meaningful enamel network survives, then falls sharply when enamel becomes scarce.
How Much Enamel Is Removed for Veneers?
There is no responsible universal answer such as “every veneer requires 0.5 mm of reduction.”
Enamel thickness varies by tooth, facial region, age, wear history, position, and previous restorative treatment. The cervical third is especially unforgiving because enamel is thinner near the cementoenamel junction.
A 2024 CBCT study reported that, among adults aged 18 to 40, mean labial enamel thickness on maxillary central incisors was approximately 0.48 mm at 1 mm above the CEJ and 0.819 mm at 3 mm above the CEJ. In patients older than 40, the corresponding averages were approximately 0.454 mm and 0.751 mm.
The same nominal 0.5 mm depth cut could therefore remain in enamel in one area and enter dentin in another. That is why the study’s authors called for individualized preparation planning rather than uniform reduction. See Quantitative Evaluation of Enamel Thickness in Maxillary Central Incisors.
Common educational protocols may reference reductions around 0.3 mm cervically and 0.5 mm through broader facial areas. Those numbers are guides, not biological guarantees.
Preparation Depth Should Follow the Planned Restoration
The smarter sequence is:
Diagnose the final tooth position and contour.
Create the wax-up or digital design.
Transfer that design through a mock-up.
Prepare through the mock-up using controlled depth cuts.
Measure reduction relative to the proposed restoration, not merely the existing tooth.
Reassess remaining enamel before selecting the final material and bonding protocol.
This reverses the usual destructive logic.
Instead of asking, “How much tooth should I remove for a veneer?” we should ask, “Where does the planned restoration genuinely need space?”
A retruded or undersized tooth may need mostly additive contour. A facially prominent tooth, rotated tooth, dark substrate, or tooth requiring major alignment correction may demand more reduction. Those are not equivalent cases, even when the final invoice calls every restoration a porcelain veneer.
Minimal-Prep Is Not the Same as Under-Prepared
Conservative dentistry can become lazy dentistry when “minimal-prep” is used as a slogan rather than a measured treatment strategy.
Too little reduction can create:
Bulky cervical emergence
Overcontoured facial surfaces
Poor gingival cleansability
Excessive opacity
Thick or unnatural incisal edges
Compromised seating
Ceramic that appears too bright because there is no room for controlled translucency
A smile that looks wider, flatter, and heavier than the approved mock-up
So yes, enamel preservation matters. But blindly preserving every micrometer while accepting an overcontoured restoration is not good veneer preparation.
The goal is not zero reduction.
The goal is the least reduction that still provides the technician with sufficient, evenly distributed restorative space.
For conservative lithium-disilicate cases, Artist Dental Lab positions its E.max veneer workflow around natural translucency, precise fit, minimal-to-standard preparation, shade information, stump shade, margin notes, STL scans, and adhesive resin-cement protocols. Those details matter because the laboratory cannot infer available space from a prescription that says only “A1, natural, ten units.”
Veneer
The Preparation Design Is a Biological Decision
Preparation design is often described by shape: window, butt joint, incisal overlap, or palatal wrap.
That description is incomplete.
Each design also determines:
How much enamel remains
Where dentin is exposed
Whether the margin stays in enamel
How functional stress enters the ceramic
Whether the incisal edge is supported
Whether the technician can control thickness
Whether the restoration can be seated without internal binding
How difficult the case will be to rebond or replace later
Window Preparation
A window preparation leaves the incisal edge intact. It may preserve more tissue and maintain natural incisal support, but it can limit opportunities to change tooth length, incisal translucency, or edge position.
Butt-Joint Preparation
A butt-joint design reduces the incisal edge without extending deeply onto the palatal surface. It can provide room for length correction and incisal ceramic while avoiding an extensive palatal finish line.
Incisal Wrap
An incisal wrap extends ceramic onto the palatal surface. It may help in selected alignment, length, or functional situations, but it also removes more tissue and can place the margin in a mechanically demanding zone.
No single design wins every case. Anyone selling one preparation shape as the “best veneer preparation technique” is simplifying a three-dimensional biological and mechanical problem into a seminar slide.
Material Choice Cannot Rescue an Overprepared Tooth
The veneer market loves material arguments: E.max versus feldspathic, monolithic versus layered, lithium disilicate versus zirconia.
Those arguments are useful only after the substrate is understood.
A 2024 narrative review found that veneers generally show survival rates above 90% beyond 10 years, while preserved enamel and minimal- or no-preparation glass-ceramic veneers were associated with the strongest outcomes. Fracture was the leading failure mechanism, followed by debonding and color change. Read Clinical Survival Rate and Laboratory Failure of Dental Veneers.
Feldspathic Veneers
Feldspathic porcelain can provide exceptional translucency, surface texture, and enamel-like light behavior at conservative thicknesses. That makes hand-layered feldspathic veneers attractive for additive and minimal-prep anterior cases with favorable substrate color.
But feldspathic porcelain is not a magic skin for every dark or overprepared tooth. Limited thickness can reduce masking ability, while excessive unsupported ceramic or poor preparation geometry can raise fracture risk.
Monolithic Lithium Disilicate
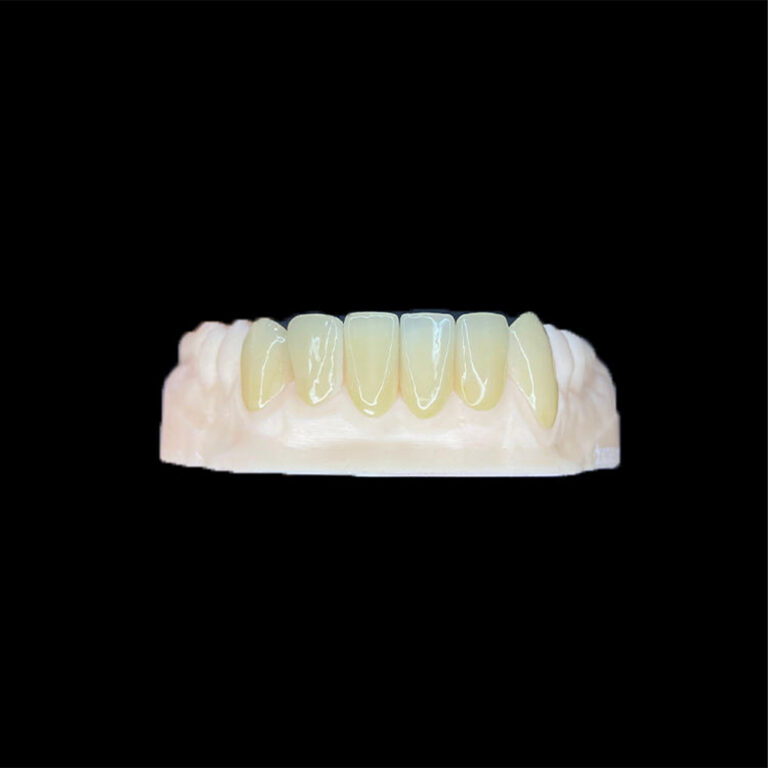
A full E.max veneer uses monolithic lithium disilicate and is generally easier to control across multi-unit cases where fit, shape, strength, value consistency, and production repeatability matter.
It can be thin. It can be strong. It still cannot make exposed dentin behave like enamel.
Layered Lithium Disilicate
A layered E.max veneer combines a lithium-disilicate core with porcelain build-up for incisal translucency, halo effects, internal characterization, and custom texture.
That optical freedom requires controlled space. Uneven preparation depth forces the technician to choose between inconsistent ceramic thickness, bulky contour, weak areas, or compromised shade control.
Dentin exposure does not automatically mean the veneer will fail.
That needs saying.
Crowding, facial prominence, existing restorations, erosion, abrasion, fracture, dark discoloration, old preparations, and alignment changes can make some dentin exposure unavoidable. The responsible response is not to pretend the exposure does not exist.
It is to map it.
Record the Distribution, Not Just the Presence
A small central island of dentin surrounded by broad enamel is not the same as:
A preparation dominated by dentin
Cervical margins in dentin
Large existing composite restorations
Deep interproximal dentin exposure
A non-vital tooth with major substrate discoloration
A tooth that has already crossed into partial-crown territory
The lab should know where the remaining enamel is, where masking is required, and whether the preparation is still structurally suited to a bonded veneer.
Protect the Enamel Periphery
When some dentin exposure cannot be avoided, maintaining enamel at the peripheral margins may support a more stable marginal seal and more predictable bonding than a preparation whose entire boundary terminates in dentin.
Consider Immediate Dentin Sealing Where Indicated
Immediate dentin sealing may be considered when freshly cut dentin is exposed before an indirect bonded restoration. The selected adhesive, timing, contamination control, provisional protocol, and final cementation system must be compatible.
This is not an improvised extra step. It is a defined adhesive protocol.
Know When the Case Is No Longer a Veneer Case
Here is the hard truth: some “veneers” are crowns with better marketing.
When the preparation removes circumferential structure, eliminates most facial enamel, substantially involves the palatal surface, or depends primarily on macro-retention rather than adhesive bonding, the treatment has moved away from conservative laminate-veneer logic.
Calling it a veneer does not restore the missing enamel.
A More Defensible Veneer Preparation Workflow
I would judge a veneer workflow by how many irreversible decisions are delayed until the team has enough information.
1. Start With Diagnosis, Not Ceramic Selection
Document tooth vitality, enamel condition, existing restorations, gingival levels, occlusion, parafunction, tooth position, smile line, substrate shade, and the magnitude of the proposed change.
2. Design the Final Outcome First
Use a diagnostic wax-up, digital smile design, or additive mock-up to define final contour and tooth position.
Do not prepare a tooth merely because the bur is already in the hand.
3. Prepare Through the Mock-Up
Depth cuts through an approved mock-up help distinguish areas that need reduction from areas where the proposed restoration is additive.
This can materially reduce unnecessary enamel loss.
4. Use Multiple Reduction References
A single facial groove does not describe an entire tooth. Evaluate cervical, middle, incisal, interproximal, and palatal reduction separately.
5. Photograph the Preparations
Send:
Full-face smile photograph
Retracted frontal and lateral views
Occlusal photographs
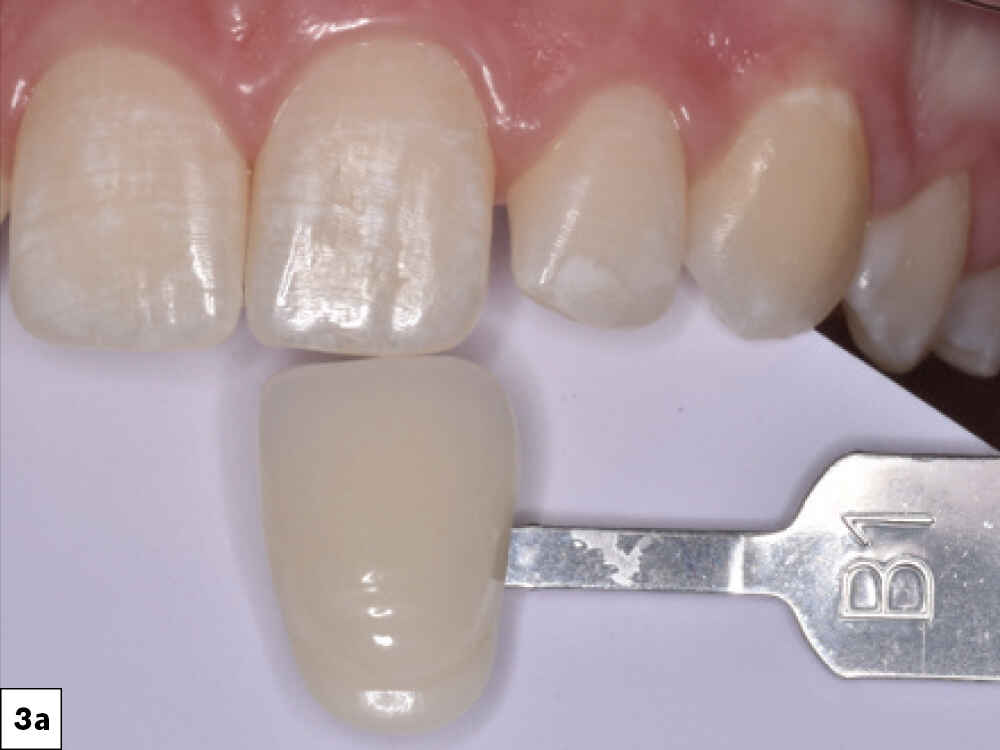
Shade-tab photograph
Stump-shade photograph
Prepared-teeth photograph
Mock-up or provisional reference
Midline and incisal-plane references
Artist Dental Lab’s article on maintaining midline and symmetry in multi-veneer cases makes the same operational point: premium ceramic work becomes less predictable when the lab receives weak records, unclear reference lines, or vague esthetic instructions.
6. State the Remaining Substrate
Tell the technician whether the preparation is:
Primarily enamel
Mixed enamel and dentin
Dominated by dentin
Partly composite
Severely discolored
Non-vital
Supported by an immediate dentin-sealing protocol
This information affects ceramic opacity, thickness, ingot or block selection, layering strategy, cement shade, and whether a try-in adjustment is realistic.
7. Reassess Before Scanning
Check margin continuity, undercuts, interproximal access, reduction uniformity, path of insertion, incisal clearance, and whether the preparation still matches the intended ceramic.
Scanning a bad preparation with a better scanner only creates a more accurate record of the problem.
Veneer
The Industry Problem Nobody Likes to Admit
Overpreparation is often hidden by the final photograph.
The patient sees white teeth. The social-media audience sees symmetry. The laboratory sees only the scan. Nobody posts the exposed dentin, the thin cervical margin, the emergency endodontic treatment, or the replacement case five years later.
Beauty can conceal biological cost.
And because porcelain veneers may still look attractive after aggressive reduction, the market can reward the operator before the long-term consequences appear. That creates a dangerous incentive: the faster, whiter, more uniform result gets applause, while the conservative clinician who spends longer on additive planning looks less dramatic online.
I disagree with that value system.
A successful veneer is not merely one that photographs well on cementation day. It is one that preserves vitality, remains bonded, respects the periodontium, maintains stable margins, survives function, and leaves the patient with reasonable future treatment options.
FAQs
What is enamel preservation in veneer preparation?
Enamel preservation in veneer preparation means limiting tooth reduction so that most of the final bonding surface and, ideally, the preparation margins remain within enamel, giving the adhesive interface a more mineralized and stable substrate than dentin while still creating enough restorative space for ceramic thickness, contour, strength, and shade control.
It does not mean refusing all preparation. It means removing tissue only where the approved restorative design requires space.
Why does bonding a veneer to enamel produce better results?
Bonding a veneer to enamel generally produces more predictable results because acid-etched enamel develops a stable microporous surface for resin penetration, while dentin contains more water, organic material, and tubules that make adhesion more technique-sensitive and more vulnerable to contamination, hydrolysis, moisture imbalance, and long-term degradation of the bonded interface.
Clinical data also associate enamel-confined preparation with lower fracture, debonding, and microleakage risk.
How much enamel is normally removed for porcelain veneers?
Porcelain veneer preparation commonly removes fractions of a millimeter, often around 0.3 mm near the cervical region and approximately 0.5 mm through broader facial areas, but these numbers are reference ranges rather than universal targets because enamel thickness, tooth position, age, wear, discoloration, and the planned final contour vary considerably among teeth and patients.
Preparation through a mock-up is generally more defensible than cutting every tooth to a fixed depth.
Can veneers still be successful when dentin is exposed?
Veneers can still succeed when limited dentin is exposed, especially when substantial enamel remains around the preparation and margins, but dentin exposure increases adhesive complexity and should prompt careful substrate mapping, contamination control, compatible bonding protocols, possible immediate dentin sealing, occlusal assessment, and honest reconsideration of whether a veneer remains the correct restoration.
Predominantly dentin-bonded cases should not be presented as equivalent to enamel-bonded minimal-prep cases.
Is no-prep always the best veneer preparation technique?
No-prep is the best veneer preparation technique only when the tooth position, final contour, substrate shade, gingival architecture, occlusion, and ceramic requirements allow an additive restoration without creating excessive bulk, poor emergence, unnatural width, weak incisal design, or compromised cleaning; otherwise, controlled minimal preparation may produce a more biological and esthetic result.
“No-prep” is an indication, not a marketing category.
Which veneer material is best for preserving enamel?
The best veneer material for preserving enamel is one that can achieve the required contour, color, strength, and optical result at a conservative thickness appropriate to the case; feldspathic porcelain and lithium disilicate are frequently used for minimally invasive bonded veneers, but material selection must follow substrate shade, preparation depth, occlusion, and laboratory capability.
A thin material is useful only when the clinical indication genuinely permits a thin restoration.
Your Next Step: Plan the Substrate Before Ordering the Ceramic
Before submitting the next veneer case, record four things clearly:
The amount and distribution of remaining enamel
The actual restorative space created
The stump shade and masking requirement
The functional limits the restoration must survive
Then send the lab the STL files, opposing arch, bite scan, preparation photographs, shade and stump-shade images, approved mock-up, margin notes, and desired incisal characteristics.
Do not send “ten veneers, natural white” and expect ceramic to solve a biological planning problem.
For a technical review of an upcoming E.max, layered E.max, or feldspathic case, use the Artist Dental Lab quotation and trial-case form to submit the material preference, scans, photographs, case complexity, destination market, and expected volume.